


Slab on Grade foundation, detail design; the basics
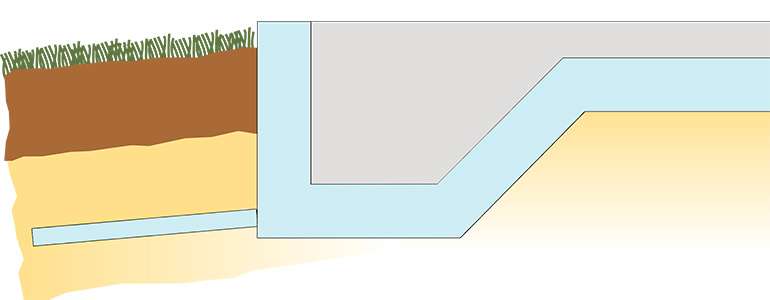
There are many different soil conditions and corresponding slab designs. This page is about how to build a thickened edge concrete slab on grade FPSF footing on soil with a high water table to prevent frost heave, by first installing drainage below the slab.
Related slab on grade foundation pages:
- Slab-on-grade technical guide
- Building a thickened edge slab on grade with normal soil conditions
- How to build a frost protected shallow foundation easily in cold climates with ICF forms
The following is a technical guide for slab-on-grade home construction. The design and dimensions of any foundation slab will be determined by the size and design of the building that will sit on top of it, as well as the soil conditions where the slab will be poured. Always consult an engineer before beginning construction as it's almost certain that you'll need one to stamp your drawings to get your foundations through Code.
Slab-on-grade step by step Instructions for problem expansive soils and high water tables
EXCAVATION for Slab on Grade foundation:
- Hire an engineer to establish how to seat the footing for the foundations. Soil tests will often be ordered to determine how to proceed.
- On expansive clay, unknown soils or infill, engineers will sometimes insist on the construction of a compacted rubble trench to support the loads of the foundation. In this case, a trench is dug around the perimeter of the future house where there will be footings. Depths, widths and backfill specifications will be provided by engineers. See our page on raft slabs as an alternative to a thickened edge slab on grade foundation.
Notes for excavating a Slab on Grade foundation:
1) When beginning with a rubble trench for the load bearing part of a foundation (as per instructions from an engineer), pit run gravel can be a more affordable option than crushed stone.
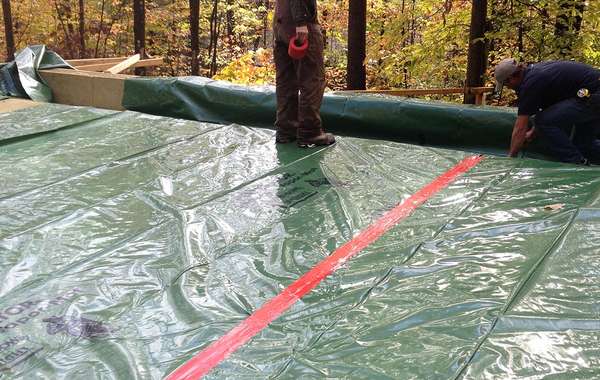
2) Ask your contractor to protect topsoil for future use. Excavated topsoil should be placed in a designated spot and protected from washing away with a waterproof covering such as a tarp.
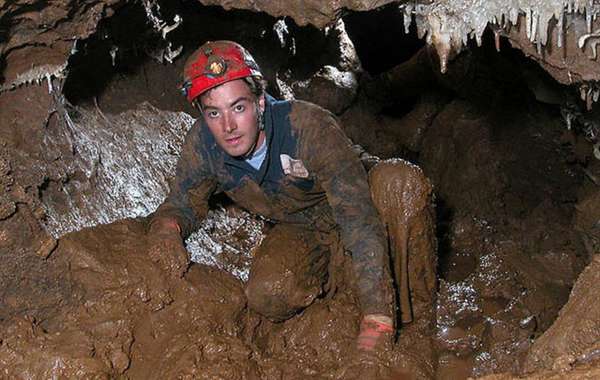
DRAINAGE under Slab on Grade Foundations:
- At the bottom of the foundation drainage trench, install rigid French drain piping (weeping tile) that can drain to a lower level. If that is not possible it should be connected to a sump pump.
- Cover the French drain with a layer of crushed stone, then cover it with a geotextile to prevent the accumulation of sediment.
Notes for Drains under FPSF or Slab on Grade:
1) Some experienced builders prefer rigid plastic French drains over flexible grooved drains to increase durability.
2) Including an accessible cleanout T-junction is a nice added feature as they allow for easy maintenance in the case of sediment buildup.
3) When dealing with an iron bacteria problem, a rubble trench footing can potentially be a more lasting solution than conventional French drains. This involves the inclusion of a compacted layer of stone beneath footings.
- If dealing with high iron bacteria content, it is a good idea to build an access pit at the surface for cleaning purposes.
- Spread crushed gravel around the French drain and install a geotextile over it. The barrier will prevent sediments from entering the drain while the gravel provides sufficient drainage.
BACKFILLING a Slab on Grade
- Cover the trench with a layer of permeable backfill material.
- Gradually fill and compact the rest of the trench as well as the undisturbed ground in the centre before spreading crushed gravel over it. Vibratory plate compactors work best and are available at most construction rental outlets.
- Dig several small trenches for the insertion of perforated pipes that will be used for radon evacuation purposes (see "Radon gas evacuation" below). The pipes should then be covered with a small amount of crushed stone.
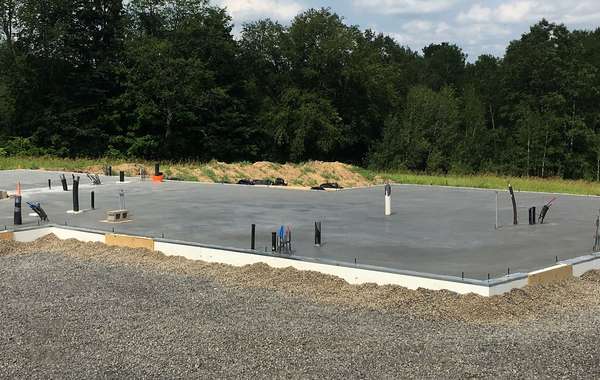
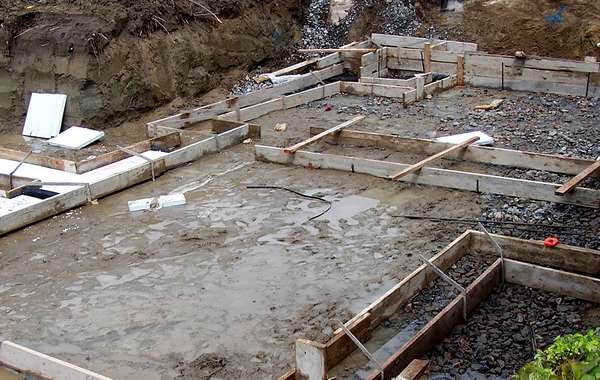
BUILDING FORMWORK for a slab on grade:
- Defining the boundaries of the concrete slab can be done easily with wooden stakes driven into the ground and a string line laced at a right angles.
- Snap a levelled chalk line on the interior of the formwork to indicate the height of the concrete to be poured
- The top of the formwork can be used as a gage to delimit the height of the concrete to be poured.
RADON GAS EVACUATION with a slab on grade foundation:
Radon is a naturally-occurring radioactive gas that is produced when uranium that is present in the earth's crust starts to disintegrate. The gas infiltrates houses through cracks in the slab. Radon exposure is linked to roughly 16% of lung cancer deaths in Canada, and is the second leading cause of lung cancer after smoking.
Health Canada advises taking measures to reduce radon levels when radon concentrations exceed 200 Bq/m3. Being exposed to high concentrations of radon for long periods of time can put you at risk for lung cancer. To learn all about Radon Mitigation in homes, see here.
INSTALLATION OF MECHANICAL RADON MITIGATION SYSTEMS:
- Inside the perimeter of the slab, dig small trenches in the crushed gravel.
- Install all mechanical equipment (plumbing, electricity, ventilation) and seal all above-ground extremities before pouring the cement.
- For a video on radon barrier installation under a slab on grade, see here
Detail design Notes:
If you plan to eventually build a second bathroom, get your contractor to do the rough-in before pouring your slab on grade or Frost Protected Shallow Foundation (FPSF) since it is very difficult to modify plumbing after the pour.
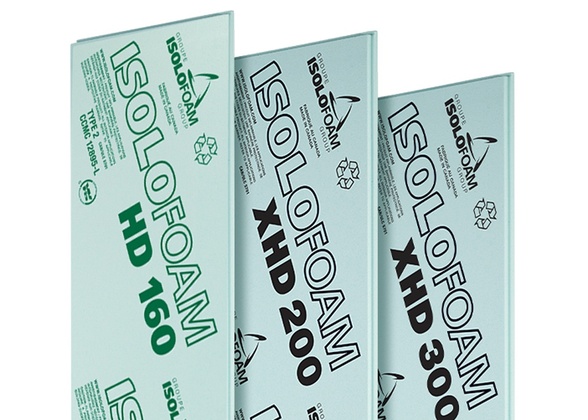
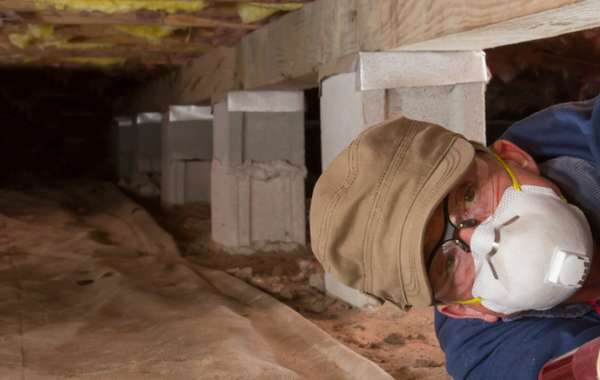
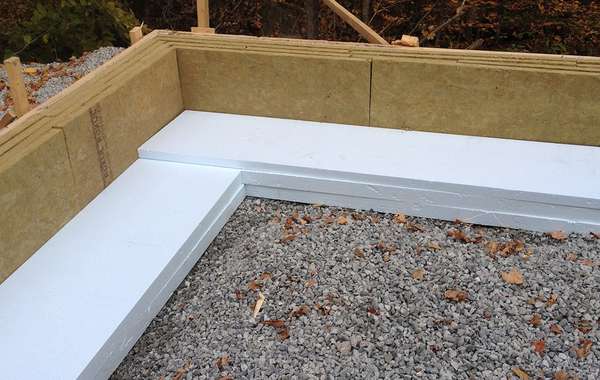
INSULATION AND AIR / VAPOUR BARRIERS FOR SLAB ON GRADE:
- Install anchor bolts and lateral insulating panels and then the center panels. Next, cut around the plumbing system and mechanical equipment.
- Ensure that there are no gaps in the insulation, even in problem areas.
- Install a polyethylene air / vapour barrier over the entire insulation area. In some cases, a coat of closed-cell spray foam will be added at this point in order to add insulation and to create a continuous moisture soil gas barrier.
- Seal the polyethylene barrier at all penetration points and openings with appropriate building tape.
1) We use the term 'air / vapour barrier' to avoid confusion of their individual roles. Polyethylene needs to be intact with no holes simply for the containment and evacuation of radon gas buildup below the slab. If you live in an area with no known radon contamination or have no intention of installing a radon evacuation system, holes in the poly are not a concern, as a 'vapour barrier' does not need to be sealed or airtight. See our vapour barrier pages for more information.
2) Insulation levels within US & Canadian building codes vary by region, but what is consistent is that they are insufficient for the prevention of heat loss through basement floors, and cost homeowners a lot of money. Regional building codes will demand in the range of R5 to R7.5, but doubling that will pay for itself in as little as 2 years. We recommend a minimum of R15 in most cold climates, more if you are including radiant heat within your slab on grade foundation.
CONCRETE REINFORCEMENT MESH:
- Install the welded steel reinforcement mesh and rebar according to an engineer’s specifications. Ensure that the polyethylene barrier is intact and not pierced for proper radon protection, using rebar chairs should keep the sharp tips of the steel rebar away from the membrane under a slab on grade or FPSF.
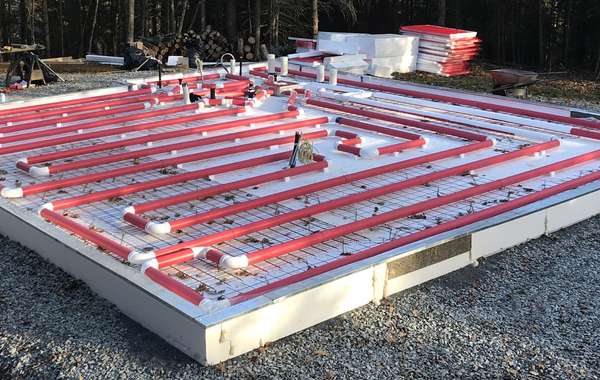
RADIANT HEAT TUBING INSTALLATION IN SLAB ON GRADE:
It is at this point that you would install tubing for hydronic (water) radiant floors or air heated radiant floors. The financial investment put towards the comfort of radiant floors can arguably be redirected towards insulation instead. Radiant floor heat is a comfortable heat, but with sufficient subfloor insulation you can mitigate the discomfort of cold associated with concrete floors by keeping them consistent with room temperature.
Note: If you've opted for a water heated radiant floor heating system, the plumbing contractor will install a network of cross-linked polyethylene piping (PEX). The reinforcement mesh is often used as a grid for attaching the piping. Plastic zip ties work great in this capacity, but ensure the ends are cut or secured, and do not protrude above the level of concrete to be poured.
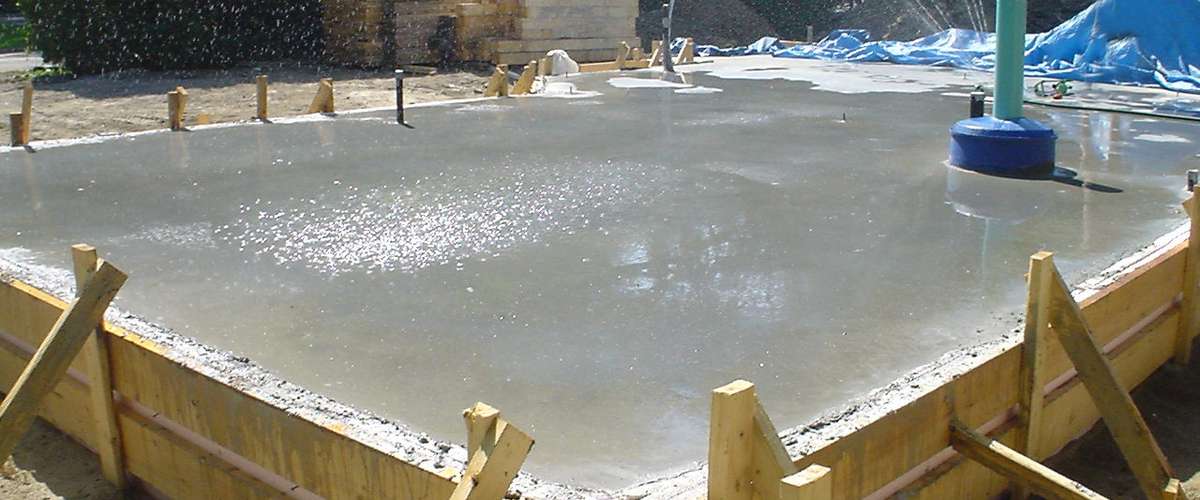
CONCRETE POURING TIPS FOR A SLAB ON GRADE CONSTRUCTION:
Ensure that the contractor waits for the proper weather conditions before pouring the concrete FPSF slab. According to the CMHC (Canada Mortgage and Housing Corporation), you must not pour concrete into a frozen formwork. In addition, the concrete must be kept at a temperature greater than 10°C for the three-day curing period following its installation to ensure correct strength and surface finish without frost damage.
When you are ready to begin pouring the concrete:
- Be sure to keep the reinforcement mesh and rebar at the height specified by the engineer. To prevent cracks from forming in the slab, the contractor can use support chairs that keep the mesh at the correct height during the pouring of the concrete (CMHC).
- Next, place the foundation anchor bolts in the concrete before it begins to harden but when it is sufficiently set so that they will stay in place.
- The concrete must be kept moist for at least three days because it needs to cure and not as some would say dry. You can do this by hosing the surface with water and covering it with a polyethylene cover or a tarp.
- Finishing a concrete slab on grade: the most affordable final finish is achieved by simply finishing the concrete with a power trowel to the desired sheen. A high level of perfection for the trowelling can take over half of a day, depending on the thickness and concrete mix. In some cases, the level of finishing is minimal to prepare the surface for polishing. Polished concrete is a highly durable surface that reveals the stone used in the mix, but it is much more costly than finished concrete.
- Once cured, expansion joints can be cut into the surface in order to control where hairline cracks appear. The joints can give the effect of large tiles with the addition of epoxy grout, but the joints can also be hidden under division walls. Ensure that you have a sufficient number of them for the area of the foundation.
See other slab on grade information pages here:
Read about how to build a slab on grade step by step, Building a thickened edge slab-on-grade foundation, Raft slabs for poor soil conditions or infill to avoid excavating and soil remediation. Everything you need to know about high performance home construction can be found in the Ecohome green building guide pages

Hello,
In your post, you recommend asking an engineer for specific instructions regarding the realization of a rubble trench, which is precisely what I would wish to do, and all the more that I am located in a region (namely Saguenay) where the climate can be rather cold, to say the least, which would thus call for some very good insulation.
In fact, that would tend to make me more comfortable with a foundation that would integrate the notion of rubber trench and that of an insulated, or in other words "frost protected" shallow foundation (FPSP), which again appears to be quite closely related to what you propose in this post.
The crux of the matter is that, as far as I am concerned, I would have no choice but to ask for the services of an engineer anyway, since this is what my municipality prescribes for any model of foundation that does not precisely fit with the Building Code, or rather with their own interpretation of that Code...
Therefore, the ideal thing would be for me to find an engineer that would be ideally as knowledgeable as possible of more ecological techniques for foundation, and preferably with the rubble trench itself, or who at least would be relatively open to new ideas and avenues...
And if that person could live in Quebec, or even in my own region, that of course would be even better...
All this to say that since you recommend consulting an engineer for the building of a rubble trench, I assumed that you considered such an option feasible, and would have some idea of who to ask for such an advice...
Is it the case ? Or in other words, would you be able to tell me where or how I could find such a valuable resource ?
This being said, thanks a lot for your help, and have a great day !
Charles-Olivier Tremblay
Hi Charles,
Your location is somewhat fortuitous, The first house designed under our Net Zero Heat program is in the Saguenay on Lac Kenogami. The owner is part of Ecohome and our French counterparts Ecohabitation. His foundation / slab is likely the same as you are considering. You can read about his house here - http://www.ecohome.net/news/latest/first-net-zero-heat-house-finalist-house-year-award-green-builderr-magazine
Good luck!
Thanks a lot !
Wonderful and much detailed. Thanks for sharing.