


Why build a frost protected shallow foundation using prefabricated foam forms?
Building a frost protected shallow foundation (FPSF) is a well-proven alternative to building deeper, more costly foundations in cold regions with seasonal ground freezing and the potential for frost heave.
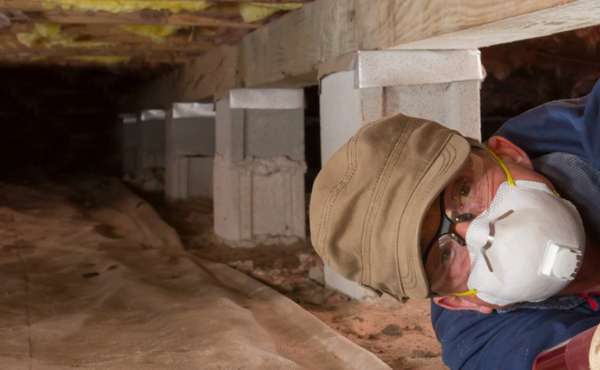
Traditional foundations for cold climates always extend down under the frost line onto a strip foundation, they can use lots of CMU block or concrete, take lots of time and excavation, and can also be a source of humidity and mold in the crawlspace or basement because they are built underground of porous materials.
More and more construction professionals and local states and provinces in cold climates with a frost line and ground heave in winter have started to realize that the simplest way to build a solid and dependable foundation in these harsh conditions is to build using frost protected shallow foundation (FPSF) forms - which are generally made from high-density EPS foam or styrofoam.
These foundation forms offer many advantages in terms of convenience, longevity, reduced humidity, radon protection, and increased insulation levels. This leads to a comfortable home with excellent energy efficiency, and an efficient use of carbon intensive materials like concrete as the heat-stabilizing thermal mass of the engineered foundation slab.
Frost protected shallow foundation (FPSF) forms are in our opinion a great way to build a dependable foundation, and we're going to show how easy installing frost protected shallow foundation forms is here.
How to build frost protected shallow foundations - why we chose this system
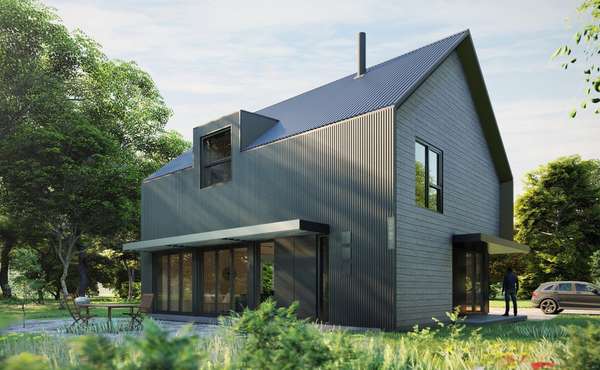
Ecohome built our demonstration prefabricated low-energy kit home, the s1600, by partnering with a specialist company that manufactures frost-protected shallow foundation forms (slab-on-grade) that are heated with air rather than liquid.
This has caused much controversy and discussion ever since, with us often hearing how "air doesn't transfer heat the same as water" and how "air doesn't hold as much heat, so can't work as well". With people saying this taking air and water in isolation, and forgetting that they are both sat in a big thermal battery, which changes everything. In our experience. The concrete slab in a super-insulated heated frost protected shallow foundation building provides a gentle and even release of comfortable heat throughout the home.
What we've found is there are many advantages to air-heated radiant floors over hydronic radiant floors, but none greater than the ability to inject solar-heated air into the thermal battery which is the concrete slab floor.
Solar air heating panels are a growing trend in green building online, with one notable shortfall – the heat that is generated is difficult to store or control.
Many people take advantage of the relatively simple and affordable nature of air-heated solar panels (compared to photovoltaic panels) to harness the energy of the sun to heat garages and workshops, but solar radiant air-heating has yet to be a viable and reliable option for well-balanced home heating. Until now ….
When looking for a heat-storage solution that would allow us to incorporate solar-air heating panels into our design in an "engineered" and reliable way, we approached Legalett, experienced engineers and manufacturers of slab-on-grade frost-protected shallow foundation form kits - including for problem soils and air-heated radiant floors, to see if high-efficiency solar air panels could feed air directly into their existing in-floor ductwork.
Legalett welcomed the challenge and engineered a system with the aim of being the main heat source of our new (as close as we can get it to ) Zero Energy home. Needless to say that we will also incorporate high efficiency cellulose insulation and air air-tight building envelope similar to a Passive House design in this beautiful prefab home kit.
Building Legalett's frost protected shallow foundation forms with radiant floor heating consists of:
- Set a benchmark level on the build site to establish finished slab elevation. If the excavation level needs to be raised, refer to the manufacturer's drawing for instructions on the use of compacted fill. NOTE: The final landscaping of the ground surface at the slab shall slope minimum 5% away from the slab.
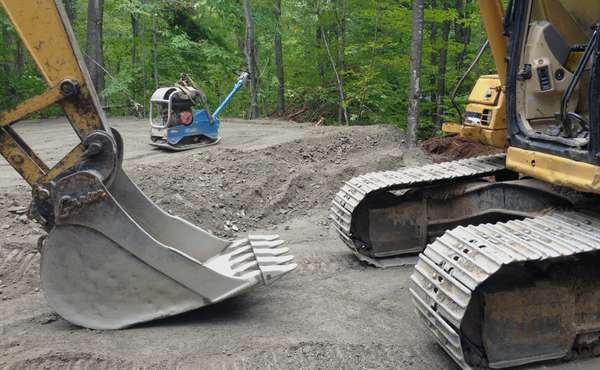
- Flatten the site and strip the topsoil carefully, putting the soil and any small native plants to one side for reuse.
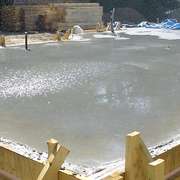
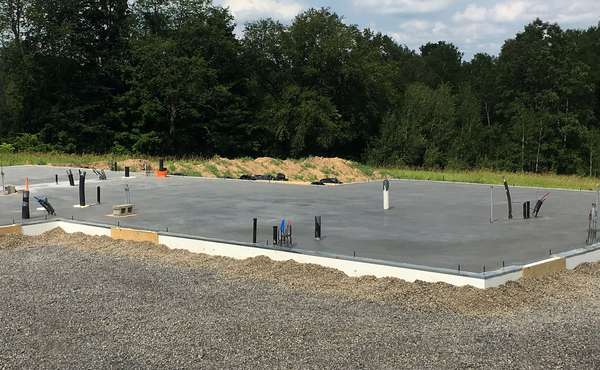
- Place 3/4” or 3/8” clear stone (min. 4” thick) and ensure gravity drainage to daylight. Level to within 1/2” of desired elevation using a vibrating plate compactor and calibrated rotating laser level. For an easy build process for your frost protected shallow foundation forms, getting the stone base level is a critical step to get right.
- Set up batter boards to 1½” to 3” (depending on building length) above the desired finished FPSF slab elevation and lay out the building perimeter from plans. String lines should NOT be used to set the elevation of components, do this using an experienced laser operator.
- Carefully check and double-check the diagonals of the batter boards for square on the corners and across the full diagonals of the slab foundation. Your frost protected shallow foundation forms are cut square and level, so it stands to reason that the prepared base needs to be set up as close to perfectly square and level as possible or this will cause problems when building up the forms to be ready for the concrete pour. We can't stress this enough, triple check that the frost protected shallow foundation for your build is in the correct place on the site as per the plans, and then check it is set level and square before all that concrete is poured, cures and it's too late.
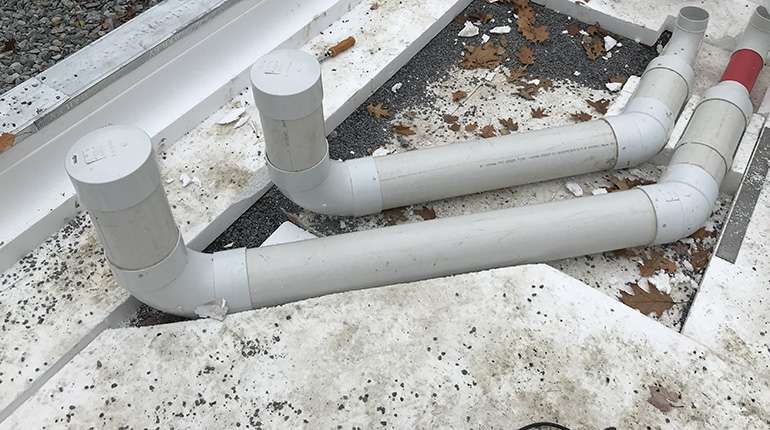
- Locate, mark, excavate and place plumbing risers and all other under slab services (ie. water, gas, electrical, etc.) If installing the air-heated slab system, also fit the extra sheet of insulation under the 2” 4000 series heater boxes as per manufacturer's drawing.
- Re-level the frost protected shallow foundation forms after the plumbing and services installation to within ¼” of desired elevation under the edge forming elements and within ½” of desired elevation in the FPSF slab centre. Compaction is not required.
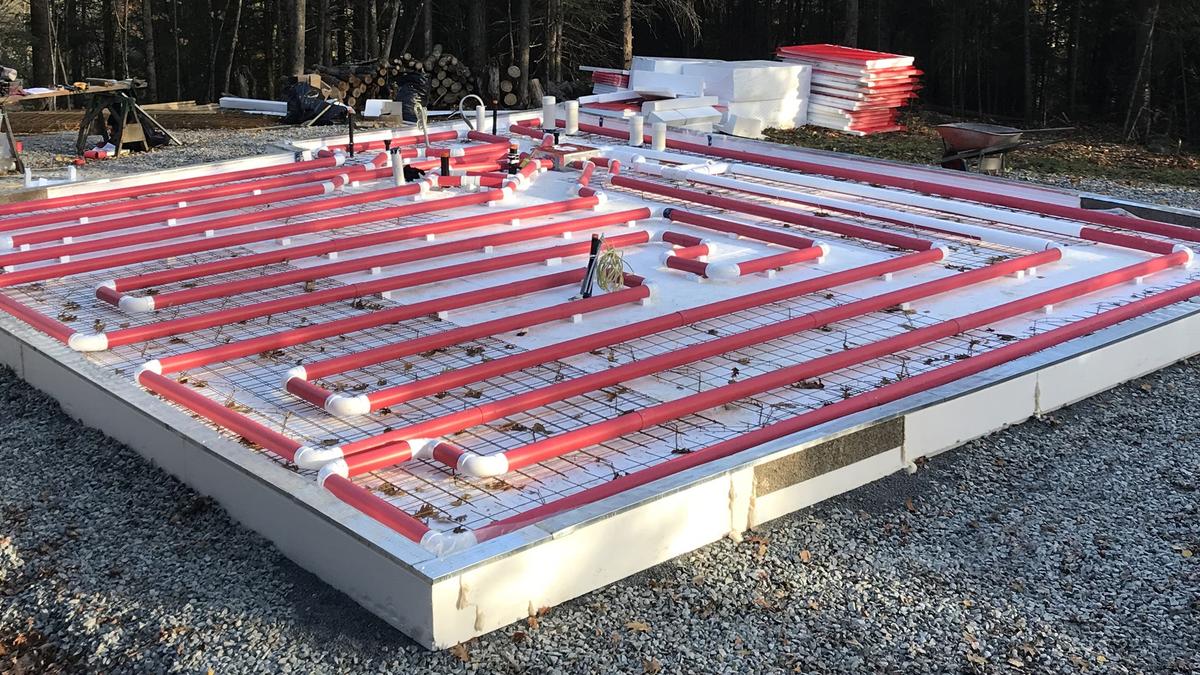
- Now it's time to start placing and installing the pre-cut foam frost protected shallow foundation forms. (NOTE: We recommend a calm and wind-free day for handling the foam forms!) Like a giant jigsaw, begin with installing the edge forms. Tie the top of edge elements together using the metal caps and check the elevation of edge forms regularly using a laser level. Lap the metal cap joint at corners and joints and secure with sheet metal screws securely. If you'd rather skip to the timelapse video showing how to build frost protected shallow foundation forms, click here.
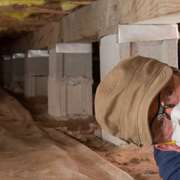
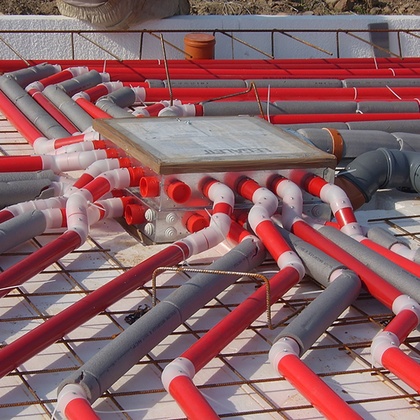
- Tie the bottom of the precut foam foundation form elements together by simultaneously installing two courses of expanded high-density polystyrene (EPS) insulation board, tied together and to elements with 6” nails to keep edge elements in place and square. Backfill gravel against the outside of edge element as adjacent foam layers are secured. Pay special attention to corners, making sure they stay square and ensure that corners are well supported by gravel backfill. Back-rake gravel under each sheet just before foam placement. Alternately, follow the foam layout on drawing to ensure minimum waste, ie. using the cut-off piece from the previous row to start the next row of foam. For either method, ensure that vertical foam joints do not line up through 2 layers of foam.
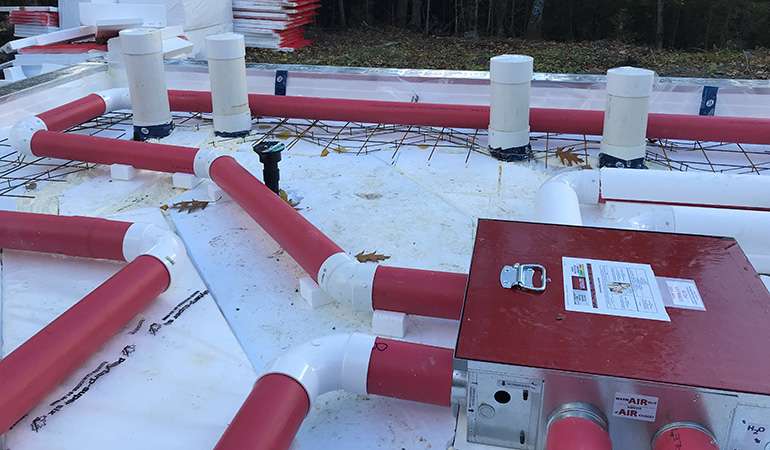
- Install any in-slab water lines in a groove in the EPS layer and foam the groove after line installation, or use conduits or sleeves above the EPS foam. Under no circumstances should ANY water lines or waste lines be placed directly in the concrete without conduits or sleeves. We recommend that plumbing risers have wrap of rockwool insulation and builder tape wherever they may be encapsulated in the concrete slab. This allows for some setting or movement, and flexibility in siting plumbing fittings.
- If installing the in-slab air radiant heating, cut out foam layer(s) and install each furnace box as per drawings and Product Data Sheets.
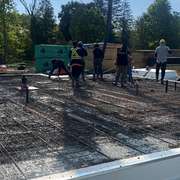
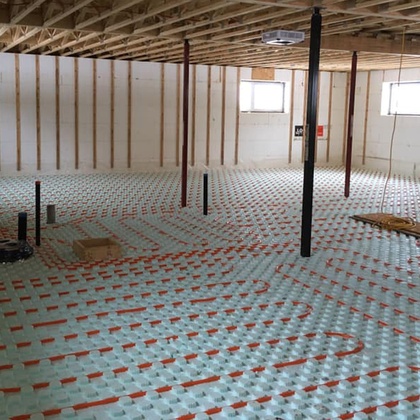
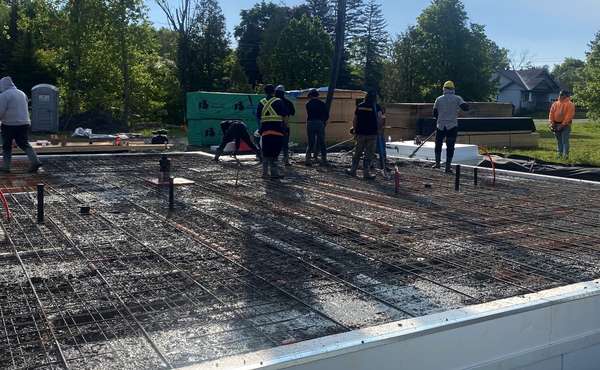
- Time to install the first layer of rebar in your frost protected shallow foundation forms. Install bottom layer of wire mesh on chairs at perimeter and under bearing walls as per drawings. Use one chair per every 2’ at mesh edges. Secure the mesh sheet edges together with rebar ties.
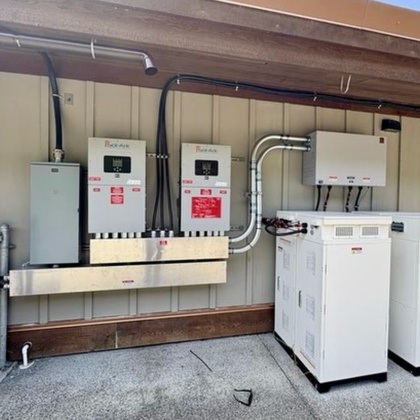
- As our FPSF in-slab heating was a custom order to incorporate the solar air heated panel, we will be skipping over this part of the installation that can be seen in the video below. A closed-loop network of 4-inch tubes was installed running through the concrete with a heater box embedded directly in the floor. In this case, added to that system are 6-inch tubes (also seen in video) that feed air to air solar panels on the south wall of the house. Air heated by those solar panels in winter, when the sun's angle is lower, will be fed into the floor heating radiant system, which will reduce the energy demand on the heater coil. Conversely and cleverly, in summer if the heat isn't needed in the house, the heat is diverted to an air/water heat exchanger for heating the hot water tank instead. What this adds up to is Energy savings; ideal for Passive solar homes, ZNE, PNE, LEED and Passive House projects. Over the last few years, with everything that's been going on, production and installation of a satisfactory solar heat exchanger has stalled, but once we revive it - we will be the first to let everyone know!
- Almost the final step before concrete pouring in the frost protected shallow foundation forms. Install the top layer wire mesh and other rebar as per drawings. Tie top and bottom mesh layers together around pipe at perimeter with supplied tie wraps and tie interior mesh and rebar together with supplied wire ties.
- Install frost skirting if needed and backfill along perimeter. See product datasheet - excavation and skirting
- Complete inspection (trained Legalett Installer / Agent only) or call for inspection by LEGALETT personnel. Fill out and submit Inspection Report complete with photographs.
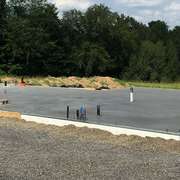
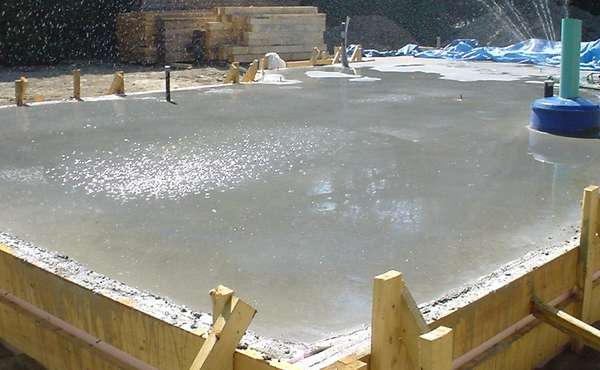
- After approval of inspection report by LEGALETT personnel and receipt of authorization code to pour, place concrete in the frost protected shallow foundation forms using pencil vibrator for good consolidation. Install ICF dowels/anchor bolts and confirm their locations with framing contractor and ensure bolts are offset from studs and have a minimum of 3” embedment in concrete.
- Steel trowel surface using power trowels.
- Keep top of slab moist for three days to minimize shrinkage and cracking. (Concrete chemically sets, then subsequently dries, but if it dries too soon, then it doesn't set properly and strength is compromized.)
- A LEGALETT construction heater can be used the day after the concrete is placed for cold weather pours only. In all cases, the construction heater MUST be run for a minimum of 2 weeks after the building is closed in (and insulated if during the heating season) and before permanent heating insert(s) and floor coverings are installed. To obtain effective drying, the entire slab should be heated
to 27°- 30°C (80°-85°F). Overall reduction in moisture content of the slab is important to prepare the surface for floor covering adhesives and prevent moisture damage to the permanent insert(s). For further information contact LEGALETT and / or refer to the following datasheets: i) Construction Heater and Floor Finishes and ii) Slab Drying and Moisture Test. - Request flushing adaptor (water units only), moisture test kit and thermostats.
- Complete start-up inspection and submit form to LEGALETT for approval. Upon approval and receipt of authorization code to install heaters, permanent heating insert can be installed.
If you are interested in getting a cost for a Legalett air heated frost protected shallow foundation forms, see here.
Generating solar domestic hot water when heating is not required also serves to protect the panels from damage that can occur due to overheating in summer.
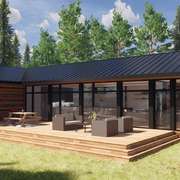
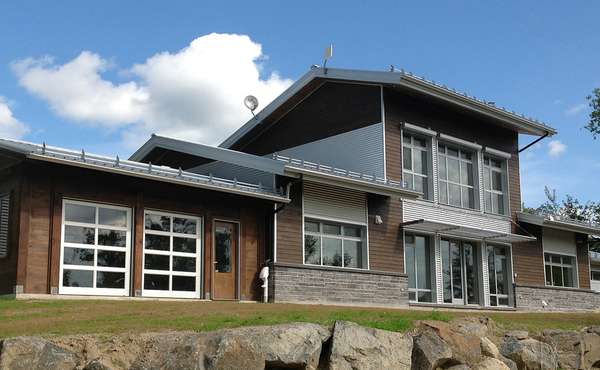
Our pre-fabricated S1600 model with dense-packed cellulose walls was delivered and installed on the slab in spring time. Below is a short video of the solar heated frost protected shallow foundation floor slab construction, for more on the (close to) zero carbon prefab home that is seated on this frost protected shallow foundation, see here!
Now you know more about smart basement design and construction to prevent flooding, find more pages about best practices for basement construction in the Ecohome Green Building guide and in these pages below:
Find out about the benefits of a free Ecohome Network Membership here! |


Back breaking work...been there done that!! Good job guys!!
Hi Fred,
Glad you liked it! Every slab we've done in the past involved building wooden forms first, so the fact that we didn't need to drive stakes into the crushed stone with a sledge hammer made this one seem like a picnic!
How big is the footprint of this house? Single floor?
Hi Igor,
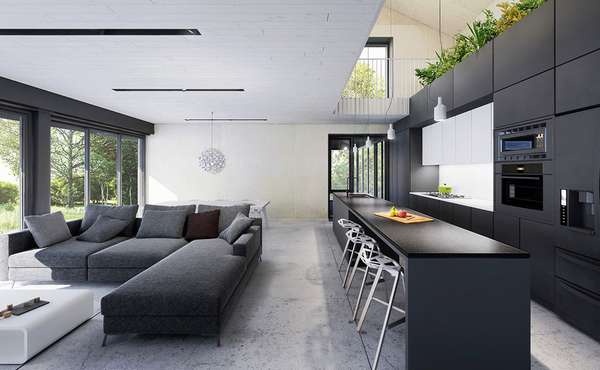
It's a 2 story house, the main floor is about 1,000 sq ft with a bit less on the second story. Here is a link to more info on this high performance prefab home, and you can see some images of the interior.
Can you speak to the advantages of forced air radiant floor heating vs water? Also, in another article you mentioned how photovoltaic ends up being more useful/versatile for water heating than direct solar water heaters - is that how this is working? I'm confused as to how the solar air heater panels will also provide hot water.
Hi Alex
In the mechanical room there will be a heat exchanger that in summer months will generate hot water instead of hot air, and frankly I haven't seen the inside of that machine yet myself. The engineers at Legalett designed it, and this being the first one there is limited information on it to date. As we get to that stage we will most definitely feature something on our pages about it when that time comes.
And yes, there is an article where we speak of possibly increased benefits of solar water heating with PV solar panels powering standard water heaters instead of setting up a dedicated thermal solar system. The theory being, that when no water heating is neccessary, your solar investment is working for you to provide power. But, that theory that did predate a few things, first of all this particular system - which doesn't have actual 'liquid' panels, so it avoids the maintenance issues and other hassles of liquid systems, but as this is still experimental we don't have anything we can report yet on total costs and benefits. The second innovation that may rebut that PV / water heater theory is an innovative new panel system by Viessman which you can read about here.
And here is our page on air vs hydronic heating. I was a hard sell myself at first but having done it both ways I am a total convert to air now.
I like this a lot. I am only familiar with building forms first, so this is a much friendlier process. I had a look at the link to see the house that went up on the slab. I like it very much, what would be the approximate cost for this house. I am in Ottawa, Ontario. Thank you.
I really like this approach to off grid electrical and heating.
What is the benefit/ tradeoff to simply running the Legalet system with electric heater units off of a typical solar system as opposed to the solar air panels? Is the idea that the solar air panels could be mounted on the southern wall, leaving the roof space to accomodate electricity generating panels?
Also, how is the build going? Very interested to see updates on construction, but I don't think any have been posted recently, unless I've missed them!
The Legalett heater is designed to run on its own, this is just to inject some free heat into the system. A normal solar air heating panel doesn't store the heat, so as great as they are, they aren't easy to regulate. So you will over heat, then cool off quick and need additional heating. That's still better than not having a solar heater, but the purpose of this was to be able to use solar air heat and still maintain a consistent ambient temperature like in any newly built home. When the solar panels don't provide enough heating then the electric coil just kicks in. The panels still aren't installed at this point but we should have them on by winter. This is a very efficient home, and though we don't have data yet, it is likely that the entire year's heating will be somewhere in the area of $150 - $200 , and no there is no zero missing :)
And as for putting them on the wall - they've been designed that way, there is very minimal loss in output due to being on the walls rather than the roof, and it is best to keep them as close as possible to the point where they are injected into the slab. There won't be rooftop solar production either, Since Quebec is powered by renewable energy its already 'clean' power, so adding solar panels would add a lot of cost and not really provide any ecological benefit. Quebec Power is pretty cheap, so solar doesn't have as great of a return on investment.
At 3:30 in the video, does Mike say "wrap slab"? ("meaning that the weight is distributed evenly") If that is possible, why is it not standard for slab-on-grade construction?
What was done to prepare the ground?
Sorry for the pronunciation Jonathan, that's RAFT slab.
Building code has standards to ensure a house won't shift, but you can build many ways - thickened edge slabs (footings) raft slabs, full foundations or screw piles. Things become standard out out of familiarity and just remain is probably the reason why it isn't standard. Like a basement is the 'standard' way to build a foundation even though they cost more, they flood and they get moldy. and buidling basements with poly vapor barriers on the inside is also 'standard' even though its the worst thing you can do to a basement wall. All that to say, 'standard' isn't always a good thing.
Raft slabs are stronger so they can reduce the infiltration of Radon Gas into homes, they are less prone to shifting and you don't see structural cracking they way you do with slabs built with footings.
What was done to prepare the ground here is quite simple because it is a raft slab with no footing - you just remove the organics layer and replace it with clear crushed stone and then you build up. Here is our page about how a raft slab works so you can get a better understanding of the differences.
Hi Mike, I am also a fan of using air (living both mixed and off grid as well). I always felt uncomfortable with building on top of styrofoam or any soft foam ... because of mices and rats ! Do you have some data/feedback on this, is there something special to prevent them from digging extremely comfortable tunnels in them ;) ? Pretty cool blog btw, thanks !
Thanks. I always wondered as they once dug a short "conduit" in the XPS ceiling in my crawlspace... It brought cold air next to my floor but to be honest, I spotted it with a thermal camera and it happended only once -- and I am unsure it had any impacted on the overall isolation of the house (the noise they made was more of a concern) ! Thanks for your reply :)
Could you blow cold air through the system in the summer?
Cooling a concrete floor is not recommended. The primary action of an air conditioner is really about removing moisture, and were you to cool a floor it would not provide any reduction in humidity, at least no 'desired' dehumidification. What you would get, would be a cold floor acting as a de facto dehumidifier with hot humid air that will likely condense on the floor, so it would be cold and clammy with a risk of mold and mildew forming. The other issue is that it would not be very efficient since col air doesn't rise, it falls, so it would be very cold at floor level rather balanced cool air within the home.
Thank you for this site and answering questions. Any thought on using these new Solar air heaters help charge a GAHT system? I want t put an attached passive solar greenhouse on a future house. The Solar Air heater may work better there as it can push the warm air underground even in the summer.