


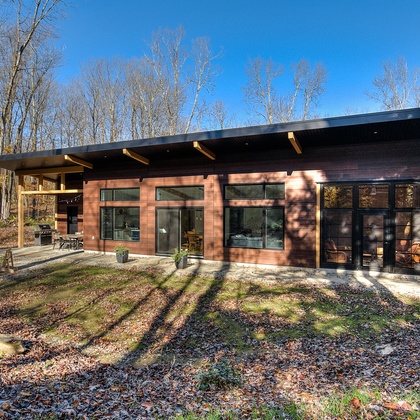
Crawlspace insulation - be careful to get it right
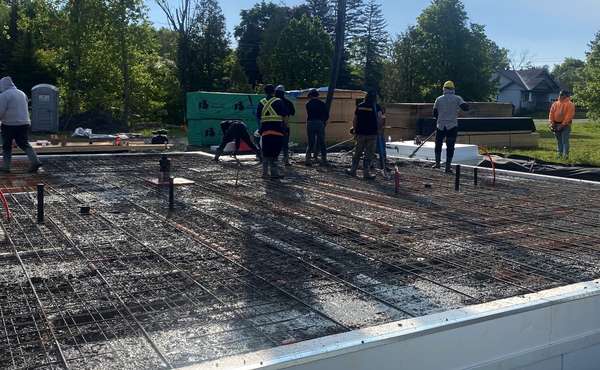
A crawlspace comes with all the downsides of a basement, but it is just too low a space to be functional either beyond the folded plastic christmas tree and a couple of boxes of baubles. Unless there is a good reason for it, going through the process of pouring a footing, then a concrete wall, then building a subfloor above and only be able to access it on your hands and knees is a lot of effort for the value you will get from that space. If you don't want a full basement, a great alternative is to build a slab-on-grade.
Important note: The following crawlspace solutions are recommendations for how to deal with moisture and heat loss only, and provide only an anecdotal overview of how to deal with radon gas. We would recommend having your air tested for radon, and if it is above Health Canada’s recommended safe levels (200 Bq/m³), please see our pages on radon gas mitigation in crawlspaces.
Fixing a dirt floor crawlspace:
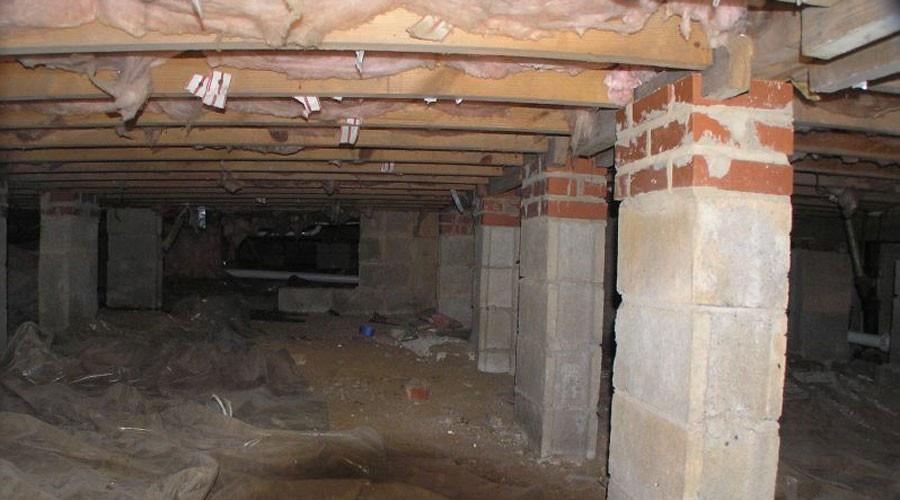
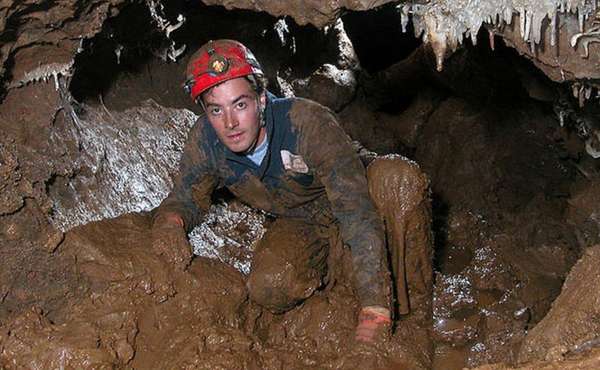
All too often a crawlspace will have nothing but a dirt floor, and probably some un-insulated walls. The result of that is an unending source of humidity as moisture in the ground evaporates into the air and can condense on cold walls and joists where mold can establish itself.
That dank air will inevitably be circulated throughout your home, providing humidity, mold spores and a pretty nasty smell that will be the dominating odour of your home, furnishings, and your clothes, so you will take that aroma everywhere you go. Rotten huh?
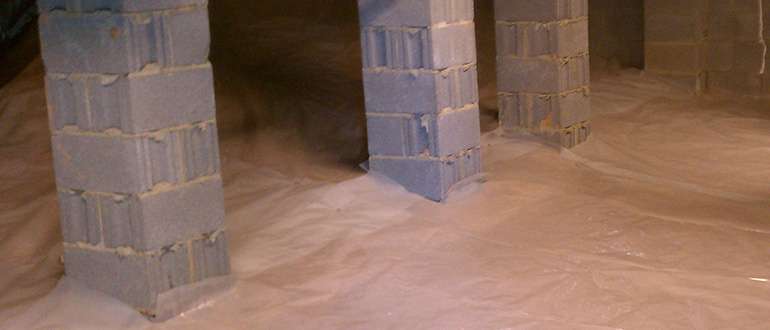
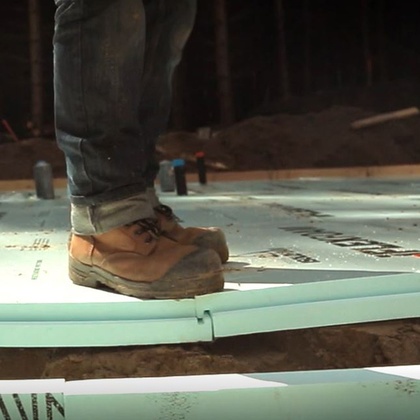
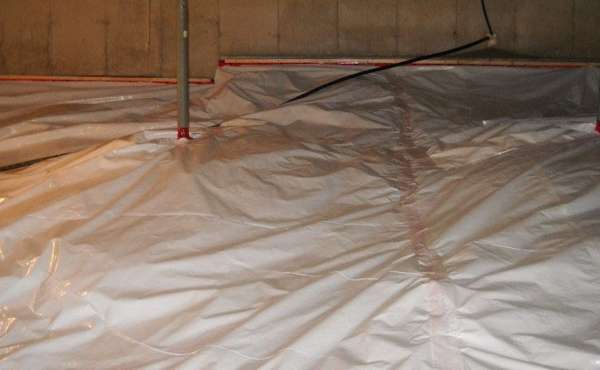
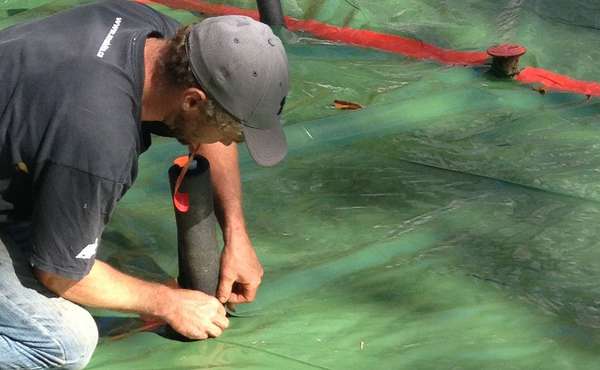
For those with nothing but a dirt floor, the single most important thing to do will not cost much - cut off the moisture supply to the air by laying down polyethylene directly on the ground. The standard 6 mil poly vapour barrier will work fine as a DIY solution.
Do the best job you can and seal the joints, but remember - if you did nothing else beyond laying it down over most of the floor, even without taping or sealing it, you would reduce the amount of moisture in the air. If your crawlspace access is inconsistent and you can only hope to do 80% of it, do it anyway; you will notice a very big difference.
The 6 mil poly is far from being a complete crawlspace solution, but we’re putting that out there so as not to leave those with really tricky crawlspaces or tight budgets feeling dejected. This is not an 'all or nothing' situation where there is no point doing anything if you can't do it all - do as much as you can, it will help.
Insulating crawlspaces:
The best way to insulate a crawlspace would be to do it from the ground up and consider it just part of the conditioned space as you would with any basement. We make no secret of the fact that we aren't huge fans of spray foam due to the emissions associated with it (with exceptions for eco-friendly spray foams) but this is one place where it can make a lot of sense.
Spray foam is done quickly, it has a high R-value, provides an air and moisture seal and fills all the tiny holes. This is not a DIY job so it will be among the more expensive options, but it will work well, and best of all ... someone else will be slithering around in your crawlspace rather than you. Since it will act as a vapour barrier, there is no need to lay down poly ahead of time; it can go right against the dirt.
When it comes to insulating the walls, there are a couple of ways to go about this – Building Code requires any crawlspace more than 5 feet high to have fire protection covering any foam products, in which case you can frame a 2x4 or 2x6 wall 1 inch away from the concrete wall; sitting it on small chunks of foam will keep it from being in contact with the ground and absorbing moisture. Spray foam is then applied to the walls behind the studs and into the cavities, you can leave enough room to do any wiring if required.
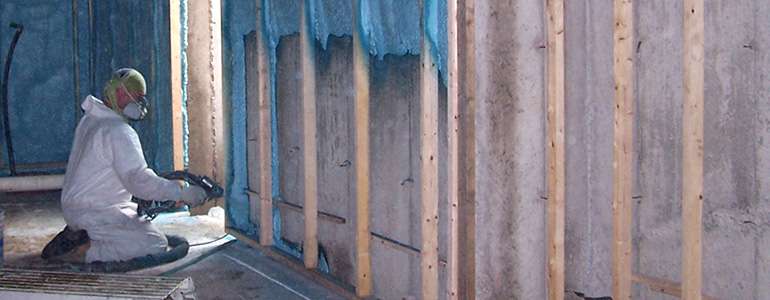
The foam needs to then be covered with drywall as fire protection, which can be attached to the stud wall. No vapour barrier is required in addition to spray foam. Building codes change and can vary by region, so confirm this locally, but currently The National Building Code in Canada for example allows foam insulation without fire protection on crawlspace walls that are less than 5 feet in height.
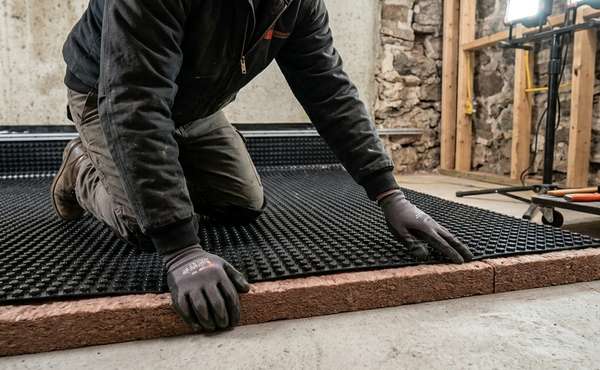
An additional option, for walls only, that you can do yourself is to apply EPS foam boards directly to the concrete using either strapping and tap con screws, or an appropriate adhesive that is suitable for foam boards (it should say so on the tube).
EPS can be substituted with XPS foam, but given its much higher greenhouse gas emissions, we prefer to recommend EPS. XPS qualifies as a vapour barrier at 1 inch, and testing shows that EPS foam acts as a vapour barrier (1 perm) at 2 inches or thicker.
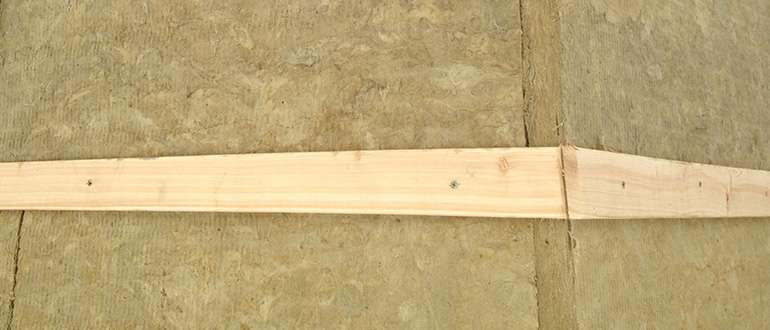
Rock wool (mineral wool) boards are an alternative product you can use and they are made from recycled stone dust, so it does not burn and does not need to be covered for fire protection. But mineral wool is not a vapour barrier, so it is best to apply a poly membrane against the concrete first.
Note: Taped XPS foam is an air barrier, but EPS and mineral wool are not. Air doesn’t leak through intact concrete but it is quite likely that crawlspace walls will leak air. If you have a stone foundation, old cracked concrete or cinderblocks, bringing the poly barrier up the wall and sealing it to the rim joists will provide you with an air barrier.
Preparing a crawlspace for vapour barriers and insulation:
First clear the space as much as possible so you have room to move around. Ensure there won't be any problems with bulk water accumulation by installing a sump pump at the lowest point. Even if you’ve never had flooding in the past, that does not mean you will never have it in the future. We’ve never heard anyone say they regretted installing a sump pump.
Remove any sharp rocks and obvious obtrusions for a more even surface so that you won't tear the plastic as you walk on it.
Should you vent a crawlspace?
No, you should not. Drawing humid air into a cold crawlspace in summer or winter defeats the purpose of stopping the source of moisture. A moisture protected crawlspace will probably be quite cool in summer and should be less humid than outdoor air, so moisture can condense on the cold surfaces of wood and concrete. It's better kept sealed up once you have dealt with moisture and air quality issues. Be sure to monitor the humidity levels once work is completed, you will likely need to include a dehumidifier to keep humidity down.
When shopping for a dehumidifier make sure it can be operated continuously with a drain hose, don't get one that needs to be manually emptied. They can easily fill up at least once in a day, and if you're not there to empty it regularly it will stop working.
The volume of water that will be produced by a dehumidifier is not so great in quantity that it necessarily needs to be directed to a drain, which likely won't even exist in a crawlspace. You can have it set it up to drain right into a small pit in the dirt below the membrane and it will absorb back into the ground.
Removing radon gas from crawlspaces
We highly recommend getting your air tested for radon gas before beginning work to determine if any measures will be needed to protect your air quality. Air contaminated with radon gas is a serious health hazard and is the second leading cause of lung cancer after smoking. Please see our page on crawlspace radon mitigation for more information.
Now you know more about how to insulate a crawlspace, reduce humidity and mold. Find more pages about sustainable construction below and in the Ecohome Green Building Guide pages.
Find more about green home construction and reap the benefits of a free Ecohome Network Membership here. |


I see you recommend no crawl space vents. You’ll have to change all our Building Codes for that to happen.
There is a lot wrong with building code, so we're doing our best!
You say, “There is a lot wrong with building Code ...” Either you’re wrong or the 2,000+ Building Officials, 35+ architect’s and engineers, and 30+ lay members who write and update the Building Code are wrong. Hmmm.....
They are, both, acceptable ways. Science is ever-changing. More and more houses are simply putting poly down and putting spray foam on the walls. I'm not sure how I feel about spray foam coming in contact with the ground, though. 20+ years ago I asked a Terminex man who was spraying the ground for termites before the slab was poured. I asked if we can put foam under the slab for insulation. He said that it would void the warranty as termites will tunnel through it. I dunno.
Yes, Lee, unfortunately they are wrong. If you'd be more comfortable hearing it from a different source then please have a read on the following -
https://buildingscience.com/sites/default/files/migrate/pdf/PA_BuiltWrongFromTheStart.pdf
The author, Joe Lsitiburek, is one of the most internationally recognized names in building science. Here is his bio, and if your credentials are comparable to his and you can provide a counter argument we would be most happy to hear it.
And - if you are able to read the article with an open mind, you will no doubt learn about several other building techniques that are allowed / required by Building Code that are contrary to the basic principles of building science.
Isn't putting a vapour barrier right on top of the soil an invitation to an infestation of mould?
Hi Geroge,
There won't be anything appealing going on underneath the vapour barrier, no question there, but that membrane is the opposite of an invitation. It's separating the humid, spider and bug domain from your home. Just don't slice a hole and crawl underneath it. A crawlspace is not something we ever suggest people build so no, it's not the ideal 'basement' floor situation but it's a lot better than the alternative - NOT laying down a membrane!
Thanks, Mike... What about keeping a vented space just above ground level and putting a vapour barrier across an elevated (4 x 4 or equivalent) support, a foot or so below the floor joists? (Since there's already a crawl space, one just has to make accomodations)
Hi Geroge, sounds to me like you mean a 'floating' vapour barrier of some kind that you could crawl under, is that right? Let me know what benefit you see in that, I can't think of any off hand. It sounds like a lot hassle, and if I'm reading you right then you would have a wooden support structure in a high-humidity enclosure due to the vapour barrier above it. That would again, be better than no barrier at all as it would at least reduce the amount of humid air that would be exchanged with the air in the conditioned space above, but It would only be a matter of time before the wood started to rot.
And I think that air would be at a greater risk of mixing with the air above due to the volume of air down there, the natural stack effect of warm air rising and the increase chance of perforations with some type of support structure. See this page all about balancing air pressure in a house to see what I mean.
Is it the visualization of bug life below the vapour barrier that has you looking for other options? That really sounds like a hassle to build and I think it would be pretty costly, I would suggest instead that you price out the option of applying spray foam on floor of the crawlspace. This is a significantly more expensive solution, but it will work very well.
If you do go that route, be sure to choose a spray foam brand carefully, I think it's linked above but here is our page about new blowing agents for foam insulation don't cause climate change.
Mike,
Thank you for the thoughtful artice and information. I have a few questions if you wouldnt mind answering.
I have a humidity problem in my vented crawl space (I believe) and am looking to mitigate this prior to installing hardwood flooring. Presently I have been seeing 70-90% humidity in my crawl space (as indicated by a hygrometer I placed there). Granted, I live in the PNW and we are in our rainy season. My subfloor is reading (using humidity probe) around 12.5 humidity while my hardwood flooring tested at 6.5 - so this is well above the allowable limit to install)
At present there is a vapor barrier installed (haphazardly and not covering all of the groundspace) and upon close inspection I have found no standing water. ( As a side note, I intend to install radiant heating (hydronic) in the joist bay beneath the subfloor with transfer plates) .
What would be the best approach to condition the crawl space to lower the humidity to within an acceptable range to install the hardwood flooring?
Hi James,
That could be a pretty quick fix. I would repair the vapor barrier first and make sure it covers the entire If its ripped and in really bad shape then install a new one if you have to; this is also the time to do a passive radon stack if you don't already have one. I would certainly encourage you to test the air for radon contamination if haven't already.
The other problem is probably the fact that it is vented. If you live in a humid region (which being in the Pacific North West is a strong possibility), then bringing in humid air is not helping matters. A crawlspace is best treated as part of the conditioned space. Those two steps and adding a dehumidifier may solve your problems.
In a cold climate like eastern Canada, where the situation is complicated by high water table (low flood risk), which would be the preferred foundation in your mind; a raised slab (stem wall) or a vented crawl space to accommodate hydrostatic issues in the unlikely event of flood waters?
Hi Duncan, there is no situation I can think of where I would list 'crawlspace' as my preferred building technique. I'd pretty much always choose a slab unless there is a need to be below grade with a basement.
Building a slab on grade on land with a high water table can be tricky if you are building a thickened edge slab (a footing), so a raft slab is perfect in that situation in such a case. You can also ad a lot of fill and raise the home, though that comes at a cost and it may not be a final level that you want.
See our page here on how to build on problem soils with raft slabs. A raft slab is flat on the bottom and has been engineered to spread the load evenly over the entire surface. So you can build on softer soils, and you don't have to dig down for a footing, so there is no risk of hitting water. We just built one in Wakefield, QC, here is a slab on grade installation video so you can see how this kit goes together, and if you like contact the company via their directory page and they can get you a price.
My spray foam contractor suggested removing the bat insulation in the floor joists after the crawl space was encapsulated. Your thoughts?
Hi Darell, if they've done a full spray foam job - meaning, all the walls as well as the floor, then that sounds like the right thing to do. At that point the crawlspace is part of your heated space, so there is no need for a thermal separator between above and below.
My crawlspace is similar to one of the gentleman who was seeking answers for his crawl, which involves hydronic in floor heating.
What we’ve done so far:
I’ve had the box ends and concrete walls spray foamed, the spray then meets up with a 13” overlap of 12mm poly on dirt floor. This is a ‘conditioned’ crawl I think? A complete envelope?
We are the new owners and were told the perimeter drain was newly completed. Unfortunately for us.... this was untrue.
We currently have water pooling in corners( sitting on top of the poly) and just trying to get through the rainy season to sort out all the issues- starting with the obvious removal of water and fixing the perimeter drain.
After these things are repaired, my intention is to air it out, dry it out, and re-poly. If a rainy season goes by without any issue, I was planning on pouring concrete over that poly.
Thoughts?
Any help is greatly appreciated as we are told so many things. Vent- NO vent....Insulate the floors for the hydronic floors to be more effective, etc..
The hydronic system is above the sub floor and covered with a finished concrete FYI.
Thank you in advance for any advice you may have!!
Tawny
My house is on footings, so there are no cement walls to seal, just plywood skirt boards that don't even quite reach the ground everywhere. Is there a modification to this approach that might apply in this case? (I really want to get rid of those batts that are drooping all over...)
Hi Denise
If the batts are starting to fall down you could remove them and re-insulate between the joists from below. If it's really low to the ground and there isn't much air flow you could also lay down a 6-mil poly membrane right on the ground and put some rocks on top of it to hold it in place, making sure it doesn't become a problem by allowing water to pool. That would reduce any moisture if that was a problem.
You could also spray foam it from below, that would give you an air seal and plenty of insulation, so you'd be much warmer for sure. Check out this page about finding spray foam with lower emissions to be pick the best brand.
If you were looking for a DIY solution you could put new batts back in, but that wouldn't do anything in terms of providing an air seal, do you find it drafty? If there is a plywood or OSB subfloor and floor boards on top then you may not be too leaky, but if there is nothing but floor boards then you'd be best to seal air leaks someway, that's where the spray foam does a really good job.
If you did batts, I might choose Rockwool rather than fiberglass as they are more solid and would probably stay in place better. You would also be wise then to nail up some diamond lath metal sheets to hold it up and prevent access for critters.
My house is 11 years old and has a partial crawl basement. Bad idea. Built on piles with 2’’x6’’ walls 30’’ high. When this was built, my thinking was that this crawl space would be warm and thus keep the floor warm. This has not been the case. There are heat ducts running in that space.
The walls are well insulated with 2’’ foam insulation added inside, the joist spaces stray foamed, there is hard foam insulation all over the very uneven ground floor (badly done) and a vapour barrier all over the whole ground floor and attached to the walls. (not sealed) You would think that would do it but no. The soil outside only comes to about 4’’-5’’ from the bottom of the pony wall. What might be happening is that with the Manitoba cold, the frost goes down into the ground outside and then it comes up inside the crawl space?? Also, there is the mouse and squirrel problem with them always managing to find their way underneath especially when the ground starts to separate from the wall. (The mice have found their way beyond the vapour barrier into the house) How high should the ground come up to the outside wall and does insulation need to be buried in the ground to prevent frost from going down so close to the wall? Should have built a full basement to spare me those problems.
Hi Jacques, that's a lot going on there for sure. To recap just to make sure I'm getting it right - walls are insulated, floor insulated, insulation between joists but heating ducts running through the space?
Rigid insulation on an unever surface is for sure not going to perform well, though the vapour barrier is likely helping a lot.
There are a couple of options I'd consider depending on what budget you have available. Installing spray foam on the dirt directly would solve a lot of problems, you could go up the wall a bit as well to meet the interior insulation, because you are correct - cold from the exterior is coming up from underneath I believe.
Another solution depending on how easy it is to accomplish, could be to add a couple of inches of EPS rigid insulation to the exterior vertical portion of the wall and back fill it. for sure if most of the wall is exposed then R8 or so of insulation isn't a lot for Manitoba. an exterior horizontal (laid flat) skirt of insulation buried under the dirt would also stop a lot of heat loss if you were going to go that route of insulating and backfilling.
Rodents is a whole other issue that you for sure would want to deal with first, here is our page on removing pests and rodents safely , there may be some info there that could help.
This is a very informative article on crawlspace insulation. It was thoughtful article and information is exactly what I need to fix mine.Thank you for sharing.
I have mold in my crawl space and I am currently getting quotes. One guy told me that once he removes the insulation that new insulation doesn't need to be added. He said that new construction homes don't have insulation in the crawl space. I live south of Nashville, TN so is this true or does it depend on the climate where you live?
Long time fan, first time poster. I have a small (900sqft) off grid cabin. wood heat, solar PV, at the moment propane for DHW (I am switching my home DHW to heat pump first, then later will figure out what to do at the cabin). Used mostly in the summer and to a lesser degree in the sholder season. The cabin is on a island in southern British columbia at sea level, so it rarely freezes. The cabin is a western red cedar log cabin of sorts (look up Panabode to see its maker). It is on a slight grade, so the crawlspaceis 12" at one end and 4' at the other end. I have spent the last while clearing out material under the cabin, the previous owner was a bit of a collector. I have removed and taken all non wood items to an annual garbage barge, I am now removing wood and rock, to give a semi smooth dirt floor. I plan to put down 6 mil poly. Presently the sides are only enclosed with cross hatch wood lattice nearing end of life. After the 6 mil poly, would you suggest I enclose the permiter with cement board, pressure treated ply, or something similar? Given the cabin is off grid, there is no power for a fan, though I could do one directly connected to a solar PV pannel I suppose. What would you recco? Thanks.
glad to hear that helps, Chris! If you're putting down metal to replace the wood I'd consider burying it in the ground as deep as your motivation can put it :). The mice will not give up their home easily so make them at least dig to get back in.
I have a question for you. We bought a house that was built in the 1950's last year that is on a crawl space and we had it encapsulated and have a dehumidifier down there. We live in southern Georgia. The humidity stays around 46% in the crawl space but the temperature stays around 80F. This started happening around May/June and i believe this is the reason our house stays so hot. Is this normal? Can we / should we add insulation to the bottom of the floor? Any help is appreciated. Thanks
Hello. I have a question. I live in a double wide manufactured home with a dirt floor crawlspace. I had my crawlspace inspected for moisture, and was told it does have a lot of moisture. Some of the plastic is completed rotted away and there are some metal parts that are wet and starting to rust. They want to do an encapsulation, where they would check and treat for termites (if needed), clean everything up and treat any visible surface fungi on wood, walls, joists, sills, subfloor, and ground. They then want to apply Borafoam insulation board to the crawl space walls and also seal up the foundation vents. He said he did not think I would need the humidifier. Does this sound right? Thank you! I'm a widow who is clueless about such things, so just looking for advice. Thanks...
Hi there! My wife and I are purchasing a ~100 year old, 720sqft home in the Seattle area, and I have a few concerns about the crawl space area. It is constructed with a pier and beam foundation, and the current insulation, vapor barrier, skirting, etc. are all in awful condition. Would I be best to replace the skirting with something rodent/insect-impermeable, lay a vapor barrier, and spray foam to seal/insulate? Or is this assumption incorrect due to the foundation type?
Due to the small footprint, I was also considering heating via radiant floor heating. Will I run into any issues if I don't insulate at the floor itself?
Thanks so much for the wonderful information!
Hi Kevin, thanks, glad you are enjoying the site!
Spray foam is a vapor barrier, and you can spray it directly onto the dirt floor, so it probably solves your problems in one shot if you remove everything that is there and spray foam it.
The term ‘skirt insulation’ refers to an exterior perimeter skirt of horizontal insulation, and I’m thinking you’re talk all interior here, is that correct? I’ll run with that assumption, and say –
Insulating the exterior of your walls is better than the interior of your walls, whenever possible mostly to protect foundations from the freeze / thaw cycle that happens when you insulate them from the inside in cold climates, and particularly with block foundations which are much weaker than poured concrete. However, the Seattle area is a pretty temperate climate so there isn’t as much concern. You could spray foam the entire interior (walls and floor) and then there is no need for a radiant floor above since the warm air below will keep the floor at a comfortable temperature.
If you go that route, I would also suggest spray foam with eco-friendly blowing agents, they are also said to be less toxic, so there would be less off-gassing into your home.
Hello, I had a termite company over today (same company that does my yearly checkup) who also installs Crawl space dehumiifiers. My hardwood floors have been cuping and was advised to have a dehumidifier installed by floor folks. When the consultent was here for the dehumidifier he advised me that the insulation (batt between floor joist) was not needed? The crawl space is actually dirt floor and has had vapour barrier and vents sealed. you can actually stand up in "crawl Space" so not low to floor. We are in Williamsburg Virginia and winters are mild to average but summers are humid. Thoughts on removing insulation?
Insulation is to keep heat from moving from one place to another, so if the crawl space is heated, then the insulation is not needed. That doesn’t mean it’s a problem, but it isn’t needed. If as you say, the floor is only dirt covered with a vapor barrier, then there would be heat loss there. So the ideal place for insulation would be to cover the dirt.
But, if you keep the house warmer than the crawlspace then the insulation will provide you will some additional comfort. Is the insulation moldy? If it is then remove it, but if it isn’t moldy and you have a poly barrier and a dehumidifier, then it likely doesn't need to be removed as you will have dealt with your humidity levels and that is what causes the problem in crawl spaces.
We have recently removed the wet and falling fiberglass insulation from between the floor joists, in the 18" high crawl space of a 26' x 40' home in Maryland. It had signifigant termite damaged wood which has now been replaced, and then was fully spray treated by the local termite contractor. The dirt floor had poly plastic layed down when the home was built about 25 years ago, which was pretty messy from the original construction debris left there, and the original failed insulation that fell upon it, so we layed new poly plastic down during the above work so that we had a cleaner surface to roll across while the above work was performed. The termite contractor was adamant that insulation should not be reinstalled between the floor joists. because it would just attract condensation and fail again. I don't really agree with that line of thinking, as I suspect the condensation would then just accumulate on the floor joists and floor, which would be worse. I would like to put fiberglass insulation back between the floor joists, and then staple poly sheating to the bottom of the floor joists, below the new insulation and across the entire bottom of the house. I suspect this will signifigantly reduce or eliminate cool air condensating upon the insulation, and help insulate the home by minimizing ways cool air can get past the insulation up to the floor. I would like your thoughts on this, and in this scenario would you suggest leaving the crawl space exterior ventilation vents open or closed? Thank you.
Hi Chris
Insulation doesn't 'attract' condensation. Condensation forms when warm, humid air meets a cool surface. If you reduce the humidity that should solve the problem. So the insulation isn't the problem, its the moisture in the air. I think your best investment at this point is a dehumidifier, and then insulate it. The new poly on the floor should also help a lot. The problem with how you suggest moving forward is your positioning of the vapor barrier - if you put it on after the insulation then its on the wrong side. A vapor barrier needs to be on the warm side of the insulation.
Given the extremly limited height, I the best way forward for you would be to spray foam it since that will be the insulation, the vapor barrier and the air barrier all in one. If you go that route, we would suggest you try to find a spray foam installer with less harmful HFO blowing agents.
Thank you Mike, I agree that the insulation will not "attract" mositure, just repeating there what the termite contractor said, which I also disagree with. I feel that the poly will keep the humid air away from the insulation, and your suggestion of putting the poly above the insulation will only allow the humid air to again contact the insulation itself, and have the same problems all over again. The problem with spray foam insulation is that you then permanetly coat all the electrical wires, junction boxes, and plumbing pipes with foam, causing a real mess for future repairs or upgrades. The main purpose of the poly under the insulation is to keep the humid air away from the insulation, so that it does not condense upon it. The secondary benefits are as a vapor barrrier (to humid air when humid, to warm air when warm, and to cold air when cold), and also to help prevent the insulation from falling down in any areas where it is not a snug fit between the joists. What about the existing crawl space ventilation vents, would you suggest leaving them open, or sealing them. If I put the insulation and poly in as I have noted, and close off the crawl space vents. I do not see a reason why a dehumidifier would not be necessary, as there will be minimal air flow or changes in the crawl space, and any moisture that condenses will be on the underside of the poly, and only drip down onto the poly on the floor. Please advise if I am missing something here?
I have a thin plastic vapor barrier that was installed 30 years ago in my crawl space and it has many holes in it. I want to put a new vapor barrier down. Should I put the new one over top of the old? Or should I remove the old?
I heard from a source on YouTube that putting the new over the old will trap air and create a bad odor- is that true?
I appreciate the article and the building inspectors and architects are wrong on so many things. I have managed a major home improvement retail company and I have done many construction projects. I currently own a home with a crawl space that is 5 feet on one end and 1 foot on the opposite end. It has foundation vents around the foundation. I currently have 6 mil plastic on the dirt floor and the previous owner installed unfaced insulation between the joists. I am planning to replace the insulation soon. Should I use faced insulation? I would ro use Manville with moisture control. Thanks so much.
I have a cottage which we want to use all year and it is open underneath with insulation on the underside of the cottage i.e. under the floor boards. The cottage is on piers and we want to close in the half back of the cottage and it will be a crawl space with a height of 2'-4'. The back of the cottage which is actually the front has a gap from water seeping underneath the cottage and critter handiwork. We are going to use pressure treated plywood at the back of the cottage and wrap it in vapour barrier and seal any gaps between the boards and the gound. We will then back fill from the outside to prevent water from getting under the cottage and redirecting the water away from the back of the cottage to either side (ditch, gravel and weeping tile). As for the critters we are hopeful they will go away :)
Along the sides of the cottage to enclose the crawl space, we are planning to frame on grade (there is a huge rock under the cottage that spreads across most of the area ) however in areas along the perimeter I am not sure if placing the framing on the ground is a good idea. We will then use 2" foam board between the framing and use 6mm vapour barrier on the ground and seal it to piers and framing as much as we can. Is this sufficient or do we need further insurlation? Do you recommend windows on either side of the crawl space in the event we have issues with moisture to air out the space? I see you do not recommend vents. Is this sufficient to keep pipes, water heater, water pump from freezing? Should we have a heater down there and if so, what do you recommend. The crawl space will be approximately 10'x20' area with height of 2'-4' as above.
The front portion of the cottage (which is actually the back facing the lake) we are planning to frame as well for storage and a play area for the kiddies. We would like to finish this area as well, but it will have a 6.5' ceiling height. Should we also use vapour barrier underneath the framing for these 'rooms'? We will have windows, sliding door and baseboard heating. There is some rock there too that we will have to be creative around. Can we use posts on rock/ground or should we be looking at a more concrete base? We will also build up the sides of the cottage as well to direct water away from the sides and and further insulate the cottage.
Can we add siding on the underpart of the cottage on the exposed plywood framing we will be using to frame the exterior at a latter to protect the plywood and is it okay if the plywood is pressure treated or should we not use pressure treated? Or do you suggest using decorative trellis instead?
Thank you.
Hi,our home at the jersey shore was built in 1922. 1/2 of the basement is finished off. The rest is crawl space and 2 year round porches with no access to the crawl space and if there was you could not fit under it. There's no insulation in the crawl space or floor joists . Could I have someone just blow insulation in there. There are pipes under rafters. TIA. George Boardman
I'm curious as to the answer to your question George. I also have a small crawl space under a cottage that is too small to access. I'm thinking I'd put down the 5 mil poly using poles to spread it out as best I can, but wonder if it would help to then blow in cellulose on top of the poly for additional insulation. I live in New England so widely varied temps. BTW - great informative article!
Thank you for this article. It's given me confidence. My house was built in 1898 and I have a crawl space of boulders, dirt and stone & mitre. I've been told to spray foam the perimeter and put poly down over the dirt & boulders. I'm located in the mountains in bc. I can't get a contractor to schedule the insulation and just spent $10k on a new furnace. I'm desperate for the full heat experience! So, I've kind of decided to do it myself. It makes sense to lay the poly first then spray foam.. can the spray connect with the poly? What do you use to seal & attach the poly? I can get a spray foam kit for $400 and it covers 250 SF - The crawl space is approximately 600 SF. Would 250 be enough? I beleive R20 is to code here. What if I can't access the whole perimeter? Can that part be left? Is this a bad idea? Thanks, Courtenay
Have a 1975 home built on half slab half crawl space with a new addition crawlspace on the back. The new addition has insulation between joists and has black poly down ( abliet not super great). The under side of the poly is wet and highly uneven. Is there anything I can add to level the floor out some before reinstalling new poly and taping it? I have already blocked most vents with foamboard and spray foam. can I do anything to the brick walls? and should I install clear poly to the bottom of the joists?
Ecohome.net is my new obsession. Thank you so much for putting this together. It's an incredible resource!
We just bought a house built in the 1850s with a stone foundation and a 5' tall "crawl space" underneath (I say that in quotes because there are stairs going down there and you can walk through it while stooped). There's definitely water damage to the foundation, which we're first solving by fixing the gutters outside, but I was interested that there's no mention of waterproofing the foundation here either internally or externally.
I know the ideal way of doing this is externally, but was told by our inspector that given the age and condition of the stone foundation this might be impossible (digging around an old stone foundation might jeopardise its integrity).
I've seen houses that are waterproofed from the inside, with a french drain and foundation wrap (draining into a sump) but there's no mention of that type of waterproofing in this article. Is this something you'd recommend if there's no possibility of exterior waterproofing?
Presumably if this were done, then we could still do the floor poly, and floor/wall insulation after the fact. Given the possible usability of the basement (storage and mechanical devices) would you recommend then pouring concrete on the insulation to level everything out?
Thanks again!
Hello, Question: Must I use the baseboard heaters in my 2.5ft crawl space? 1960 MCM bungalow, Vancouver Island, Concrete block foundation, no vents, vapour barrier installed, walls not insulated (installing foam board was advice from inspector), two baseboard heaters installed for a 1200sqft space. The heaters are quite expensive to run. I turned them off and don't find the floors too cold (slippers!) and my heating bill is now reasonable. Moisture in the house is 50-60% in all rooms. Can I leave the heaters off? Would you suggest a dehumidifier in this case?
A response below answered my question. Thankfully the cinder blocks are in great condition and at low risk of damage in my climate. I'll be foam insulating the walls, sealing poly to the foam, installing a dehumidifier and making sure the entrance isn't leaking lots of air. Thanks
1st off, don’t know how i didn’t find this website sooner!! Lots of good questions and Great advice!
I live in Capitola, CA (Santa Cruz, County) I’m about 1/2 mile from the beach in the San Francisco Bay Area.
Currently its 54' and the low of 41'. We rarely go below 40's. But to us beach bums its Cold! Outside Humidity is 65% today. And we have had about 4 or 5 days straight of rain. Not super rainy where we are but at times.
My house was built in 1967, my grandparents where the first to live in it, and passed on to my mother and now my family. it is about 1500 sq. And has slab for the living room and garage and Stem Wall foundation with about a 2 foot crawl space! Tiny!! maybe 18" in parts.
We are starting to smell that musty odor again. And White looking dirt underneath.
Our yards used to flood a lot with rains, and mud standing water would take days, weeks to go away. High Water table?
We just installed about 40 yards of concrete Patios, new driveway and filled in by the walkways so the whole perimeter of the house is concrete. (one small 2x4' dirt / well base rock)
We have a sump pump when it would have standing water for weeks under my house. Now not much water, and I have some plastic vapor barrier down. That used because it was so muddy under the house when we were working one time.
My plan is to put 6ML over every inch under that house which is 23x48'
- Sounds like I should close the vents from under the house?
- The crawl space is not heated, and no Batt insulation is installed. If I insulate, should i put a vapor barrier between the sub-floor and insulation and below (hold them in and extra protection) that also and on the dirt floor?
- And is the crawl space supposed to be heated? Or insulated?
- Never had a dehumidifier under the house before, is that something we should do? Maybe in the rooms too. We have the ones for the shelves in the closets and some rooms with mold proof paint. But we do get some mold at times. The Ocean air…
- I’m looking at quotes for Spray Foam, but I work for a Heavy Civil Construction company and I did most of the land moving, forms, rebar, water lines, electrical for my patios. So I tend to be a major DIYer. But if that price is over $2000 or so to have them spray I have more Time than I have Money!
- Should we treat the dirt with vinegar first? Or a different Mold killing product?
- There might be some minor cracks in the stem wall foundation from the Earthquake in 89, but the siding comes down low to the ground, so not sure how well I can seal that from the outside or inside. Maybe the water / moister is coming up from the ground?
Im trying to mitigate all the issues so I don’t have to continue to go under the house. I don’t like confined spaces, or spiders!
Thanks!
Kevin from Capitola
Hello. Building a new home in NC coastal area. Doing crawl for two reasons-one for softer floor (plantar fasciitis and ankle hardware and bad back!) and concerned for any plumbing leaks that could be hard to locate with slab! So options are hard cut foam in sealed crawl OR ... spray foam for a sealed crawl space. BOTH with plastic vapor barrier on the ground. We will have an engineered wood floor glued and was not planning to heat or condition the crawl space. We will have a usable door at the back of the house under a room that sticks out on it's own to store some things like outdoor furniture. Also we will have a large dehumidifier as part of the package with either type of foam we decide upon. I don't like the idea of people saying there will be mold under the plastic. This makes me nervous and I worry if workers under there Could tear the plastic and we would not know! So....
1. Which insulation type do you recommend? 2. What thickness plastic for floor you recommend?
3. does the foam overlap the plastic at all?
4. Will just the walls be insulated or the underneath of the floor as well? 5. When building a new house -at what point do we test the crawl for radon? 6. Would it be costly to condition that space on a large foot print house and what is the benefit if so. 7. Can we not condition. The space ?
8. WHAT IS THE ECO FRIENDLY SPRAY BRAND?!
Hi, first time homeowner I have a vented crawl space. Radon pipe runs through it at ground level and out through the roof. I have a vapor barrier on the ground level and stone below for the entire space. Above in the floor joists is fiberglass batt insulation. What is the best thing to do
to keep the areas around better insulated? Would foam board along with sealing rim joists be where I should start? If so, after that would the batt insulation come completely out of the joists or stay in place? Seal all vents in the crawl space? Does a crawl space next to a finished room (family room) affect the temp and humidity of that room? Thanks for all the help in advance! Hoping to get my split level home much much more efficient. Open to all input and help on the matter!
Hi! First off, very informative page for crawlspace issues, thanks!
We have an unvented crawlspace, a torn old vapor barrier, no floor insulation and no wall insulation. Doesn't appear to have any standing water or mold issues.
We are thinking of insulating the cinder block walls with foam board and replacing the vapor barrier to run up the walls a bit. Possibly a dehumidifier too. Thoughts?
Sure, good idea. Just check the joints between the blocks, if they're cracked and shifting at all then insulating the walls may make that worse as they so far have stayed warm all winter (I assume you've been heating it) and now they will freeze. It's just worth a look first. And yes on the dehumifier, try to keep it below 50, even 40% RH if you can.
One of the most thorough articles on this topic I've read. Since the comments seem to remain active, I'll post my own conundrum:
We live in an early-1900s farmhouse near Portland, OR. Our crawlspace is about 3' tall and vented (which is common here due to the PNW marine climate and need for radon mitigation; The crawlspace currently has a shoddy vapor barrier (with construction debris left underneath), leaky panned bay return ducts, fiberglass batt insulation between the floor joists (with no subfloor), and dampness in places underneath the vapor barrier (but no standing water). RH has consistently been creeping into the 80% range.
Unfortunately, we have a mold issue. We know that we need to remove the old vapor barrier, insulation, and construction debris. My question is – what do we do to prevent it from happening again? My current thinking is: 1) Install a more durable 12mil vapor barrier with taped seams 2) Eliminate the moisture source (we think) by patching a foundation crack, improving exterior grading, and routing the gutter downspouts further downhill 4) Replace the panned bay return ductwork with something less leaky 5) Install new insulation between/around the floor joists - either better batt or closed-cell spray foam (any preferences?).
Does that seem reasonable? I know everyone likes an unvented crawlspace with rigid/spray foam wall insulation and a dehumidifier, but I'm reticent to go that route due to the radon issue and because I'm skeptical of any solution that requires continuous power supply to keep it dry. We've had too many neighbors have their dehumidifiers/sump pumps/etc. die at the worst time... :) Your thoughts warmly welcomed!
Thanks for this great service! Love what Ecohome stands for and is doing. Also the informed courtesy of Ecohome's responses. I have a concrete block crawlspace of about 900 square feet under our main living floor in a house north of Ottawa. It's basically dry, although sometimes a bit of water comes in through cracks in the blocks and also can pool a bit under the poly at the sump pump low point. The sump pump never comes on that I have noticed. There is evidence of mice droppings. The crawlspace has poly on the floor covering dirt as part of a radon system and going up the walls a bit. Humidity is kept down with a good dehumidifier and vents are blocked. The crawl space is unheated but I am wondering if it makes sense to sprayfoam the walls and if so whether to use open or closed cells? I'll double check but I think I can find blowers here who use Demilec or Elastochem, the most responsible sprays? Whereas closed cell has a higher R-value per inch, I have also read that open cell may actually be better in cold climates and also has less of a toxic or climate change impact. Also that while open cell does not provide a moisture barrier, this could be a better way to deal with dampness - allowing it to leave the wood and be dehumidified in the crawl space rather than causing rot but is a better air barrier, compared to closed cell. If open cell is used, does it need an additional vapor retarder on the interior side, e.g. a spray vapor retarder paint? The goal of insulating would be to lower heating bills over time (and given my electricity is green in Quebec, getting a pay back from this investment), have warmer upstairs floors and reduce dampness which could contribute to mold. Do these different goals call for different solutions? Would it make sense to insulate a crawl space and not heat it? Is there a recommended minimum temperature to heat it at, and is the return better the more you heat it? Lastly, are you concerned with spray foam hiding termite activity and what do you think about spray foams using soy? Lots of questions. Thank you.
I had some termite challenges at my home in Virginia. The termite contractor went to treat the problem and noticed some moisture problems in the crawlspace. They took out the old vapor barrier and put in a new one, as well as a dehumidifier. Some of the insulation between the floor joists had fallen down so they told me now that I'm runnind a dehumidifier that I should remove the insulation completely now that they have sealed the vents and installed their dehumidifier. They told me that it shouldn't effect the comfort of the home. Is it normal to not have insulation between the house and the crawlspace in this sitaution? If feel like the floor would just be a constant source of cold air coming into the rest of the house and vice versa in the summer.
If there is no insulation between the crawlspace and home above then you're just treating it like conditioned space, so it's best to have the exterior insulated if you're going to do that. But yes, it's fairly normal.
As for the vapor barrier, they often cause more harm than good in a home because their role is often misunderstood and they end up trapping moisture where it shouldn't be, especially in basements and crawlspaces. So when you say you had moisture problems and 'replaced' the vapor barrier that made me wonder if it was the problem. Where is the vapor barrier and on which side of the insulation - warm side or cold?
Due to the termite treatment and the need to inspect it they said we really can't insulate the exterior walls. So I'm stuck with a space under the house that is essentially at the mercy of the weather elements temperature wise and I wonder if it is just going to drive my heating and cooling bill.
Vapor barrier is laying on top of the dirt and taped a few inches up the walls ins the crawl. Other than the vapor barrier being new the only thing different is that I now have a dehumidifier system. I'm not sure what warm or cold side is for insulation but since it is in the crawl I would assume that is the cold side.
That's good to hear on the vapor barrier, covering the dirt in a crawlspace is the single most important thing to do. At this point yes, you are at the mercy of the weather, so your options are - you could insulate between the josts, but that's tricky since you really would want a vapor barrier on the warm side, and that's hard to do as you would need to put it into the joist cavities first before the insulation. Alternatively you could either attach rigid foam to the under side of the joists since foam would be a vapor barrier (you would want that fairly airtight otherwise cool air will just circulate). Is the dirt floor flat enough that you could lay down sheets of rigid insulation? and can you insulate the interior of the exterior walls?
The space is pretty flat and there is lots of room to crawl which makes it much easier to work in the space. So it feels like I was sold a partial solution then that really doesn't put me in a better situation than what I already had. I can insulate the interior of the exterior wall due to the termite treatment and annual inspections required. Are you suggesting putting rigid foam over the barrier on the floor? If I did that would the cold air just seep through the walls of the crawl and up into the house? Seems there really isn't a good solution due to the need to monitor for termite activity.
Don't think of this as heat loss through air movement and leakage, think of it as radiant heat transfer. You can read more here about how heat loss happens through conduction, convection and radiation. If the floor is flat and you laid a 2 or 3 inch layer of foam down, there may be slight loss through the joints but it would be far better than not having it. And if they are just laying there and you need to access a farther point in the crawlspace you could just lift them to pass and replace them after, assuming you don't need to do this regularly.
Doing the walls would be great as well, but in terms the floor and 'radiant heat transfer', the warm air of your crawlspace will warm the dirt floor continuously, foam on top will reduce that pretty significanlty I imagine. so don't think of it as an all or nothing solution. There is also the option of attaching foam to the inside of the wall as well, either with an adhesive (in summer so it can set better) or strapping and concrete screws.
Great information here, I'm learning a lot. I might not have my crawlspace set up in the best way. It's 3 feet tall, 1600 sq ft., all cement, floor and walls. There's never been any moisture issues, it's nice and dry all year round. On the advice of the inspector I insulated all the perimeter walls with rigid foam board with the adhesive. It's tightly fitted from the cement floor right up to the joists. I have not done anything to the cement floor. We don't get too much below freezing in the winter. (west coast of Canada, Vancouver area) The other day it was just slightly below freezing and I went into the crawlspace and was quite surprised how warm it was down there with no source of heat. I still have the original batten insulation between all the floor joists, there is no vapour barrier with it. I was considering replacing it with new stuff or with rigid foam pieces because it's been pulled out and put back in many areas from past owner's renovations and now from our current wiring and plumbing changes, so it's not in the best shape. After reading information here I'm wondering if it even needs to be there at all? Also, there are three vents which I have been closing in the fall and covering over with a piece of rigid foam and opening in the summer because I thought that was the right thing to do. Should they be kept closed permanently?
The insulation between the joists is probably helping keep your feet warm, it would also be contributing a bit to heat savings as the crawl space is cooler. Better if it had a vapour barrier but given the relatively mild temperatures in Coastal BC and that you say it is dry, you may be able to leave it no problem. I would pull a batt down for a look, and if it’s perfectly dry then that’s pretty much all you need to see to know it’s doing fine.
As for the crawlspace floor – do you go down there much? Since it’s poured concrete and I assume flat, a really easy insulation job if you don’t go down there regularly would just be to buy a bunch of 4x8 2-inch sheets of rigid EPS foam and just lay them down. You can walk on them a bit without doing much harm, or you could just put them aside to reach a further part of the crawlspace if you needed access and then replace them after. Either way - if it’s dry, the walls are insulated, between the joists is insulated, and you’re in a reasonably mild climate, I think as long as your feet are warm enough then there is really no great urgency to undertake any major work.
As for ventilation – letting hot humid air into a crawlspace in summer can actually lead to moisture condensing on the cool concrete floor or even the floor joists, so I’d keep the vents closed summer and winter and just have a dehumidifier set to keep it at 50%RH.
Thanks for the quick response. The insulation is bone dry, so it doesn't seem like there would be any benefit to a vapour barrier, unless it serves any other purpose? The cement floor is flat. Now that we have finished renovating we will have no need for access so I could consider laying the EPS foam, but I wonder how much difference it would make? The house floors are pretty good, they get a bit cooler, I wouldn't even say cold when we have one of our short infrequent cold snaps. If I was to do the EPS foam on crawlspace floor would that help much to reduce the heating costs of the home? Our heating bills are fairly reasonable, but of course those costs are going to keep increasing. Just curious, our crawlspace is mostly underground does that help to keep it from getting as cold? I was also told by our inspector that our insulation in our attic could be more sufficient so that will be on my list as well.
You're in a pretty forgiving climate for Canada, so if its dry, your feet are comfortable and your bills are reasonable then it's not a really pressing issue.
Hi Mike,
Long time reader, first time posting as I'm facing a similar situation to Mr. Parnell above except that the building is a cottage one hour north of Ottawa on a stem wall foundation. I've read the articles of Joe Lstiburek, yours, and others, and I can't find a definitive answer to the question: in a cold climate, is insulation over the dirt floor of an unvented, closed crawlspace needed? I know it should be present under a slab, but that's to control frost heave.
As I run through it in my head, the dirt floor of a crawlspace theoretically has an infinite capacity to absorb heat from above, so insulation should be important. But I can't find any code or expert recommending it, and I wonder if it's that important if I'm only heating the crawlspace to 5C during the winter (electric baseboard heat)?
I'm hoping you can shed some light on this, thanks in advance!
Hi Erik,
Are the joists insulated? The cold will find its way up if not. If you have insulation between the joists it wouldn't really be necessary to do the floor as well if its 5C, but if the joists aren't insulated then it could be a bit uncomfortable.
I can see how the answer to that may seem elusive, but it is pretty simple. In general - If you're going to heat the space, then insulate it. You should absolutely have a poly membrane covering the dirt to keep the moisture down, and if the surface is flat and you don't use it much, you can lay just down rigid foam sheets on top of the poly. If you ever need to access further parts of the space you can easily lift them to clear a path if it seems the will crack by walking on them.
They would not need to be taped or sealed in anyway, and the nice thing is that they will be in perfect shape and easily repurposed in the future. Some people put spray foam, we generally aren't fans of that if you can avoid it.
I can try to help more if you let me know what you have - flat floor or uneven, insulation between joists or not, poly on ground, how much space down there, and if you use it much.
Thanks for the information, much appreciated!
Very happy to help!
I live in the PNW on Whidby Island, WA. And I recently had a contractor replace the R19 backed-insulation in the crawl space. I was suprised that he used un-backed R30 insulation. He also replaced the poly covering the dirt. Should I be concerned that there is no longer a moisture berrier between the subfloor and the top of the new insulation?
A few points from my experience that might be helpful: we have a cottage with crawlspace that was converted to 4 season use. It's an uneven dirt floor with CMU walls around 3-4ft tall.
The previous owner insulated the walls with a couple of inches of EPS foam (which is closed-cell and therefore an air barrier I believe, contrary to the note in the artlcle). The floor is covered with with 6 mil poly. But there's no mechanical ventilation so i left the vents operable because otherwise, in summer, humidity still gets in and condenses on the joists etc creating mold. The vents could be closed off presumably if I had continuous ventilation or a dehimidifier with drain.
The footpring is around 700 sq ft, and one small 500W baseboard wired to a digital thermostat works well for keeping the temp at around 12 C in winter. The heater is suspended from the joists with a metal sheet above it to protect the floor. Pipes and water pump have been fine at that temp.
The only potential failing is if there's long periods of power loss in which case I would need go and drain the water from the pump and pipes to prevent freezing. Hydro Quebec has an app with an alert to show power loss so I can be notified - perhaps the same exists in other provinces.
We draw water from the lake, and the inlet water pipe is wrapped with heat tape (controlled by a thermostat) to prevent freezing.
The key is tight air sealing around the EPS boards in the crawlspace, and making sure the rim joist is well air sealed. If you do have vents, make sure the vents can be well sealed in winter. Operable windows would be better than vents - I have DIY'd insulated vent covers that can be fitted from the outside, but they're still not perfect.
The no-vent option would be better, but it does require ventilation. I imagine if there's a lower power air fan pushing air to the outside from the crawlspace, and a passive vent that allows air to move from the cottage to the crawlspace, that would go some way to making sure air keeps moving in the right direction?
Thanks for sharing your thoughts and techniques Leo. If it were me, I'd be sealing the vents up and running a dehumidifier. Sometimes in the hottest and most humid days of summer, the air coming in through vents can actually be a cause of condensation, not the solution. I'd sooner close it up and put a dehumidifier down there to keep humidity low.
And if I'm reading you right, in winter you're blowing air out of the crawlspace and leaving air from upstairs to vent down? I'd keep it closed all year with a dehumififier running to keep humidity down and to save energy. The only problem with that is radon, have you had it tested for radon gas? It is easy to do a radon evacuation stack since the floor is exposed, and even insulate the floor afterwards with sheets of EPS foam if its relatively flat, does any of that sound like a sensible solution? I think you'd save money on electricity and keep the mold risk lower this way. Here is a page on how to remove radon gas from basements and crawlspaces.
Hi there, I have a crawl space with a gravel floor... can you spray foam right over the gravel floor? There is also one separate area that is wet from a tiny leak in our water heater... should we address the dampness before we spray that gravel floor area that is wet? Another question, can you spray over drywall? There is a small portion of the crawlspace wall that is drywalled. A contractor came to quote the project and suggested he just spray over everything but I wanted to do some research first. Thanks!
Hi team - we live in Austin and have a pier and beam home with a 3'tall crawl space (slightly graded). We have lots of venting and appropriate sloping from the perimeter of the crawl space. We are currently remediating mold in our home / crawl space and ripping out all fiberglass insulation. I was planning to install rockwool batting with foil / metal trim to keep out critters and just let the space be open air as is. I want / need good insulation and also want to avoid another mold problem. Is this the best solution without spending a fortune?
Wonderful information thank you! I disrupted the soil around my 4ft frost wall in my crawlspace when I was digging a trench. Is there anything I can put around the footer now to help strengthen it? Should the wet dirt be right against my footer and foundation walls? Or should I keep it back a bit? I am in a high water table as well. Thank you
Hi Angie
Nothing much you can do that would strengthen a footing that I can think of. The mention of a 4 foot frost wall indicates you are in quite a cold climate, so based on that presumption alone I would suggest you consider a few things such as :
Be sure the dirt coverage meets local code for frost depth. Althernatively, you could skirt it with EPS insulation. Both can work, just be sure to have sufficient dirt coverage over the EPS.
If you have removed and are replacing dirt around a footing or frost wall, that is a good time to waterproof the wall, also exterior insulation is always best if you can swing it. And finally be sure to slope the ground away from foundation and not towards it. Though a high water table is not something a mere mortal can easily fight back, water will find its desired level.