
How to insulate house walls from the outside
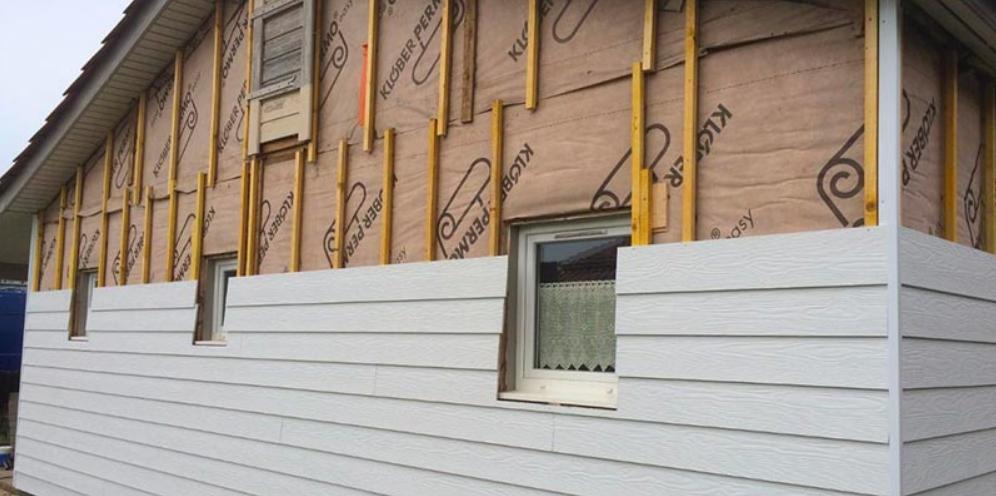
Adding extra insulation to the exterior walls of an older home when renovating or remodeling is a great way of improving a home's walls thermal performance and reducing energy use while reducing heating bills, carbon footprint and improving a building's comfort level.
It may look easy to go buy some packs of rigid insulation panels down at the local hardware store and screw them to your walls, but unless you understand how your existing walls are built and how they "work" in terms of keeping moisture, heat and cold where they should be for durability, the insulation panels might not be the only things you're screwing up!
Adding insulation to the exterior of a home correctly starts with establishing what climate zone you are building in and how the existing wall is built to make sure you are not creating a condensation point at a dangerous place within the wall assembly, or preventing internal moisture from the occasional leak in the exterior skin from running away, so the wall structure can dry out.
Walls need to be built to meet their specific climate needs. All too often ‘the best wall assemblies’ migrate from their own climate to one where they do not belong, like putting interior vapor barriers on homes with aircon in hot humid regions, which simply should not be done if you want your house to last.
Durable, healthy and sustainable homes need careful research and planning, as changing one element without considering how this changes the dynamics of the building envelope is a potential recipe for disaster.
The best pre-emptive strike against the possibility of a nightmare exterior wall renovation and insulation project is educating yourself, so you don’t get talked into the wrong wall system by a poorly-informed general contractor. Start by watching our ‘building science made easy’ video below.
What is the right amount of insulation for walls?
Determining your climate zone will help decide on an appropriate amount of wall insulation for your home, whether you are in a heating or a cooling climate. Next, compile a short list of the types of insulation that best suit you by determining what your biggest concerns are.
Consider some of the following: Cost, durability, fire-resistance, insect-resistance, low GWP (global warming potential), made with recycled materials, made with natural materials, which ones are best for sound proofing, or for reducing off-gassing to protect indoor air quality.
See our page on choosing the right building insulation for the right application
Once you determine the approximate amount of insulation you want to install on exterior walls and the type(s) of insulation you are open to using, then you need to find a way to attach /apply it securely to the outside of the walls in a manner that preserves it's R-value or thermal insulating qualities.
How to avoid thermal bridges when fixing exterior wall insulation in place
For insulation to work properly on exterior walls and have a long functional lifespan, the wall system needs to have all the appropriate components, including an air barrier, a vapor barrier /vapor control layer, well balanced insulation, and be attached in a way that doesn’t compromise the R value of the insulation. But you already know that from the building science video right? Didn’t think there would be a test so soon did you?
Here is a page on thermal bridges: what they are and how to break them in buildings
But for those not clicking their homework assignments, here’s a quick summary – metal is a conductor, and when you have metal that passes from one side of a wall to the other, you have a thermal bridge, which is a path for heat to leave your home, and money to leave your wallet.
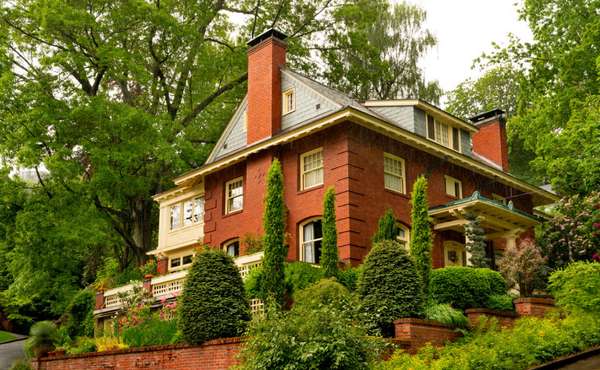
To those of you living in Toronto or New York in older homes, this also applies to the elegant brownstone rowhouses, townhouses, and tenements that were built over a hundred years ago from brick and stone - neither of which are known for their outstanding insulating properties either.
Of course we all want to limit using energy (and losing money) while decreasing our carbon footprint as much as possible, so be mindful of the way you fasten any insulation when refinishing and upgrading outside walls - as in a perfect exterior wall assembly the insulation layer should be continuous, unbroken by thermal bridges. Below are a few methods for improving an older home's insulation levels and attaching exterior wall insulation successfully.
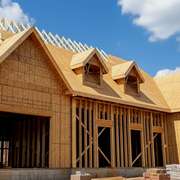
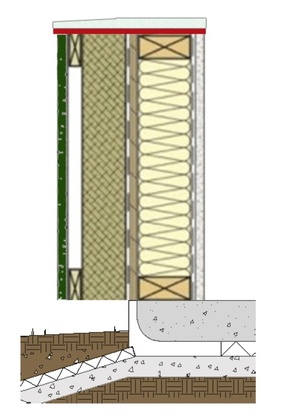
Larsen trusses with cellulose or batt insulation
A Larsen truss wall is one with engineered I-joists attached to the outside of a stud or brick wall, which then creates a cavity that can be filled with additional insulation. You can add batt insulation, dense pack cellulose, rigid insulation panels or spray foam if you choose (spray foam is our least favorite but it can be done so we mention it, though we always encourage readers to choose spray foam with the safest blowing agents)
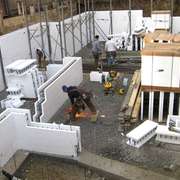
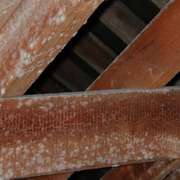
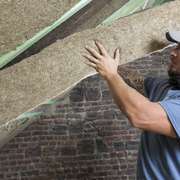
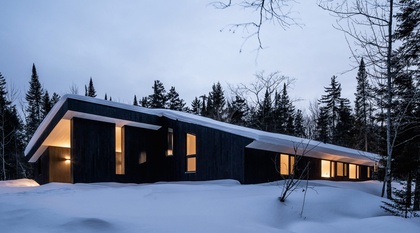
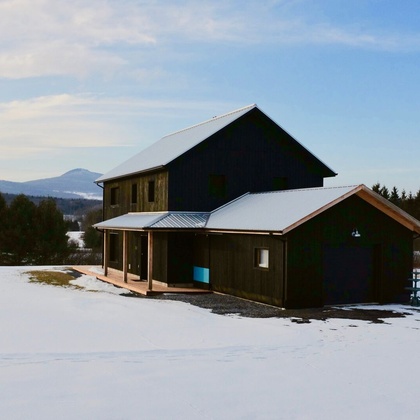
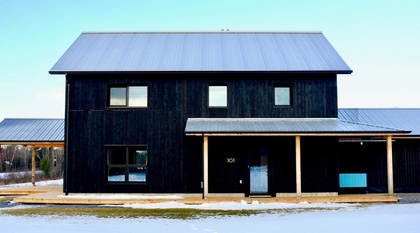
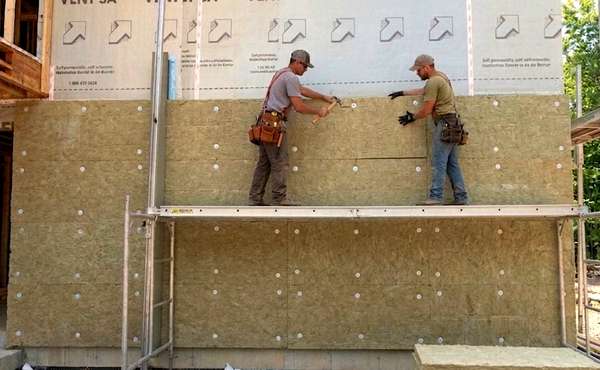
Larsen truss walls can be made in a variety of thicknesses, which is a really nice advantage to the design as it can be done in a way that has the best return on investment for any climate. Below is a photo of a Passive House using Larsen trusses on the exterior of the wall (see video), that will then be filled with dense-packed cellulose insulation.
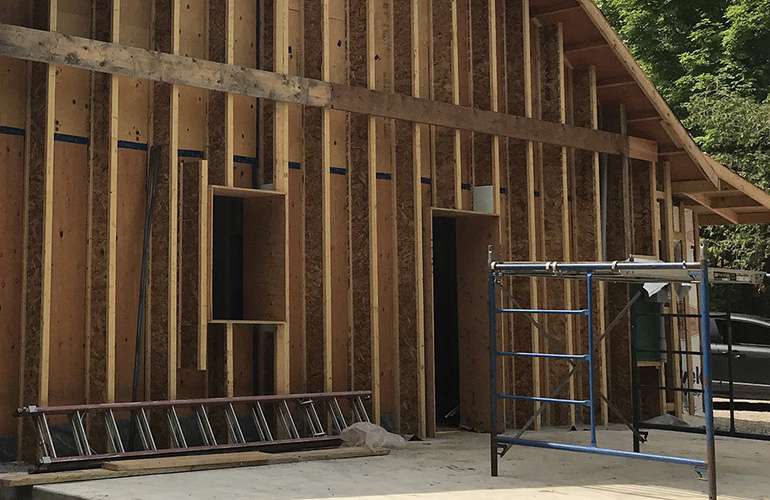
To go back to thermal bridges – wood does act as a thermal bridge, but not nearly as much as metal, and with engineered I-joists, at only 5/8ths of an inch, the conductivity of the wood isn’t a great concern and becomes even less so the deeper it is.
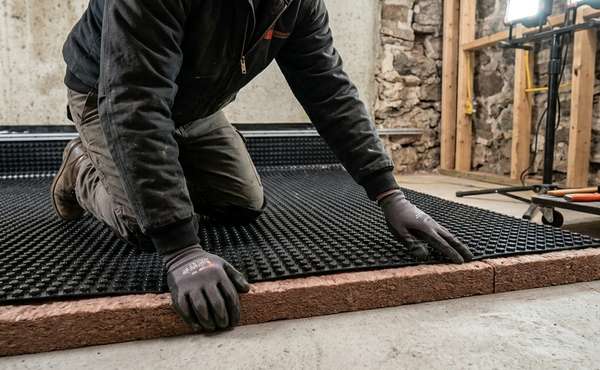
Fiberglass thermal spacers or "Cascadia Clips"
The purpose of fiberglass insulation fasteners is to attach the clip itself to the frame, which then supports and secures the insulation with a material that has a low conductivity to avoid heat loss, fiberglass clips also provide a solid surface for fastening strapping (furring strips) and exterior cladding.
Cascadia Clips from Cascadia Windows in Vancouver are the biggest name in fiberglass thermal spacers you will find across Canada and the U.S. so the concept has in a way adopted the brand name, but there are others brands of wall insulation thermal spacers such as Armatherm Z Girt available, pictured below.
Also, if installing a final finish to exterior walls over additional wall insulation, see our page on how to install exterior siding so walls can dry.
Attaching insulation with metal screws
Above are a couple of ways to attach exterior insulation and maintain the highest possible R value by breaking thermal bridges, but the reality is that most exterior insulation is going to be a few inches of rigid insulation boards screwed or nailed to a wall with strapping. It’s not perfect and it does reduce the overall performance of the wall, but it’s not the end of the world, so don’t panic if you’ve already done it or are planning on doing it, we’re just trying to outline best practices.
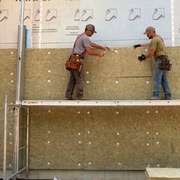
We built our LEED V4 Platinum Edelweiss House using rigid Rockwool or Roxul insulation panels attached with strapping and screws (which is in the building science video above), and what we did to break the thermal bridge was to do it in 2 layers of 4 inches of rigid Rockwool so there would not be a single screw passing through the wall assembly.
It worked great in terms of energy efficiency and durability, though it’s not what we would call the most efficient use of time as doing two layers of insulation instead of just one meant double the work. In hindsight it is unlikely we would ever repeat that process, but that’s how we learn! You can see the whole Edelweiss LEED Platinum v4 certified Demo House being built in our YouTube green building video series.
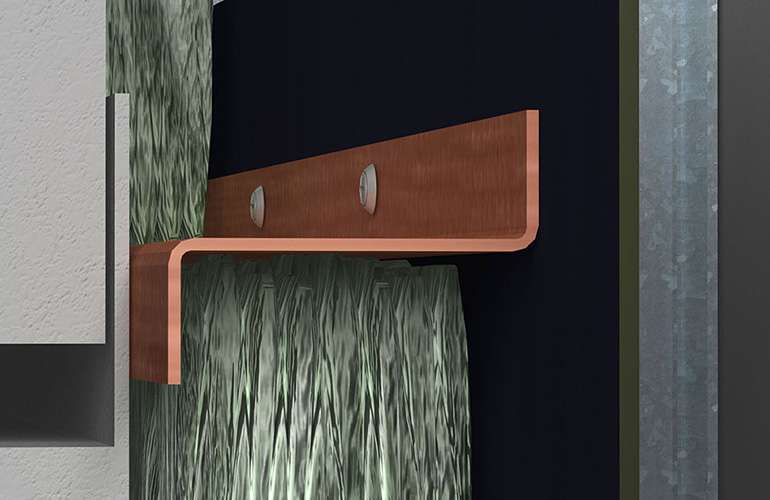
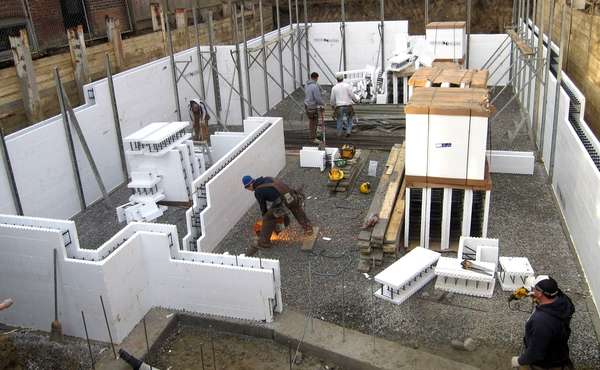
One alternative "mainstream" system that we like for attaching rigid exterior insulation on the outside of walls and avoiding thermal bridges is the ThermalWall PH panel. It is a rigid EPS foam insulation panel that comes in various thicknesses, which is in itself not a new concept in wall insulation, but the interesting part is how simply and quickly it is fitted. It was originally invented by Legalett as an effective way to increase total exterior wall R-values to Passive House standard easily taking a standard code compliant R-24 wall up to a R-52 high performance envelope.
Even Lloyd Alter of Treehugger magazine wrote when reviewing the system; "there are some serious advantages to foam that can make a TreeHugger think twice, especially when one is talking Passive House, where one needs a lot of insulation and avoiding thermal bridges is a very big deal.... I do often foam at the mouth about foam insulation and have always promoted alternatives. But this system really does provide a continuous wrap of effective insulation ... to the roof. It is going to be pretty airtight too. It is such a simple system that makes a very good case for the stuff" which we agree with.
There is a galvanized metal rail embedded inside the panel, and when the ‘snap track’ is removed the metal rail is exposed. From there you can screw it to a stud wall or into masonry, then you replace the snap track and fasten your exterior strapping to the same metal rail.

The advantages are plenty here – panels are between 4.5 inches and 8 inches thick, the exterior insulation is continuous, and they can be attached with 6-inch #10 screws from 4 to 6 inches long. Having a central screw that attaches the panel to the wall and a separate screw attaching exterior furring strips to the rail breaks the thermal bridge.
An additional benefit is that screws of that length are still quite affordable. From experience, over 6 inches long you start getting into ¼ inch diameter truss head screws and they start to get really expensive - which when insulating large exterior wall areas starts to add up in cost.
We realize that the mere mention of any kind of "Styrofoam" or foam insulation (ThermalWall PH is made with EPS / Expanded polystyrene) can upset the sensibilities of hard-core environmentalists. But it is worth keeping in mind that EPS insulation panels are mostly made of air, it is recyclable, the plastic content is a petroleum byproduct rather than primary material and it could be plant-based if it weren't for cost and the carbon footprint of doing so, and it works well when you use it for the right applications.
It’s not "perfect", but then what in the building industry is? We've found that EPS's reputation as somewhat of an environmental "no-go area" is often based on a misunderstanding of what it is, and isn't, so we'd recommend remaining open-minded until you've got all the facts. To get a quote for ThermalWall rigid foam insulation panels, see here.
Even the greenest natural home insulation products have a carbon footprint of some kind, for example a strawbale house or straw insulated SIPS panels has diesel fuel in its history from fertilizing, irrigation, harvesting and transportation. And a lifecycle analysis of EPS (expanded polystyrene) insulation is not nearly as a bad as its reputation in some quarters of the green building industry would have us believe - but then a lot of the problem is it's usually thought of as Styrofoam in North America - which it may surprise you to learn it most definitely isn't. Just putting that out there, but we always welcome (friendly) dissenting voices and discussions in the comments section below!
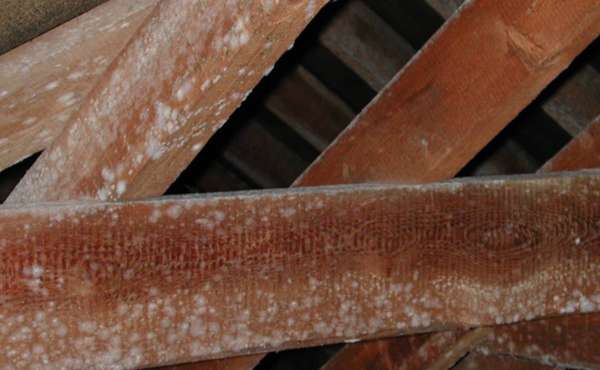
The risks of condensation when insulating walls
The most important thing to remember when insulating exterior walls during renovations, is to be sure not to trap moisture between two vapor barriers. If a home already has a vapor retarder or vapor barrier, it’s important not to add another vapor-impermeable layer on the opposite side of the wall that could trap moisture in the middle along with organic materials such as insulation or wood framing members.
Some rigid insulation boards have integrated air barriers, some have vapor barriers, some have both and some have none. Some insulation panels (like EPS, XPS and polyiso) can act as a vapor barrier, which can be a good thing or sometimes a bad thing, so be careful!
This is why insulating exterior walls can sometimes go terribly wrong when "poor" insulation products are chosen for any given application. Don't just walk into a building supply store and pick the cheapest rigid insulation panel, that could be a disasterously expensive decision. This page will help explain:
The differences between Polyiso, EPS & XPS & Styrofoam
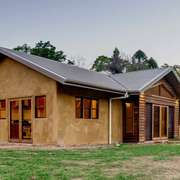
Stone wall insulation can significantly improve the overall energy efficiency of your home while maintaining its historic integrity. Understand how stone wall insulation preserves both energy efficiency and home aesthetics.
This is why deciding on a wall assembly for renovations has to be considered carefully to ensure that walls are able to dry out. Be sure to either have your wall assembly designed by a professional, but better still, get an understanding of the science behind it yourself, that way you will be able to spot anything that seems fishy with enough time to change it. Check out some of the links below, and if you have any questions that aren’t answered they look in our discussion forum and maybe ask a question of your own here.
Success in extreme weather depends on effectively managing moisture in cold climate stone homes through capillary-active materials.
Now you know more about how to insulate house walls from the outside and the pitfalls to avoid. Find more pages about how to build energy efficient and durable walls in the Ecohome Green Building Guide and these pages here :
Find out all the benefits that come with signing up for a free Ecohome Membership! |


That double-strapped two isulation-layer wall looks like it would a nightmare to get a flat surface on the outside to side onto.. Is it?
Do you mean the one with the double layer of 4-inch rockwool panels? If so, I wouldn't say it was a nightmare, but it did require a bit of effort. If you drove a screw too deep it would for sure bend the strapping, so what we did was put a straight edge on it when it was installed and adjust it a bit to make sure it was straight, we drove some screws in a bit and backed a few out. Definitely a step we didn't anticipate, but all said and done it wasn't too time consuming, it may have added 2 hours or so of time to the whole place. Still - it works great, but it's not a wall assembly we would repeat given the other options out there, including some stuff that has hit the market since we did that.
I was really impressed with your Edelwiesse wall system video. But like you said, you always learn something new. You mentionned that one of the alternatives that you like is this ThermalWall PH. What are some of the other new wall systems you're a fan of.
We live in Palm Springs Ca in a brick home built in 1948. The exterior brick is also the interior brick. We need to insulated because of the rising electric costs becaus of the summer heat. Which would be more effective, a new roof with sufficient insulation or try to insulate the brick from the exterior?
That is a very difficult question to answer Ray, but I will try to give you variables to consider. If you have an attic where you could insulate with something like loose blown cellulose insulation, that would be pretty easy and affordable, but if you have a cathedral ceiling with no attic space, then you would need to build up and create an entirely new roof. In which case, the cost goes up exponentially.
In an ideal world you would do it all, the roof and the exterior of brick, so it really all depends on your budget. Insulating it will for sure save money in the long run (assuming the house is in relatively good condition and will stand long into the future, but just how long it would take for you to see a return on your investment is impossible to say from this end. You could get a quote from a couple of general contractors and see what they come up with for cost, and if you wanted you could consider doing some energy modelling to see if it seems worth the investment.
We live in Australia. Just insulating house now. Old house, solid brick, truss steel roof.
I realize Palm Springs Ray typed last year.
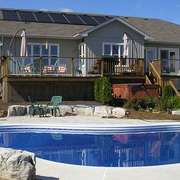
Solar panels shade the roof on direct sun side. Reduces electricity costs via a natural insulation as well as being a generator solar powered. I'll be installing soon.
I don't think I can afford a verandah which envelopes the walls with shade and reduces internal cooling costs significantly. Probably hanging shade cloth instead.
Our weather dry. Our city is capital of driest state on driest continent on earth. Cold is bone cold due to dry. Hard to explain but when in Europe I was T-shirt at 0℃ and okay with that yet dry 5℃ is very cold.
I'm just renovating now. Insulation seems like first job. I'd love ideas regarding my walls.
I'm covering lower breather holes with alloy mesh to prevent mice migration seasonal from fields into choosing my home as their shelter. Aswell as lower wall really easy job. I'm thinking that I'll plate steel top of brick work thus provide a hard secondary barrier. Using old fence tin as plate. With insulation on mind, thoughts are that still air trapped as air gap in bricks would assist insulation effort. That air hasn't passage. Ambient regardless of hot or cold won't flow past secondary layer(back of brick).
Breathers remain yet flow is removed.
Ceiling is batts, under roof is foil roll.
Decent door seals too brother.
At 45℃ heat outside. Other house had no air conditioner running. Fresh breathable air less than half outside temp. The doors are sealed to prevent draft.
On really hot days, maybe half hour with air con and house stays cold.
Most days just open up when cool breeze on, let house cool itself and seal off.
Doors lose a lot due to draft otherwise. Windows too.
Lastly.
A simple fan of much less electricity than an air conditioner with compressor can circulate within to keep air fresh.
If stuffy becomes, can crack door open or open window to change air. Loss of efficiency during moment but controlled by you.
Mike, appreciate your site and commentary. I have an aquaintance who is totally rebuilding a 1960's/70's era home in Victoria BC (wet, damp winters, dry summers) and has totally stripped the walls inside and out so is down to the 2x4 studs. He's starting to put Tyvek on the outside wall and I've suggested he look at adding insulation from the outside as well as putting rockwool in the inside. Back in 1986, I built a new home in Winnipeg and used R20 fiberglass batts between the 2x6 studs but then added a product called GlasClad (2" ~R8 I think) on the exterior which once the Tyvek and tar paper and stucco was added gave me around R30 walls and BaseClad (2" R8) on the exterior of the basement walls which were eventually filled in below grade and stuccoed above ground. This 1700 ft sq home, which was also passive solar, only cost us about $375 per year to heat with gas hot air furnance and hot water. Sadly we only got to enjoy the home for a couple of years and then ended up moving, but the subsequent residents all really enjoyed it's comfort and efficiency. I've not seen it in a decade but it still looked great then.
These "clad" products were fibreglass boards, not batting, and I've not seen them around for years. Are they still available or is their a rockwool substitute? I'm reluctant to recommend the blue or white styrofam as I would not want a vapour barrier on the exterior walls which could cause a dew point in the wall cavety somewhere. (I even question Tyvek on exterior walls in Victoria because the walls have to breathe and if they don't - well you've heard of the Leaky Condo phenomen, buildup of black mould in the walls. Perhaps Tyvek has sufficent "breathing rate", I just don't know?)
What do you think?
Is there an insulating board that could be installed outside? (he's already installed the windows so I suspect he would not want to go with batts on the exterior wall which would make really deep window wells). If so what, and would a 2" R7 or R8 work? I'm not sure what he'd going to finish off the exterior walls with. Might be stucco or perhaps Hardiboad. I suspect either might need some horizontal strapping in which case he could run 2x3's vertical or horizontal and put the rockwool boards in between the strapping?
Our home, 1967 split level, 2x4 walls. We're a combination of stucco and vertical cedar cladding on our walls, and I've wondered about recladding our home to further reduce heat loss on cold days - not that economic a project with such low energy costs. I could strap on a product like our old GlassClad or whatever is available under the batton boards, but wonder if it would be possible to just put the same over top of the stucco and just re-stucco over it all? Thanks
Don
Great information on how to insulate exterior walls of the existing homes from outside. Very Insightful.
With the thermal wall rigid foam insulation - What kind of finish siding can be used with this foam application...?
The "Performance Wall" video is very good and I have two questions...at the bottom of the new exterior insulated wall, How would that be finished? as it will protrude from the existing wall and just be hanging in the breeze. - Question 2 - Are those long screws strong enough to carry the load over time once the siding is installed...? Thanks in advance great website!
I find I hard to buy into any improvements will begin to pay for themselves over time. In Ontario Canada our electric rates have more than doubled in the last ten years. The government is not in business to lose money. Grants or incentives will have to be payed back in some form. If every home in Ontario cut energy cost by 2500 $'s per year the utility will go out of business (this wont happen). In time any savings will be gobbled up by increase in rates. I expect by 2030 they will double again maybe more and if I'm still alive in 2050 not sure how I will afford net zero energy to survive. Effectively I think all improvements will achieve is freezing rates for a period of time until they strech again beyond affordabilty where I think the rates are currently. I foresee no change in affordable rates plus the added debt of the reno's. I hope all this madness works out for everyone! Most people I know have invested in a home as income for retirement - I think net zero effectively will change all this for most people in this situation....
Hi Gerry, I see where you're going with that, but I don't think the end result is what you think if homes use less energy.
If the province saves energy, the province and everyone in it wins, full stop. This investment helps reach climate change goals, it reduces air pollution, save on health care costs, etc. And if there is an abundance of energy around due to it not being used by Ontario residents, then it will be sold to other provinces or states. Money given to homeowners to repair homes also stimulates the local economy by job creation. There are endless spin off benefits, and using less energy is always a good thing.
If others insulate, and cut their usage, and the govt increases rates, their rates stay the same, but yours go up.
its in your benefit to insulate whether rates rise or not.
Good afternoon I am reading the cement about how to insulate a house from the outside I live in Connecticut where it's cold I just bought a house built in the 1900.?iam about to install new siding what is the best way to insulate it from the outside.
Hi Mike,
Similar question to the last comment and I think like many others, we have a 30 yr old house in the Northeast (NH), 2 x 6 walls, fiberglass batting with the brown vapor barrier against the back of the Sheetrock, 1/2" plywood then cedar siding which constantly needs repainting. Plus our wooden molding and window sills are starting to rot. We're planning to completely replace it all with new windows, composite siding & molding.
Since we'll now have the opportunity, what do you suggest for adding extra insulation? Rigid foam insulation seems like a good option over the plywood but it will need to allow airflow right?
Then install the new composite siding over that?
Thanks....
AD.
Hi Andrew
If you are taking the outside right back to the plywood, I think the biggest energy efficiency upgrade you could do at that point would be to install an air barrier to make it airtight, here is an example of an exterior peel and stick airtight membrane that is somewhat vapor permeable. You could install rigid insulation over top of that. I would also look at this page here about which is the best right rigid insulation so you find a suitable product. Some will trap moisture and some will let it pass. Mineral wool insulation lets moisture through where foam insulation will trap it.
And finally, see this page about how to install siding so walls can dry.
Please talk about hanging so many elements on the exterior of the structure. I am considering using your plan of double furring and two layers of insulation. This will bring the exterior far beyondthe existing foundation . The new elements are secured with screws. It starts to be a long reach. What happens to durability of the wall in wind? How deep into the studs must the first screws penetrate to provide good support for the next layers? What is the screw pattern?
Exterior insulation sagging is for sure something to be aware of and get out in front of. With new builds you can extend the slab or foundation insulation to help support it, but with retrofits the weight of the insulation as well as siding is important to consider. Of all the solutions listed above, perhaps the ThermalWall insulation panels from Legalett may be the safest option for you as they don't have screws that pass through the whole wall assembly, they also take the type and weight siding that will follow into account and supply the screws for you to be sure it can handle the weight without sagging.
Thanks for the reply. What is the best route to determinng if merely strong, supplied screws or an added foundation is going to be best practice? Is this decision going to require an engineer or an experienced hammer?
I have a home built in 1973. The walls are 2 by 4 if I am not mistaken. I want to wait tight the home and possibly add some insulation when I am redoing my sidings. What are my best options and is EcoHome provides the service itself?