


A technical guide to understanding the role weather barriers and rainscreens play in a wall, choosing the right products and installation tips for optimum performance.
They're officially known as water-resistive barriers or WRBs, sometimes weather-resistive barriers, but in practical terms they are more commonly called housewraps and weather barriers. With so many options I plan to randomly switch between terms just to alleviate the monotony and keep us all entertained.
A few other linguistic options to mention - cladding is the same as siding, furring strips are the same as strapping. Those and your weather barrier all installed properly are what defines a ventilated rainscreen.
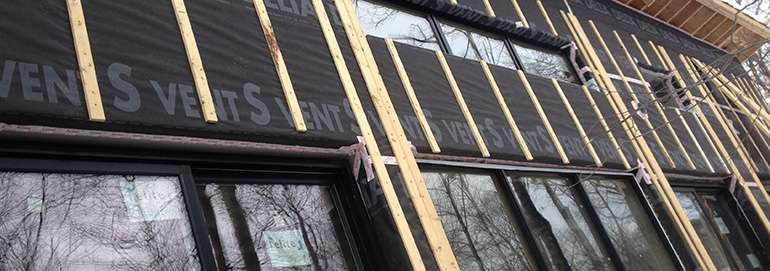
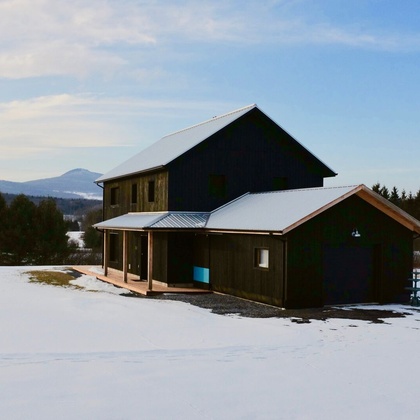
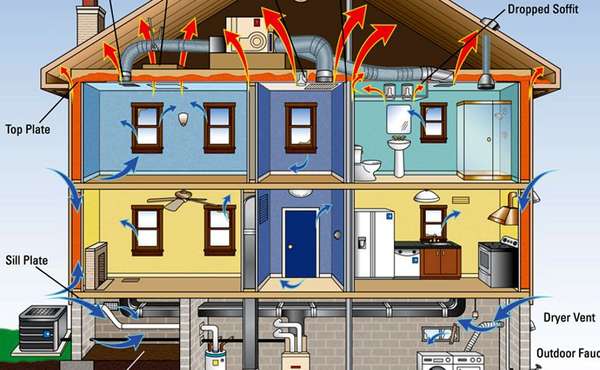
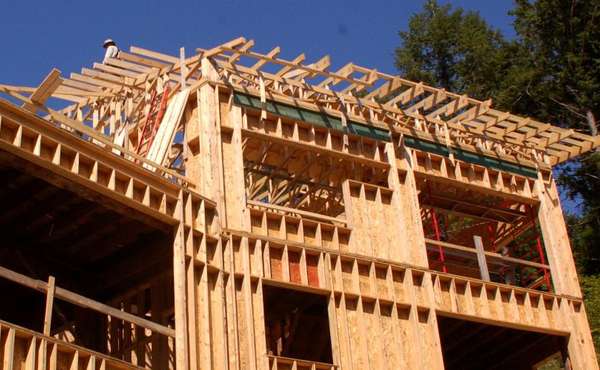
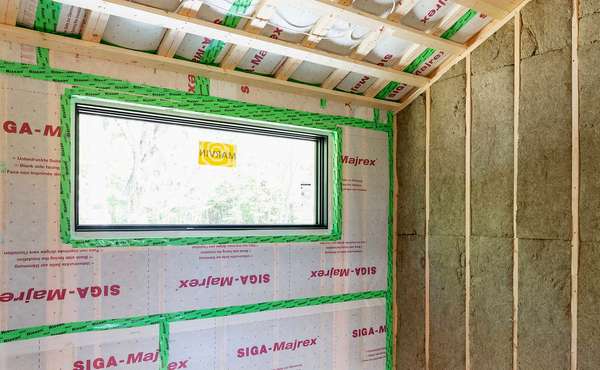
There are many different potential wall assemblies, and many products with different characteristics that can be used in different cases. For the sake of simplicity and not getting off on a bunch of tangents, in this article we will stick with the bread and butter wall assembly we all know - a stud wall with exterior sheathing, housewrap, strapping and siding. Learn more on innovative framing techniques for material-efficient homes.
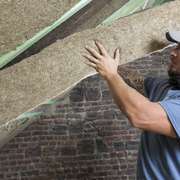
Just like a canvas or nylon tent, water will drain down a water-resistive barrier but standing water would drain through them, albeit slowly. Since moisture can evaporate through WRBs, any humidity that accumulates in a wall assembly has a chance to escape.
There in a nutshell is the purpose of a weather barrier - to provide a drainage plane that protects sensitive materials from direct exposure to precipitation at the same time that it allows walls to dry out.
It's worth a mention at this point that weather barriers are often intended to act as an air barrier as well, but the most common installation techniques (staples, nails and hastily installed tape) mean it is a rare case when they actually do a good job at air sealing. Manufacturers will rightly claim their products are a suitable choice for an air barrier, and they most certainly are. The failure of weather barriers to perform well in that capacity lies entirely with how they are installed.
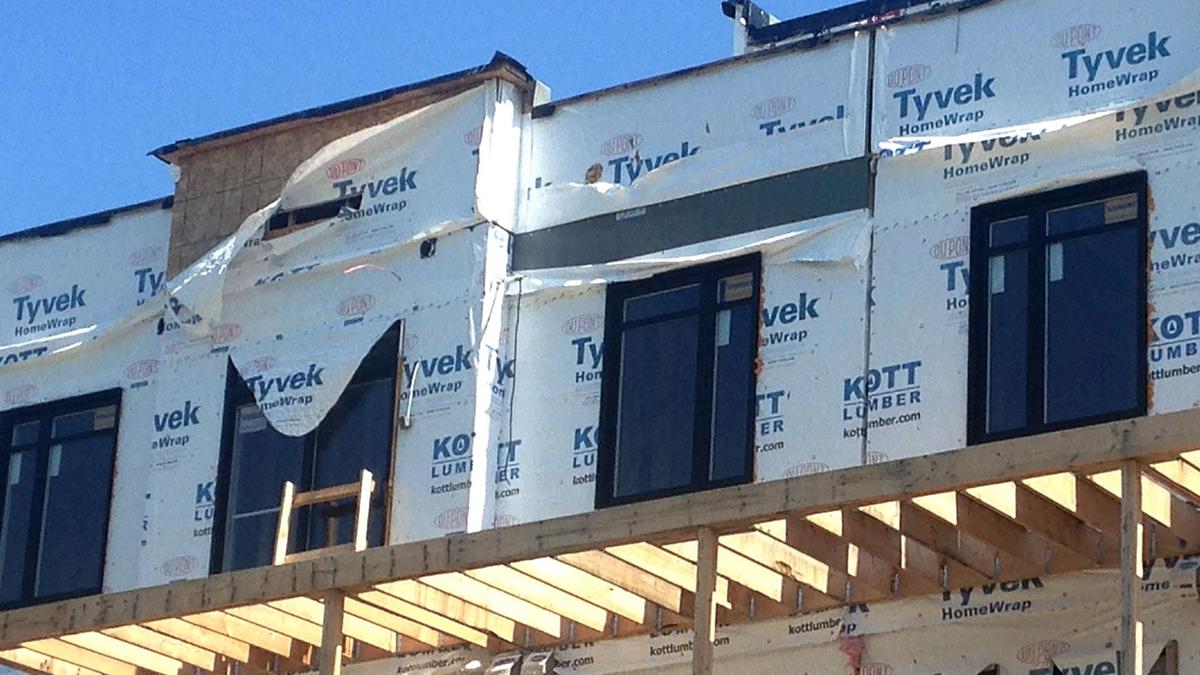
Randomly peppering your housewrap or home wrap with staples creates a lot of little holes where air can enter and escape. Also, when exposed to the extreme temperature shifts between summer and winter and the endless movement of a loose weather barrier due to wind and air pressure differences, the solvent-based tapes we most often use may become brittle over time and no longer adhere.
You'll have better luck using weather barriers as air barriers if you place staples where they will be covered by strapping, or put tape over them. Don't over-staple it for no reason, staples only have to hold it up until the strapping is on. And if you can wait for a calm day with no wind you will really only need to staple it at the top (where it will be overlapped anyway) and let it hang. Better still would be forgoing staples altogether and using nails with plastic washers.
Be meticulous when taping joints and try to use brands of tape that are more suitable for extreme temperature changes. Siga,Delta Multi-Band and Air Stop are three examples of tapes with much better adhesion.
Peel-and-stick membranes:
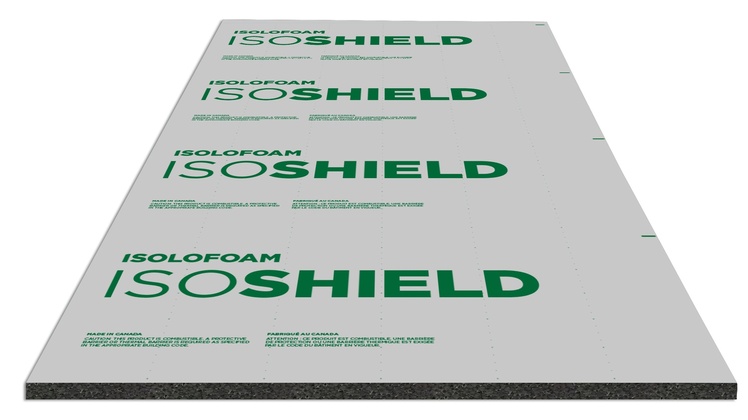
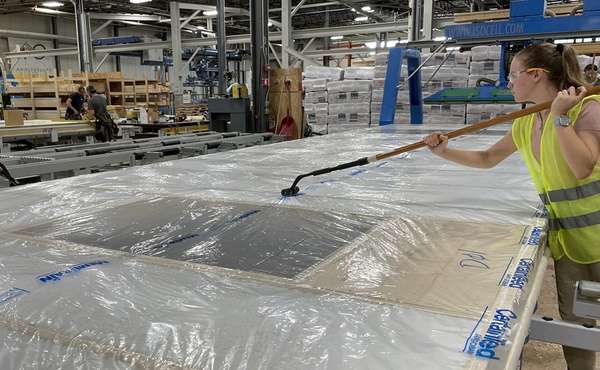
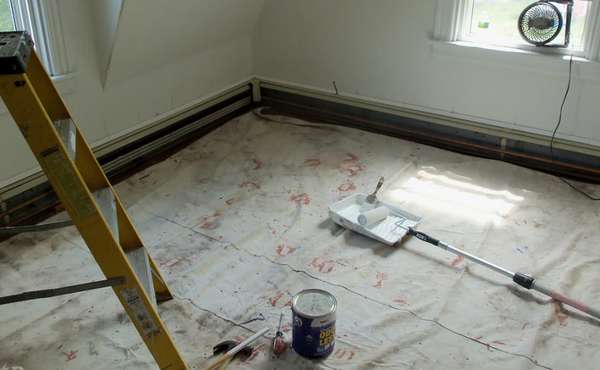
An alternative to the commonly used non-adhesive housewraps are the 'peel-and-stick' membranes, and if you'd like a fancier word for them, go with this - self-adhering air and water-resistive barriers.
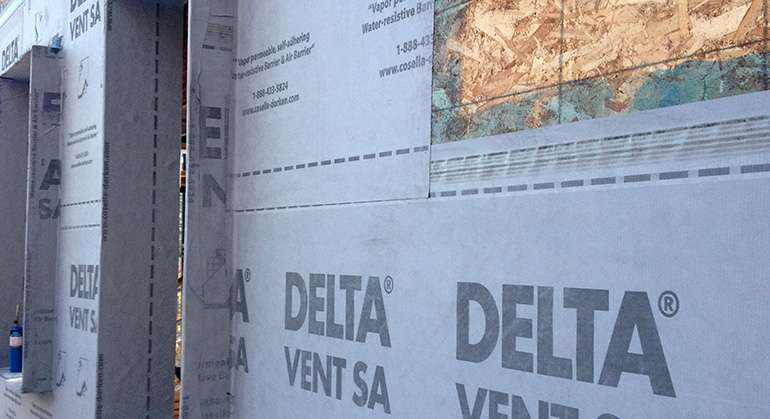
They're still vapour permeable, but membranes that stick to the sheathing are much less susceptible to damage caused by wind pressure.
Since a conventional housewrap is usually held on by staples, the back and forth ballooning of those loose weather barriers can over time enlarge staple and nail holes and reduce their ability to prevent air leakage. With no stapling needed and being fully adhered to the sheathing, wind and air pressure isn't a concern for air barrier durability with peel-and-stick membranes.
Depending on the substrate you're sticking the membrane to, manufacturers may recommend they be installed by first applying a primer to the surface for better and longer lasting adhesion. Including a primer in the mix will also affect the vapour permeability of your wall exterior; more on that in a moment.
Self-adhering membranes are not all the same:
Like so many other building products, it is important that you understand the properties of different membranes before choosing one, don't just pick one randomly off the shelf based on price or brand recognition. Some are vapour permeable and will allow walls to dry, some will not. They both have suitable applications but shouldn't be randomly interchanged.
For the standard wall assembly we are talking about here, make sure that whatever membrane you choose as your weather barrier is vapour permeable, and the more permeable the better. Look for the vapour permeance rating (how much moisture can pass though it); it should be on the product itself but also on the technical data sheets of company websites.
1 Perm and 60 Ng* (U.S. and Canadian ratings respectively) are the benchmark permeability rates for what defines a type II residential vapour barrier. Products rated below those numbers are vapour barriers, those rated between 1 and 10 perms are considered vapour retarders. The higher the perm rating or Ng, the quicker moisture can evaporate.
*Ng stands for Nanograms, or billionths of a gram of water. That 60 Ng number refers to the amount of water that will pass through a square meter of a material in a second [60 ng/(Pa.s.m2)].
1 U.S. perm is actually 57 Ng, that 3 billionths of a gram difference between 57 and 60 is what you call 'close enough for jazz'. And forget the 60 Ng for now, we''ll go with perms only.
Categorizations of building materials based on their permeability rates:
| Vapour impermeable | 0.1 perms or less |
| Vapour semi-impermeable | 1.0 perm or less and greater than 0.1 perms |
| Vapour semi-permeable | 10 perms or less and greater than 1.0 perms |
| Vapour permeable | Greater than 10 perms |
Understanding vapour permeability:
All we are talking about so far are the stand alone housewraps everyone is used to seeing, which will range from about 6 to 60 perms. To go further down this rabbit hole, you will find that your sheathing will impact vapour permeability of the wall assembly as well. [Read more about material permeability here].
Conclusions about the vapour permeability of sheathing seem to differ heavily from different sources, We will run with the pack on this one for now, using the numbers most manufacturers cite.
7/16" OSB (oriented strand board) has a rating of about 2 perms; compare that to half-inch plywood which is about 10 perms. And those rates will change with thickness - 3/4 inch OSB is rated about 40 Ng (2/3rds of a perm) which actually qualifies it as a vapour barrier, and can be used as such on the interior. [Here's an example of how osb can be used as a vapor barrier]
So you need to look at the wall as a whole, and don't assume that the perm rating of the weather barrier you choose will define the permeability of the exterior of your wall as a whole.
Starting off with such a low-perm sheathing as OSB means even a high-perm weather barrier may have little effect, so the added cost of plywood is something that may be worth considering investing in for your overall wall durability, as it is 5 times more permeable to vapour than OSB.
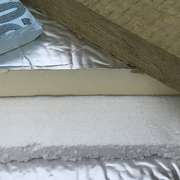
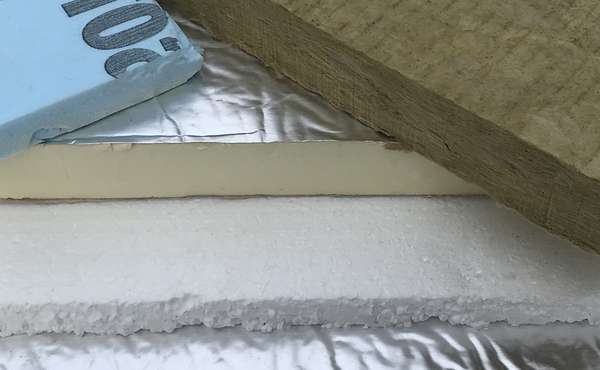
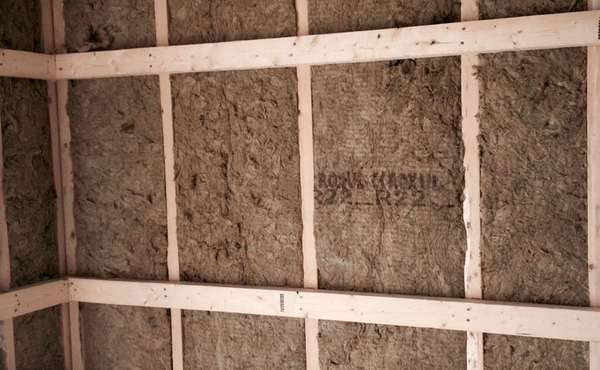
Also important to remember is that if you are putting a rigid board insulation on the exterior, that as well will have a vapour permeability rating that should be considered. As an example, 2 inches of Roxul ComfortBoard is rated between 30 and 40 perms, compared to 2 inches of EPS foam which is about 1 perm, and 2 inches of XPS foam is only about .5 perms. Meaning, by putting 2 inches of foam on the outside of the house you have effectively just installed an exterior vapour barrier.
Permeability is tested in two manners - 'dry cup' and 'wet cup'. Each method simulates the vapour drive in a different direction, so the resulting numbers vary, and manufacturers may not always tell you which test method was used.
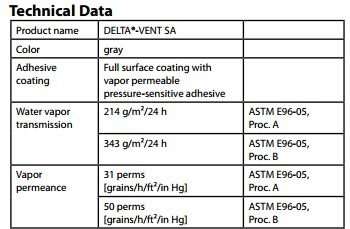
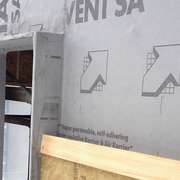
To use Vent SA from Cosella-Dörken as an example (which to our knowledge has the highest perm rating of peel-and-stick membranes), their 'wet cup' test resulted in a rating of 31 perms, dry cup testing was 50 perms. Not all manufacturers will list both numbers or even tell you which result they are posting, assume they are putting their best foot forward and giving you the more favourable looking number.
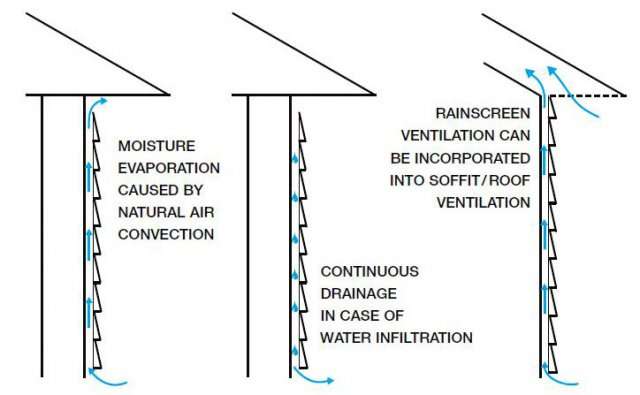
A rainscreen allows walls to dry:
'Ventilated rainscreen' is a term that gets somewhat misunderstood and is defined differently at times. It isn't an individual product or material but a design feature. The combination of a weather barrier, strapping and exterior cladding and ventilation openings at the top and bottom together create a 'rainscreen'. The intention of a rainscreen is to protect walls from a driving rain while allowing any water that does penetrate to drain out, and letting air move through it so it can dry.

Installing siding directly against your weather barrier will greatly reduce the ability of a wall to dry. This isn't very common anymore but it does still happen. Always install strapping to separate the siding from the weather barrier. And a common practice to avoid is installing strapping horizontally. That prevents both the drainage and air convection that is essential for walls to stay dry. Water drains down and warm air rises - don't stop that from happening.
If your siding choice requires horizontal strapping (like board and batten), include some kind of spacer in back of it so water can still drain and air can still rise. Without that space behind it, horizontal strapping can lead to a small amount of standing water that can saturate building materials.
That gap in a rain screen doesn't need to be significant, just enough for water to drain and air to rise. If the weather barrier is tightly attached, as in the case of a peel-and-stick membrane or is part of a rigid board product, building scientists say as little as 1/16th gap provides a capillary break, that will let liquid water drain out.
If you have a loose or bunched up weather barrier that might block that space, you may be wise to install a thicker spacer to ensure that space is continuous. Care during installation is what will determine how well your rainscreen blocks and releases moisture.
Now you know about home weather resistive barriers (WRBs), learn more about choosing the best building materials in the Ecohome Building guide and these pages here :
Sign up here for a free Ecohome Membership and promote your business for free! |


Do you need house wrap if you're installing rigid foam on the exterior, that's sealed at all joints?
Hi Marie,
You don’t absolutely have to install a WRB overtop of rigid foam panels, but a lot builders choose to anyway as it is a good way to ensure that any water that infiltrates through siding due to driving rain doesn’t end up in the joints of the foam boards and to make sure the wall can drain properly; it can also be a good safeguard to make sure that water from window flashings does not get in behind the foam.
Some builders also use the WRB as an air barrier, so before you omit it from your wall assembly you should make sure that you have a proper air barrier.
And how thick is the foam you are installing? Keep in mind that rigid foam insulation can be a vapor barrier – XPS as of about 1 inch, EPS as of about 2 inches. And Polyiso insulation with foil is a vapour barrier. Despite the fact that we regularly see it being installed on the exterior of houses, that isn’t a great thing since it acts as a vapour barrier. So the thicker you can make it the better; I would propose at least 2 inches, but 3 or 4 would be even better. And with or without a WRB, be sure to have a drainage plane where water can drain; at this link is a video on how to install siding so walls can dry. And here is another video that may be of value to you about how to install a peel and stick exterior air barrier.
I used 7/16 OSB sheathing and will be installing tongue and groove pine siding. I will also install a rainscreen with strapping. My question is, does the type of house wrap matter? I have either Prime Wrap which is a perforated fabric or Tyvek which is not perforated. From your article, because the OSB has such a low perm, I don't really have to worry about how many perms the house wrap has. Thanks!
Hi Kathy, There really isn't clear and concise info regarding permeability once you start layering different materials on top of each other. I don't think you can really go wrong with either, but we would say the more your wall can dry the better. Each material should have a specs page where they list their permeability if you want to know for sure which is more permeable to moisture. And most important is to install the siding properly, see the link in the comment above.
I have a question involving radiant barrier house wrap on top of ZipR. I am in process of finalizing exterior wall designs and I want to place a radiant barrier with a Perm Rating of 6 on top of the Zip R. The Zip R would be the water barrier and have 1"of rigid foam on the inside for a thermal break and R Value of 6 attached to a 2x6 wall which will have Roxul mineral Wool insulation, R value of 23 for something near a final R vaule of 29. I want to put a Radiant Barrier wrap on the outside that has a Perm Rating of 6. I was wondering if anybody has done this and if that Perm Rating would allow any moisture that got past the Rain Screen and the Radiant Barrier and onto the Zip to dry fast enough to avoid any issues.
Hi Mike - I'm building a new house that is 70% stucco, 20% Cedar siding, and 10% stone. The climate is low humidity and low rainfall/20" rainfall yearly. The plan is to use TYVEK over the OSB. I keep hearing that xxxxxxx would be a superior product to use? Can that be so??
We have blocked out the name because we often get manufacturers on here trying to start discussions on their own products Doug, and honestly it doesn't stick out as either as being either better or worse than all the other competitors. Who do you keep hearing that from? And where are you building?
Hi Mike
I’ve heard commentary about Barricade from our local Boise builders. I was planning to use Tyvek but - everyone has their own opinion I realize that. Actual test data is needed. I just want a good house wrap for my situation. My house is located in Star, Idaho. 83669 Thanks Mike
Doug W.
Hey Doug. There is nothing wrong with tyvek, the product itself works great, but typically people put thousands of holes in it with staples and nails so installation is always where it's faults come from. I would say be very sparing with the staples if you can, and when possible only put them at the very top where it will be overlapped and taped, Strapping will hold it tight to the wall in the center. That works if you come by soon enough with the strapping so you don't leave it flapping in the wind.
Our preference is the peel and stick membranes as they do a much better job at air sealing a house. As for choosing one, check the perm ratings on company spec sheets online and you can see how they stack up against each other for permeability, then it's down to price and what you have access to.
And I'll also point you to our page about how to install siding so walls can dry, that will help your WRB do the job it is intended to do.
I have a home built in the late 1960s in MA. The prior owner covered the house with vinyl, which was not done with care. Water gets behind the vinyl. The cedar wood clapboard is rotted in many places. Also, behind the cedar is missing and or torn tar paper. There is a heavy mildew smell outside in places. Inside there is a dry musty smell as well. We are considering removing the vinyl and replacing the siding with new cedar wood along with a rain guard. However, my main concern is wrapping the house in something to air tight to prevent the house from breathing and causing trapped dry musty and mildew smells inside the house. My house does not have central air, which makes an air exchange unit not possible.
What do you recommend for my house? Any help is greatly apprecaited.
Sounds like the exterior cladding was built wrong all around, sorry to say. If there was tar paper against sheathing and then shingles directly on the tar paper, it will not be able to dry. See this page here – How to install siding so walls can dry.
I think you are best to remove it and the vinyl, then do a proper weather barrier with an air space and strapping as explained in that page I just linked. I can’t guarantee the musty smell will go away instantly, but I would think it would dissipate over time if the walls are able to dry out.
As for air exchangers, there is one product that may work for you, it is a great solution for installing ventilation without having to run ducts all around your house, see here - ductless air exchanger for renovations
And I wouldn't hesitate to do these repairs for fear of trapping air, your house will continue to rot if you don't. And even by making the house air tight, if you build it so walls can dry I can't imagine your air quality getting worse even without an air exchanger, even the most airtight house will still have some air leaks and change the indoor air.
I am building a 3 season summer cabin in Maine, rat slab, no attic. The inside will be tongue and groove pine, the insulation Cel Pak, the exterior Hardie Shingle and Hardie Panel and batten.
If we use 5/8" CDX plywood, what would you recommend for housewrap , ie level of vapor permeability?
And Any vapor barrier inside the Cel Pak?
Thanks.
Our Canadian home is 20 years old and is subject to extreme winds and driving snow and rain. I want to replace the vinyl siding but want to also insulate the outside. I was thinking of putting Rockwool insulation on the outside of the wall and then new foam backed vinyl siding. Do I need to also put a vapour barrier between the rockwool and siding? Your help and advice will be appreciated
Rockwool is a smart idea but I would skip the foam backed vinyl. For cold climate houses, foam is okay on the outside when it is thick enough, but adding just an inch could do more harm than good as it will act as second vapour barrier, and an exterior one, which is not good. Rockwool lets moisture pass through, whereas foam will stop or at least slow it, to the point where you can have condensation form. If foam is thick enough (as in being about 2/3rds of the wall insulation) then the interior surface becomes the vapour barrier, but it will be warm. So, either go with Rockwool comfortboard, or if you want to use foam then we would suggset you make sure it is thicker that the existing wall insulation. This Thermalwall foam panel that has a metal rail inside for fastening it if you want use foam, the other issue with exterior rigid insulation panels is finding a suitable way to fasten them.
Building a detatched garage in Manitoba Canada where the Painted LP Smartside exterior sheeting is the finished product so it is attached directly to the 2X6 framing. Joints are all on studs, walls to be insulated R20 with Vapor barrier on inside and drywall attached. Between the vapor barrier on the inside, and the painted finished Smartside exterior, is there a need for a weather barrier/house wrap as well? We had considered doing housewrap between the Smartside and the 2X6 framing, not sure if it's needed. Comments?
I don't know the product, but from what you say I would be concerned about how the wall is supposed to dry. Is the intention for these to replace sheating and prevent racking?
A typical siding install, when you're thinking about durability, would include an airspace between the siding and the framed wall sheathing to allow any moisture in the wall to escape. If you attach this siding directly to the stud wall, then the vapour permeabilty of that siding becomes important, and that doesn't look permeable to me. If you look at our page about how to install siding so walls can dry you will see the air space behind the siding so that humidity in the wall can espape. Maybe have a look at the product specs or contact the company to ask about how the wall is supposed to dry and let us know. I just don't really see it. Short story - I would want to have sheathing or at least cross bracing, a weather barrier, vertical strapping then the siding, this way air can get in behind so moisture doesn't build up.
Can I use Weather Watch instead of a House Wrap ?
Unless they have a more extensive product line than I was able to find, I would stick with your preferred brand of house wrap if you're talking about walls.
The Weather Watch membrane I saw was an ice and water shield roof membrane, is that what you are talking about? For roofs I imagine it is similar to many other brands or water proof roof membranes, but to replace Tyvek then no. Tyvek is a moisture permeable house wrap, Weather Watch is not.
Choosing the right weather barrier on a house really depends on what you are hoping the membrane will do. There are places within a building assembly where a waterproof membrane is suitable, and places where it isn't. If you tell us what your wall assembly is going to be we can help you figure out the right type of membrane.
Hi, I am renovating a painted cinder block garage and have chosen various insulations that are made to breathe. It was painted prior to my purchase so I am not sure what type of paint but it does not bubble.
1)Should I sand this to try to open it up to breathe just in case?
For the east and south facing bathroom walls i will use pure wool insulation which is breathable and moisture resistant. I have read that it is important not to put a moisture barrier between the inside block wall and the insulation because swetting will drip down to the floor but that it may be a good idea to wrap the exterior with a wind/ weather barrier.
2) I would like to know your expert opinion on how and with what materials you would construct the finish wall exterior to interior starting with the cinder blocks and including wool insulation and pine 2x4 studs for interior? including is it good to add moisture resistant drywall for bathroom over the wool at all ? directly? or with something against the studs between wool and drywall?
Thank you, J in Ohio
that is exterior painting on block walls not interior