


Why fix leaky faucets?
One of the jobs that sat on my honey-do-list for quite a while longer than I care to admit has been to fix the leaky and dripping older-style faucet in the bathroom at the cabin - made worse by us being off grid and only having a finite amount of rainwater available in our outside catchment tank.
Over this long dry summer, our water supply kept on running out, so we became very aware of how precious every single drop of water can be, but I confess, that the beach and yard chores during the hot weather were way more appealing than sweating away in the very warm house fixing a faucet - so that tap was left dripping!
There is really no excuse for wasting clean drinking water though, even if you're connected to a seemingly endless supply of city water. Ask those who rely on Lake Mead in Nevada, which was formed by building the Hoover Dam in the 1930s.
It is one of several man-made reservoirs that store water from the Colorado River to supply household water, irrigation for farms and hydropower to Arizona, California, Colorado, Nevada, New Mexico, Utah, Wyoming and parts of Mexico - a total of 40 million people in Western USA.

They nearly ran out of water in the summer of 2021 - can you even imagine? And from what the scientists are telling us, this shortage of fresh water is something we're going to have to get used to as a consequence of climate change... what we're getting at here, is that every drip counts!
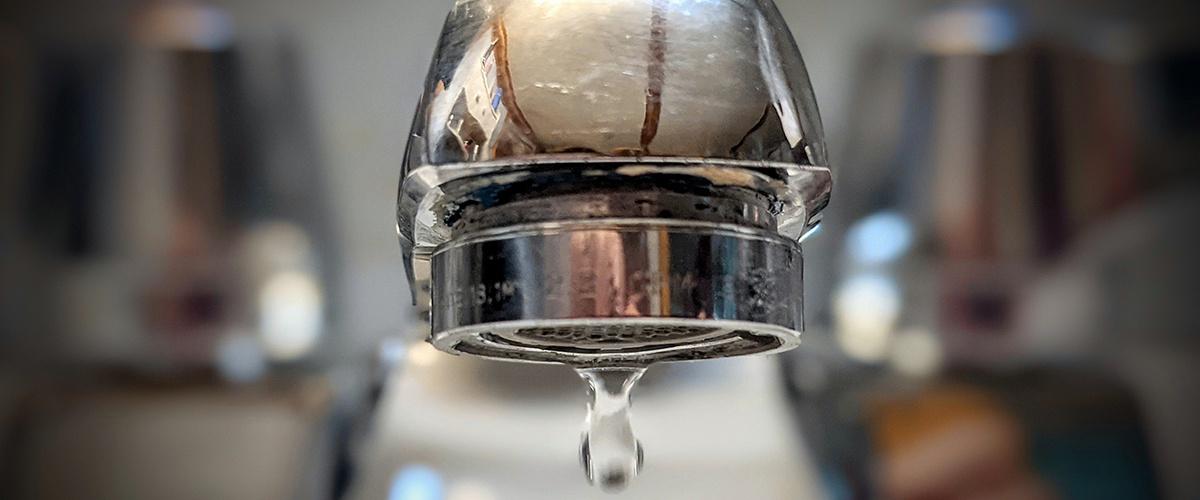
A leaking faucet can waste a lot of water
Until I looked it up, I didn't realize that a very typical leak of 10 drips per minute wastes around one gallon of water per day, or 32 gallons per month. But as our ancient faucet was becoming mighty difficult to fully shut off, I started to wonder about those taps that leak a lot more.
Well, I was shocked to learn that a faucet leaking 60 drips per minute (like ours) wastes around 5 gallons per day, or 150 gallons of water per month... and when you have to drive 3 miles up and down a track to go find more, those drops of water are definitely worth saving!
As we had heavy rain this weekend and I was pretty much confined to the cabin, I decided to do something about fixing that leaky faucet to save us some of this precious rainwater in our recovery system tank for next summer's vacation.
How to repair a leaky faucet - what to check first
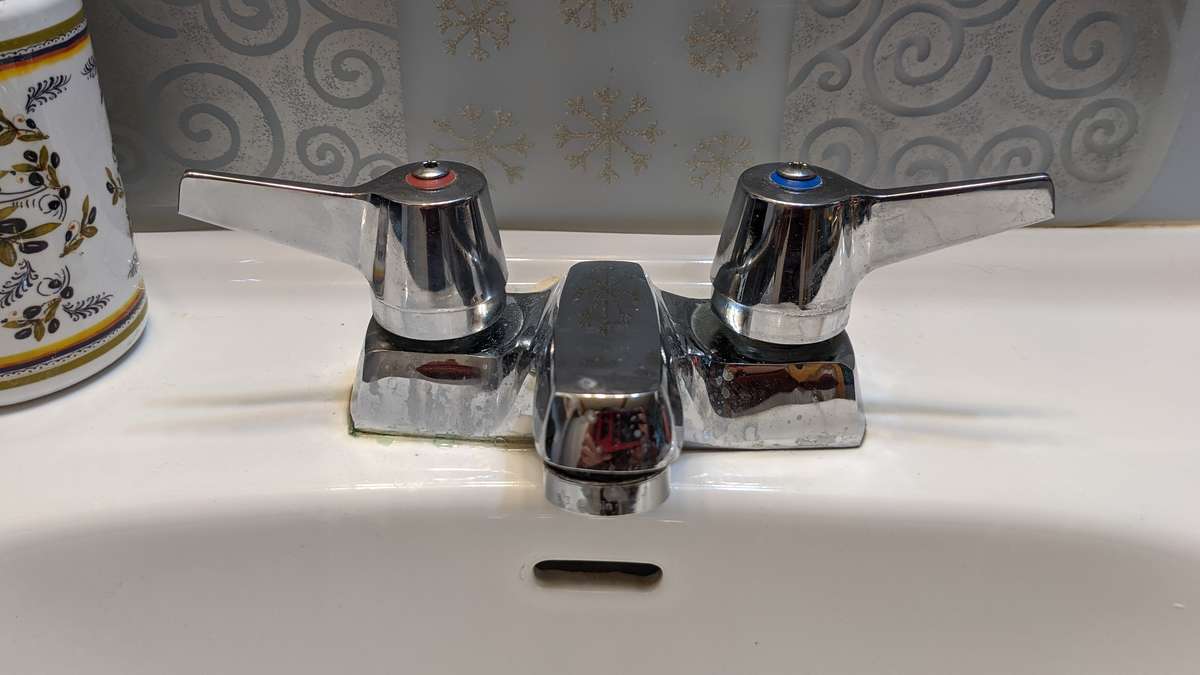
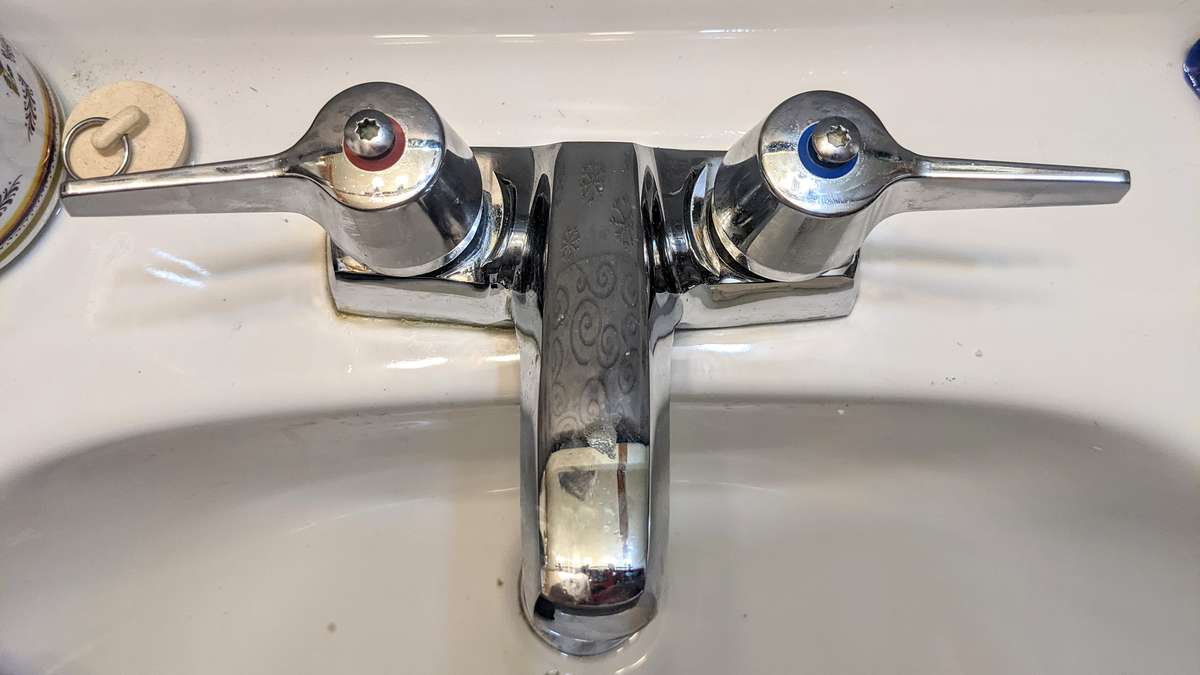
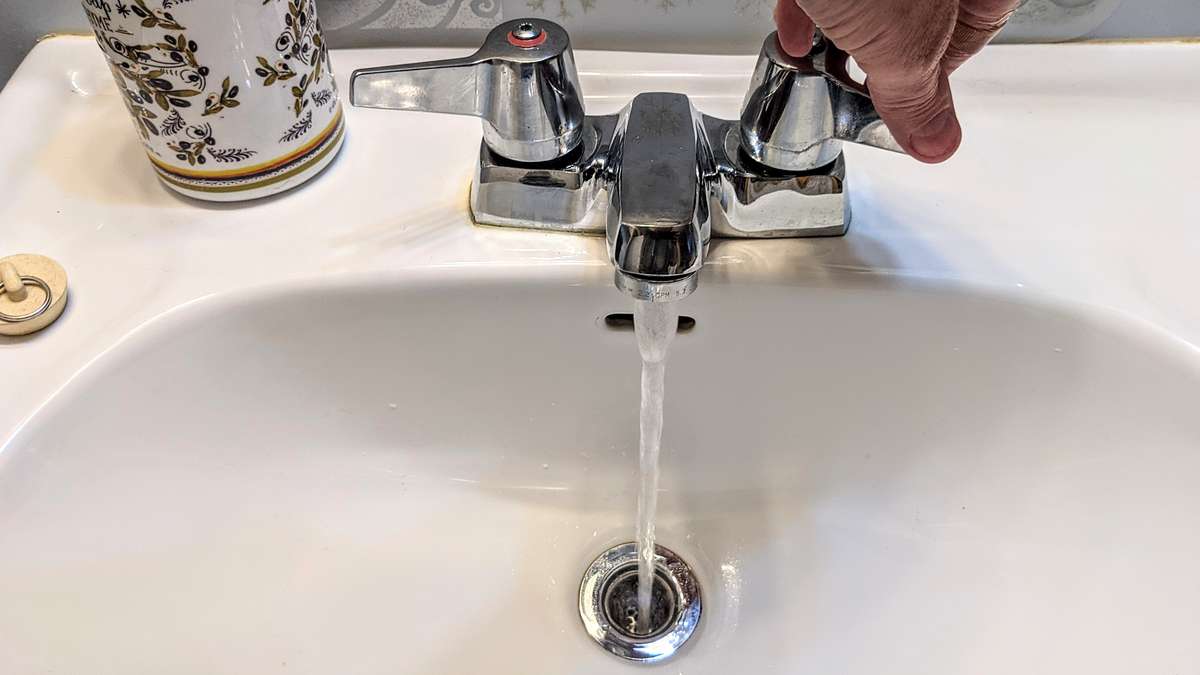
First of all, I suggest you take a careful look at your faucet. Where is the water actually leaking from? Is it working it's way up around the tap spindle and causing a wet patch around the base of the faucet? Or, is the water dripping from the faucet outlet because it's really hard to shut off the valve properly to make a seal?
If the water is coming from the spindle (or body of the tap), I've some bad news for you. This normally shows that your faucet has perished or torn O rings in it - often caused by a corroded faucet cartridge body.
In this case it is still possible to fix a leak, but I would recommend replacing the entire faucet cartridge rather than trying to replace the 'O' rings themselves, as whatever caused them to rip and leak in the first place will probably cause it to happen again.
Also, it's quite a fiddly and hard task replacing O rings; it can be tricky to find the right size of rings, and a whole new cartridge body for a traditional tap with a washer is only around $7-10 per side.
As older bathroom and kitchen faucets work pretty much the same way, they can each need some repairs over time, especially replacing their sealing washer. And it's a lot more sustainable and cheaper to repair a faucet than to throw it away and buy and install a new one.
The other advantage to fixing an older faucet is that older ones are often made better than the newer ones, and they may also fit with the style of your original bathroom fittings. that's pretty important if they are pink or avocado colored!
It's also kind of satisfying fixing stuff at home, especially if you enjoy tinkering in the house on a wet and cold weekend, like me!
What tools are needed for a quick dripping faucet repair?
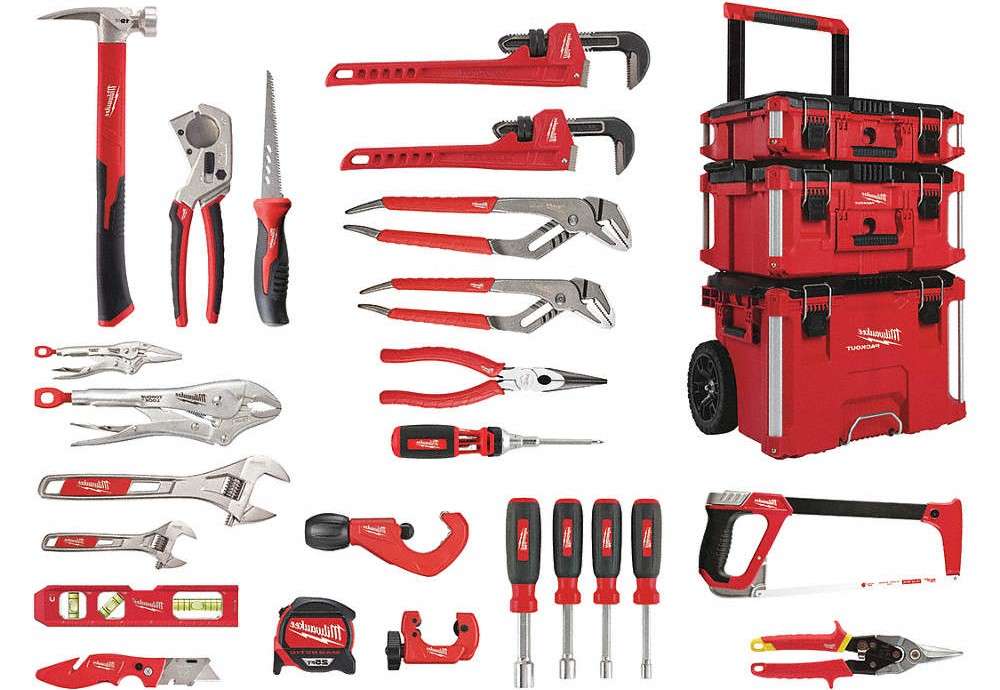
As a minimum, to repair a dripping faucet you're going to need some basic plumbers tools like plumbers grips, a screwdriver set, possibly some Torx bits and some wipes or bathroom paper - as well as safety goggles, gloves, ear muffs, a comprehensive first aid kit and a tetanus shot (you can never be too careful!)
Seriously though, repairing a dripping faucet is one of those "DIY easy fixes" that can get complicated really quickly if it turns out you don't have the right tool when you need it. So if you don't have a fair selection of handtools already, or don't feel 100% comfortable around water leaks and sharp tools, then maybe leave tasks like fixing a leaking faucet to the professionals.
Otherwise, use it as a great excuse to go and buy some tools and give DIY home repairs a go - but don't blame me if it all goes pear-shaped, ok? If over 30 years in the construction industry has taught me anything, it's that home reno jobs, especially "quick repair tasks" rarely go 100% as planned, especially when you weren't the person who installed things correctly in the first place...
Repairing a dripping faucet - step 1
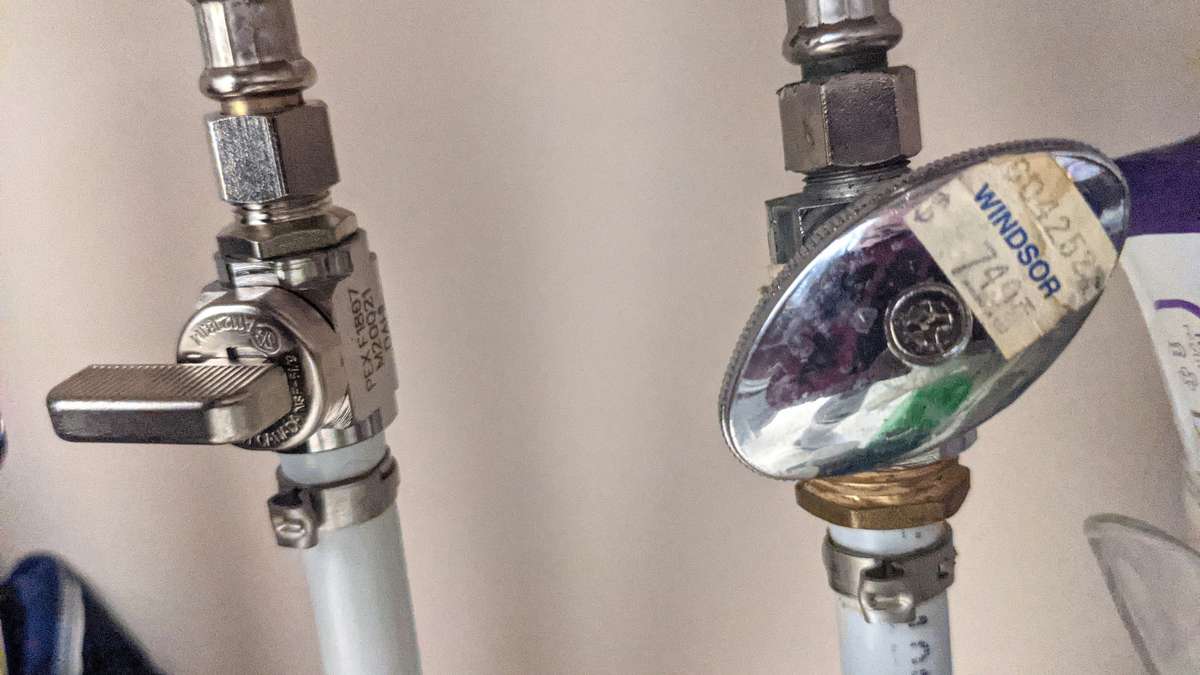
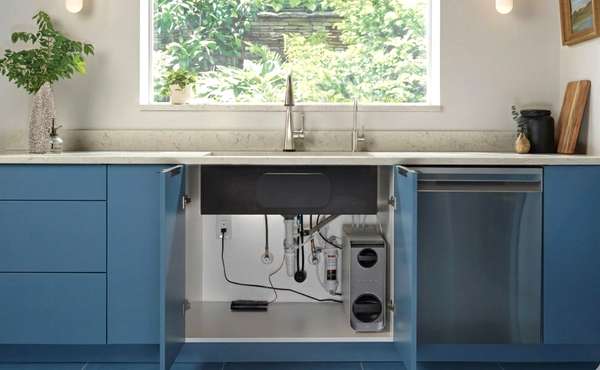
So that you don't have a major flood, the first step to repairing a dripping faucet is to turn off the hot and cold water supply lines. Hopefully, whoever fitted the original faucet also thought to fit shut-off valves on the hot and cold supply lines leading up to the sink (see below). Our faucet had 2 different types, the one on the left is a ball valve that just takes a quarter turn to shut it off, the right hand one had to be wound down until the water stopped. Once you think the water is off, turn your faucet on - both hot and cold - and make sure that no water is flowing after the initial pressure is released.
If the water doesn't turn off, or if you don't have shut off valves on your faucet feeds, you need to locate and turn off the main house cold water supply tap, and the hot outflow tap on the hot water tank. It's a good idea to know where these are (and to turn them off if you're away from home) - as water leaks in a home cause more damage than just about anything else.
In 2017 alone, the total amount of insurance payouts for water damage was $13 billion. The average claim costing about $10,000 - and trust me, having repaired quite a few leaking, moldy smelly basements, water leaks can make a mighty mess in a home.
“Wildfires, hurricanes and tornadoes catch headlines, but the reality is that the No.1 kind of risk that the everyday consumer has is a water claim,” USAA assistant vice-president of P&C innovation Jon-Mike Kowall told Wall Street Journal recently. So as far as water leaks are concerned, prevention really is better than a cure.
Step 2 - taking the faucet apart
On some faucets the screw holding the tap top or lever in place is hidden under a cover that has the blue or red color on it to denote hot or cold. This will have to be carefully levered off first. On our faucet, the screw was apparent, and it had a star shape or 'Torx' head, a type of screw drive characterized by a 6-point star-shaped pattern, developed in 1967 by Camcar Textron and mostly used on vehicles.
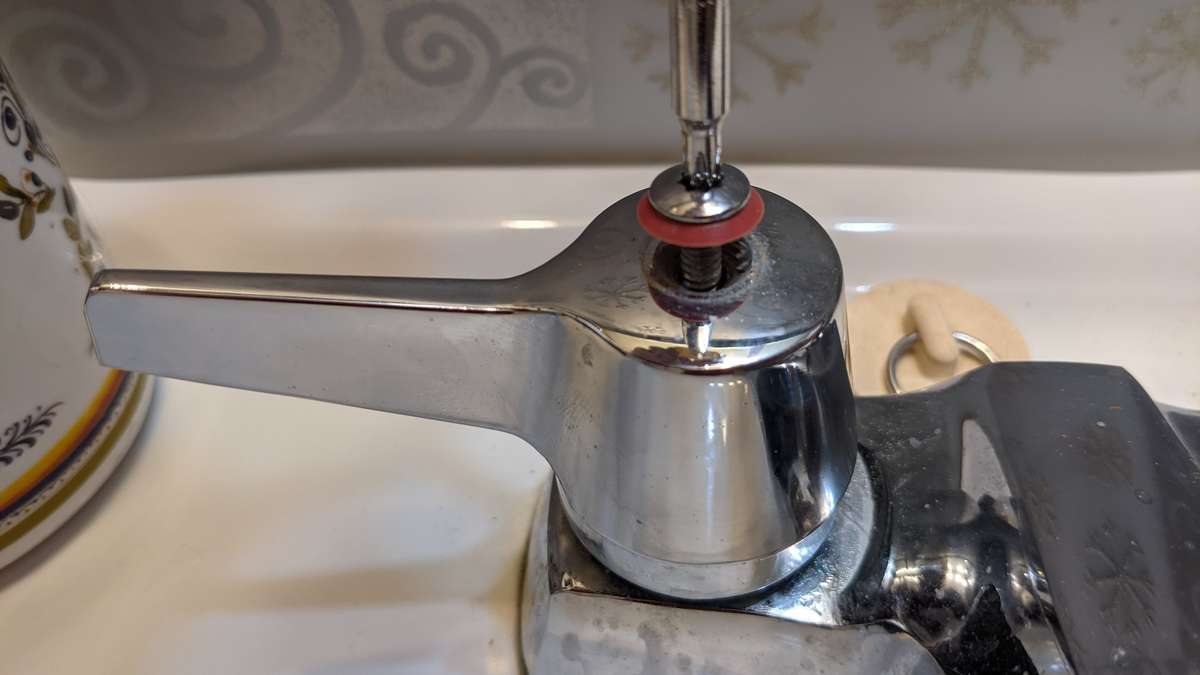
Thankfully I happened to have a tool to fit this in my toolbox, but many faucets have simple slot drives or Philips head screws. Whatever you have, find the right screwdriver and unscrew the fixing out of the top of the faucet cartridge. You should also probably wear some disposable gloves to keep grease off your hands as things are going to get messy shortly.
Helpful tip: When unscrewing these screws, put the drain plug in (unlike me) so that if (or when) you drop the screw, it doesn't fall into the sink trap. (And yes, I'm talking from experience here... sink P-traps are just plain nasty, there's no quicker way to ruin a nice leaky faucet fix than losing one of the screws you can't live without down the drain - trust me).
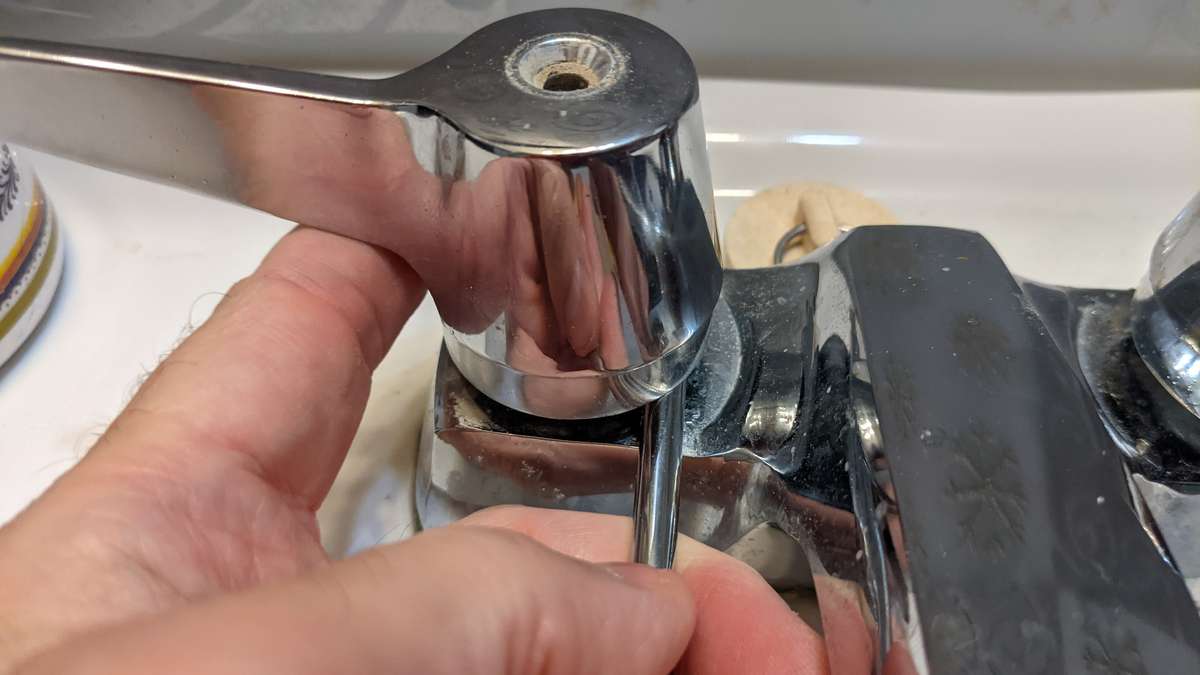
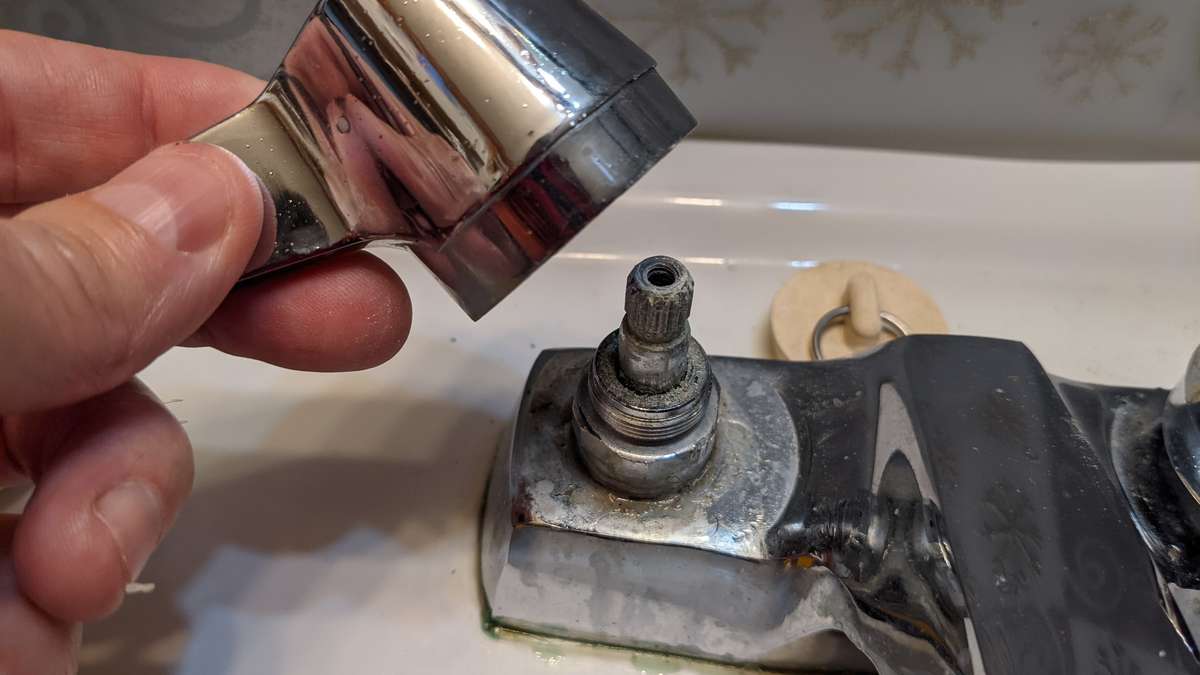
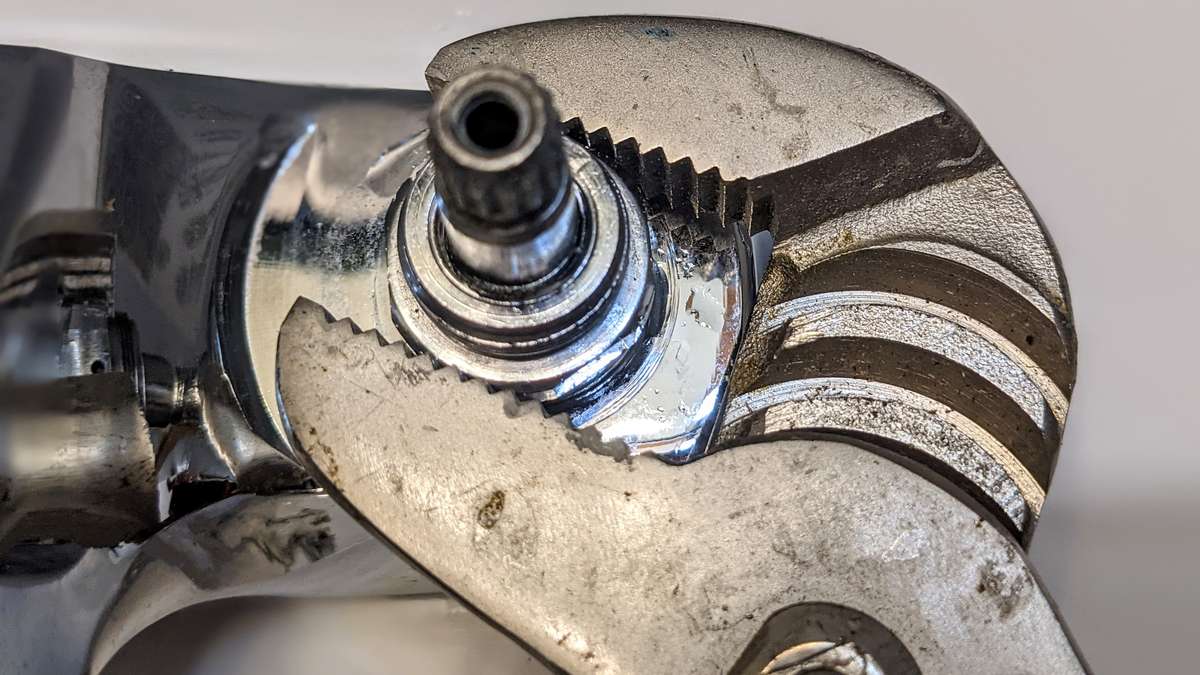
Once the holding screws are removed, carefully pry the top of the faucet up and off the tap cartridge using equal pressure on both sides. Some cartridges have a splined top (like those seen here). Some are square, and I've even seen pentagon and hexagon shaped tops, depending on the brand.
Regardless, the principal is the same - the screw keeps the top in place, and it's the shape underneath that locks into the tap handle and turns the mechanism in the faucet cartridge that lifts and lowers the washer onto its seat. This is what lets the water flow when open, and hopefully shuts it off when closed down.
Step 3 - removing the faucet cartridge
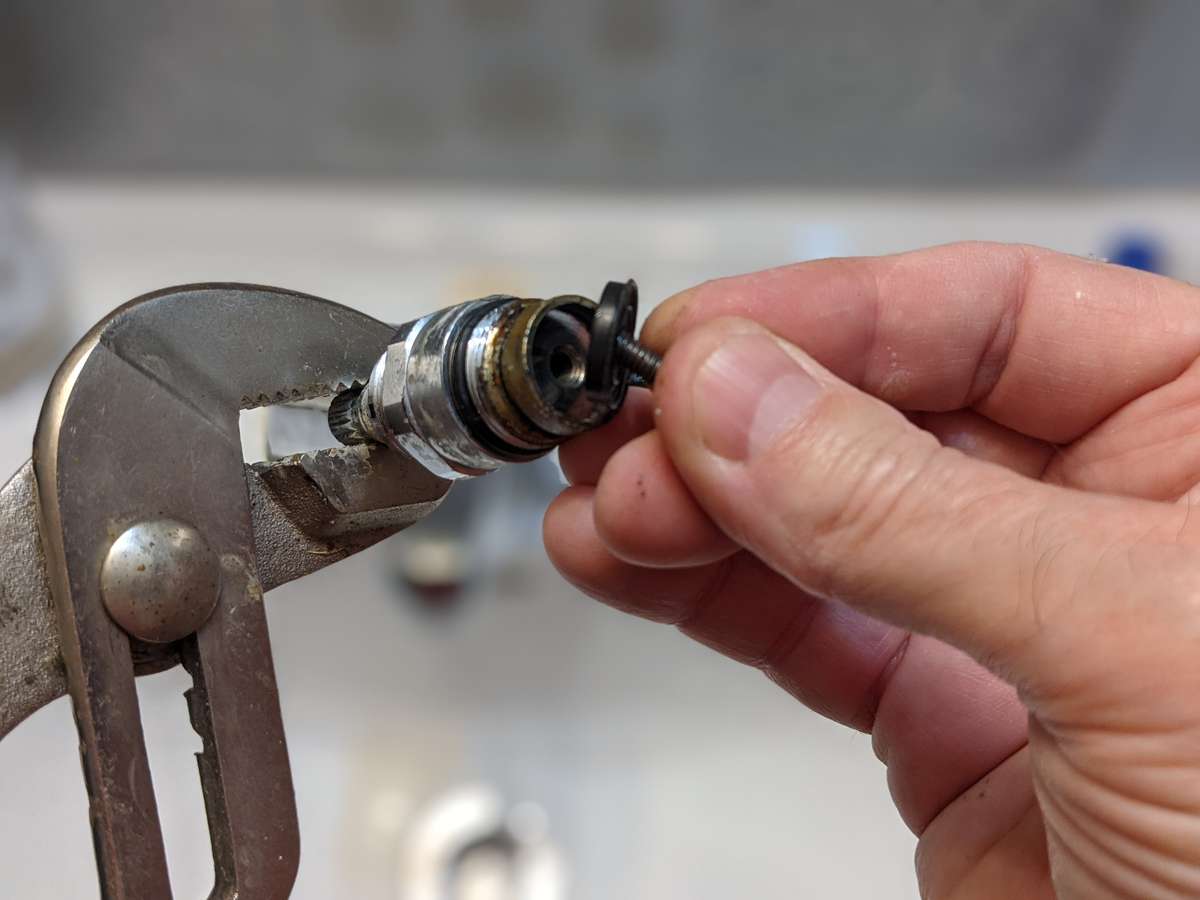
The cartridge in a faucet - which contains the mechanism to turn the water on (and hopefully off) - is screwed into the body of the faucet itself, and there are two of them in a two-handed tap, one for hot and one for cold. Ideally, you will have a suitably-sized spanner that fits the nut-shaped top of the cartridge. If not, you can use a pair of plumbers grips like I did, but be sure to adjust them carefully on the slide so they close to the right size, and put it them the right side around so that the harder you pull, the tighter they grip. Below is the correct way to have plumbers pliers positioned to loosen a right hand thread (which is 99% of them).

Just to show how carefully I research my articles - knowing they get read around the world - I discovered that plumbing pliers or grips are also known as tongue and groove pliers, water pump pliers, adjustable pliers, groove-joint pliers, arc-joint pliers, multi grips, and channellocks. That should keep Google happy!
Whatever you use, when you start to unscrew the tap cartridge it's a great idea to put equal and opposite pressure on the spout of the faucet to prevent putting too much pressure on the porcelain sink bowl. And you may need to use a reasonable amount of force to move the faucet cartridge if it hasn't been unscrewed in many years. I've learned to position plumbers pliers close enough to the spout so I can squeeze the plier handles and spout together to free them off without forcing anything.
Also, when repairing these older quarter-turn faucets, remember to keep the left and right (hot and cold) sides seperate, as they operate in opposite directions. You really don't want to mix them up at this point, or your newly repaired and non-leaking faucet will operate backwards. I may know someone who did this recently, but he probably wouldn't admit to it...
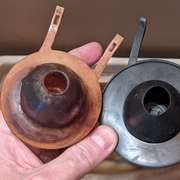
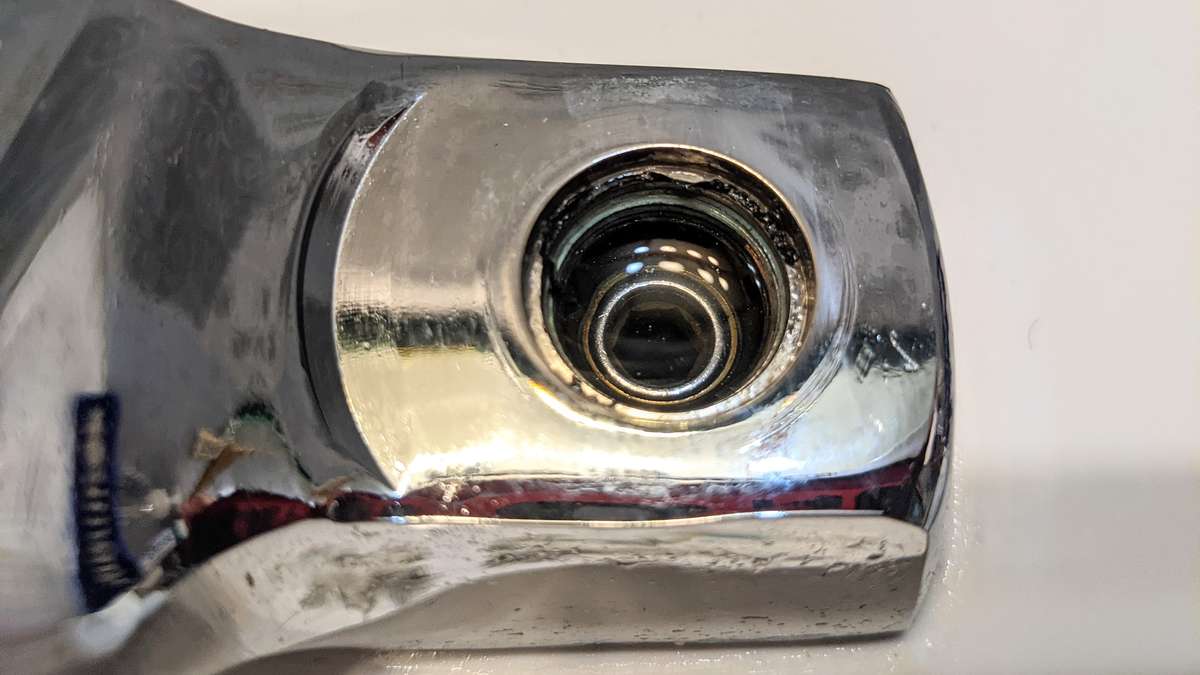
Step 4 - inspect the sealing face for the faucet washer in the tap body
Once the cartridge is carefully unscrewed, lift the faucet cartridge up and away and take a look at the seat face that the sealing washer tightens down onto. The face needs to be clean and free of major pitting - many are chrome-plated on a brass faucet body, and over the years they can get worn and corroded. Thankfully, mine looked good enough for a few more years of service.
And give everything a really good clean while you can get to it. Usually this part of the faucet is hidden under the tap handle and is encrusted with soap and old toothpaste. Nice.
Back in the day, a traditional plumber even had tools to recut these valve seats on faucets, but these days that skill and those old tools have mostly been lost to history. And at the rate plumbers charge, plus just the initial service call, it's probably going to cost less to replace the faucet anyway.
This faucet even has removable valve seats that unscrew and could be replaced if that was the cause of our faucet drip. But again, I'm going to say that locating the right parts and going to all those lengths is probably going to be too slow and costly for most folks to even consider doing just to fix a leak. Thankfully, as you can see below, our valve seats were still fine for a few years good service, so I only had the tap washers to replace.
Step 5 - removing the worn out sealing washer
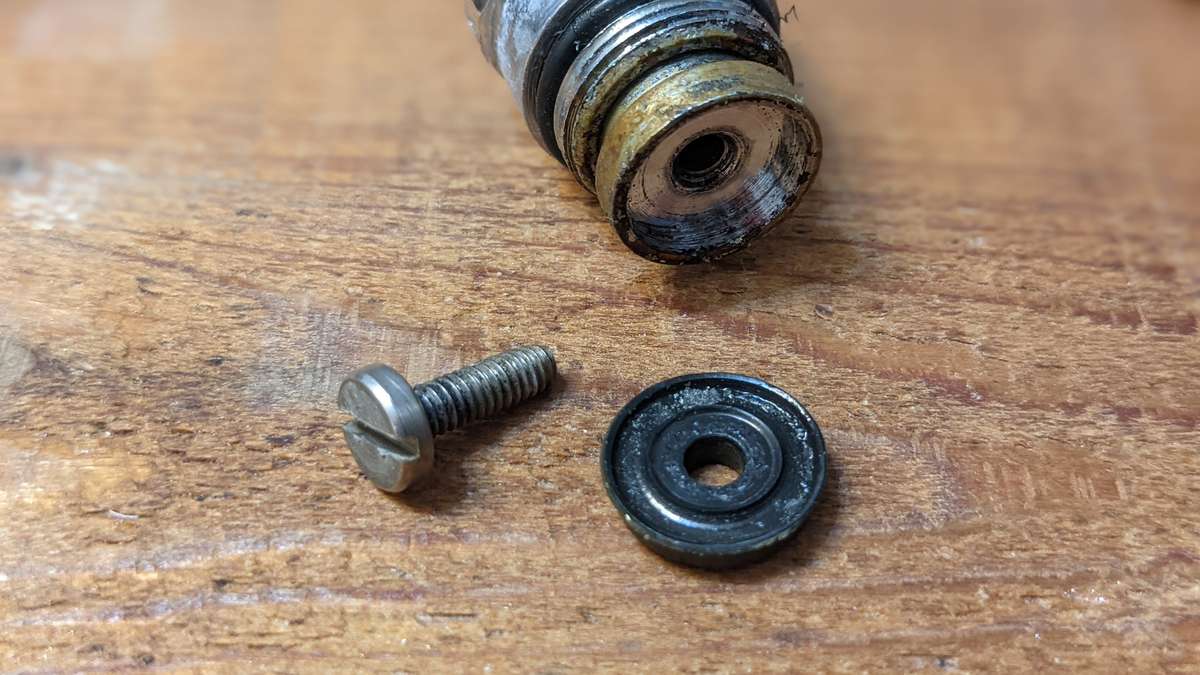
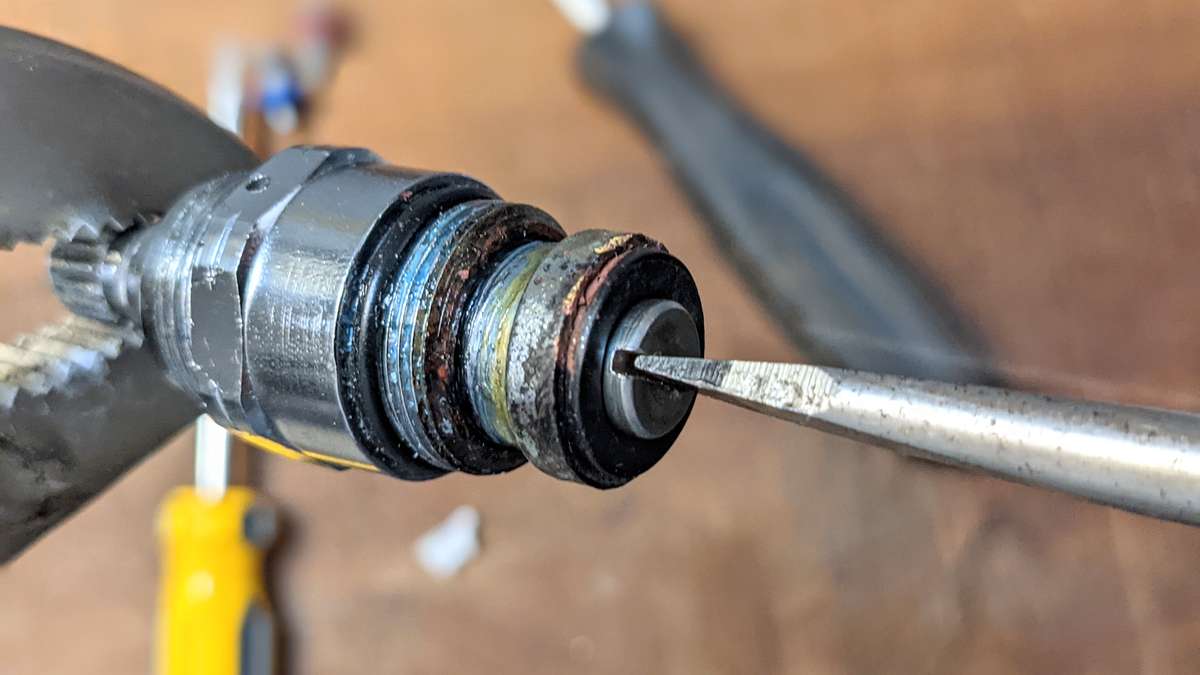
The sealing washer in the end of the cartridge is usually held in with a brass Bibb screw, which needs to be unscrewed, and do so very carefully. They don't take much force to break as brass is quite soft. Occasionally they are stainless steel like this one, which was an unexpected suprise. This faucet must have been of a superior quality at its time of purchase I reckon, making it even more worth repairing and saving.
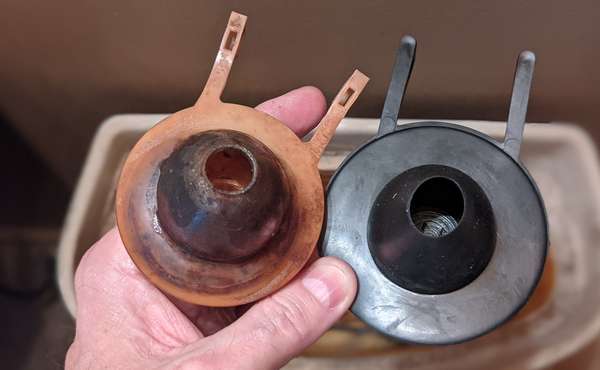
The washer itself on a dripping tap is often hard and cracked, which is part of the reason why they leak; they are also usually deformed like this one. Hold the spindle firmly with grips rather than holding the body of the cartridge when turning it, or you will pop the mechanism out instead of undoing the screw.

Once the screw is loose, use it to pry the washer out of the retaining cup on the end of the mechanism. Notice how this one has been squashed down so hard in an attempt to stop the faucet dripping that it had a lip on the outer edge as well as the deep groove from the valve seat.
It his hard to believe that all that lies between a perfectly operating drip-free faucet, and a leaking and wasteful dribbling mess in the sink, is a 20 cent rubber washer - but here it is.
Step 6 - take a trip to your local independent hardware store
If you are fortunate like me to have a corner hardware store that's been there forever and sells everything from roofing nails to cough drops, then now is a great time to take a trip down there. My local store had exactly what I needed in their tap washer section for 97 cents, and I also picked up some waterproof grease to help lubricate those O-rings and the quarter turn screw in the mechanism part, but more about that later.
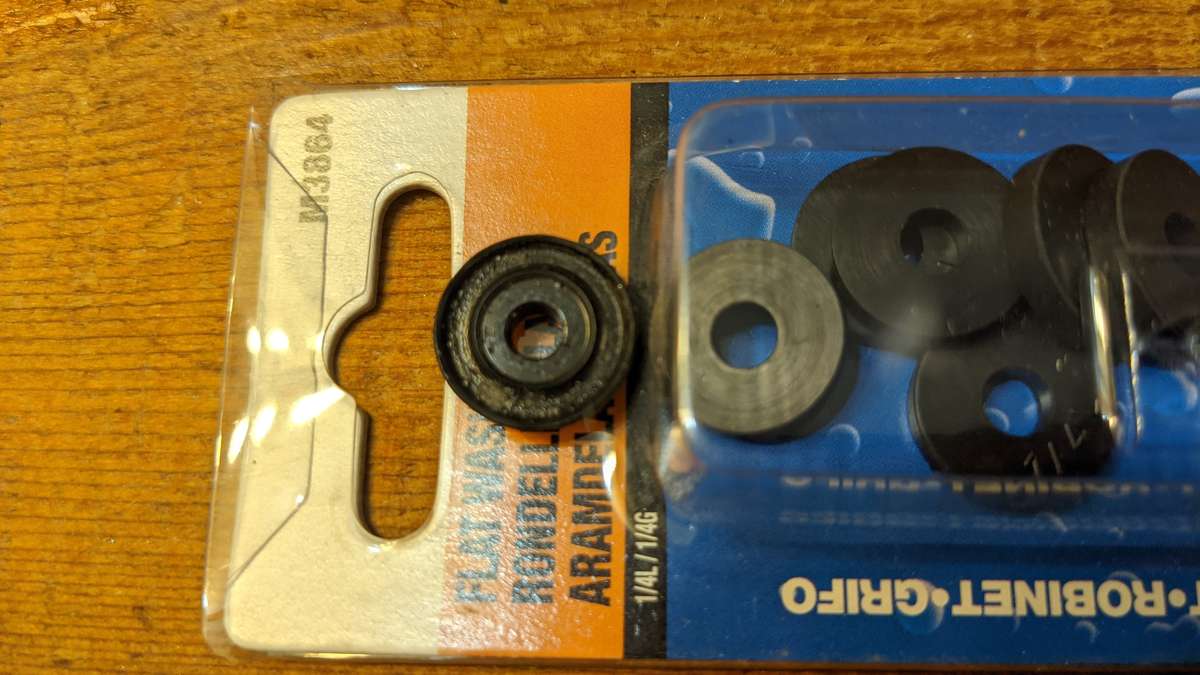

Alternatively, you can go online and buy a big assortment pack of new tap washers ahead of time and some food grade silicon grease, as this saves having to run out to the store mid-job. But, it also means you're going to have to plan ahead for your dripping faucet repair. You're going to spend more money, and you're going to have to store 100's of rubber washers in the hope that one day they will come in handy (and that you can remember where you put them and that age didn't make them go hard!).
Nahhh, I've decided that wherever possible, I will leave it to my friendly local hardware store to stock my DIY spares inventory until I need it. Because Lilani is awesome and knows where everything is! Thanks Lilani, and see you soon! (See, I promised you a name-drop :-)
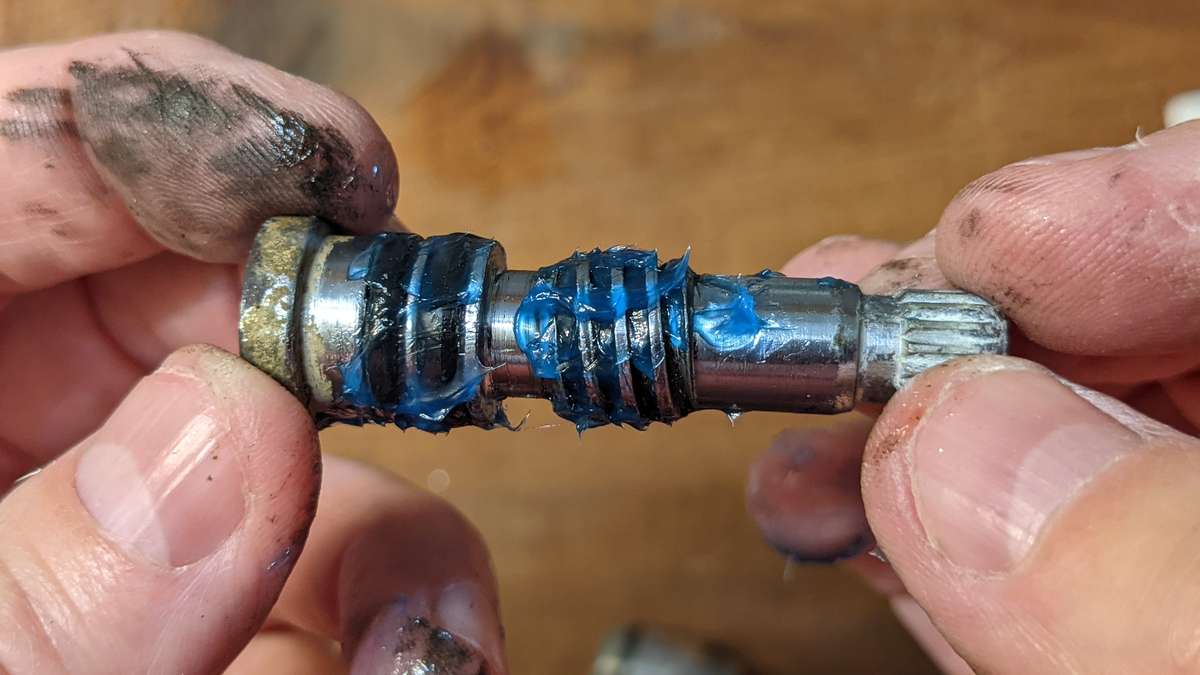
Step 7 - disassemble the faucet cartridge, clean, grease and reassemble
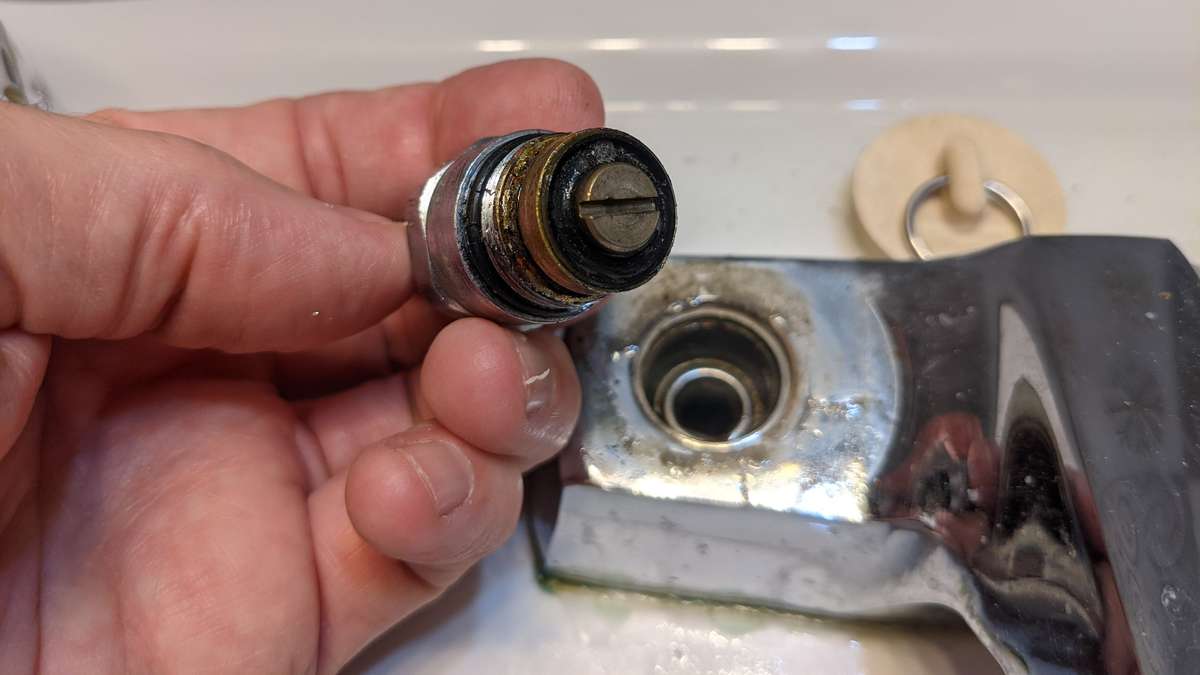
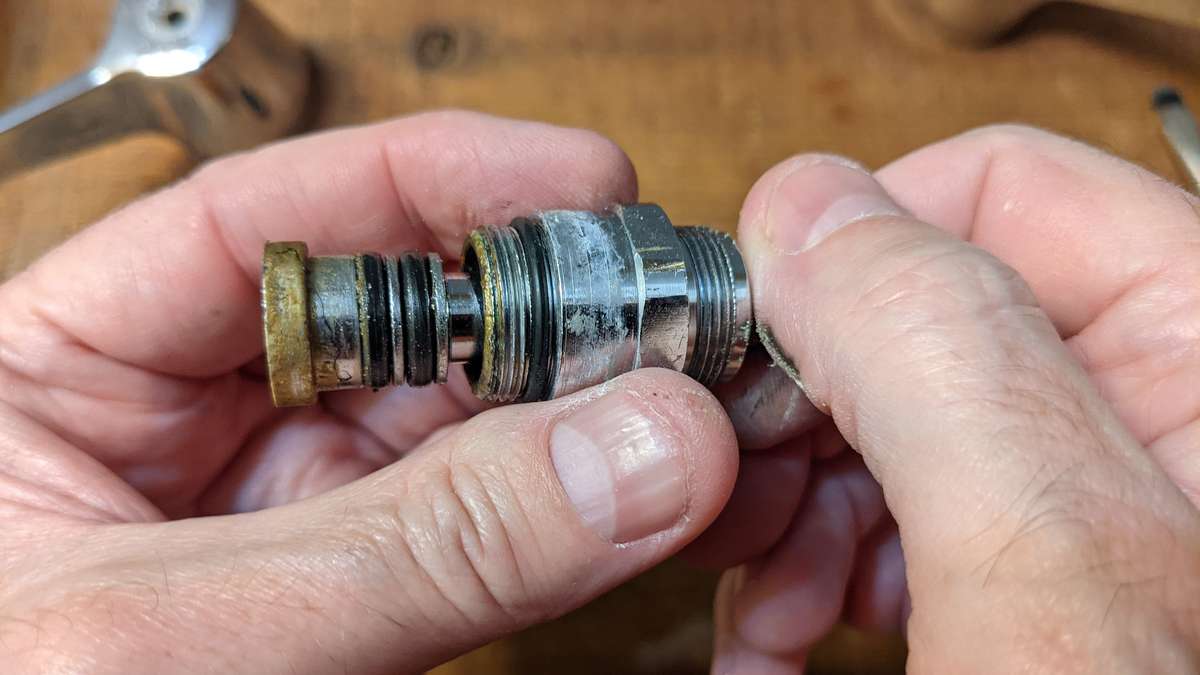
I mentioned earlier to keep the hot and cold faucet mechanisms apart - and well - I'm going to remind you again because on these older style quarter-turn units, they spin in opposite directions so you don't want to mix them up. To disassemble them, grip the outer body of the cartridge firmly in one hand and spin the knurled tap end in your fingers until the whole mechanism spins loose and comes out of the bore of the body.
If it doesn't spin freely, you're probably turning it the wrong way, so try giving it a spin the other way. On the image above and below you can see the 'clockwise to close' faucet cartridge mechanism with all the old grease and gunk on there. On my faucet, this is the left hand hot water side.
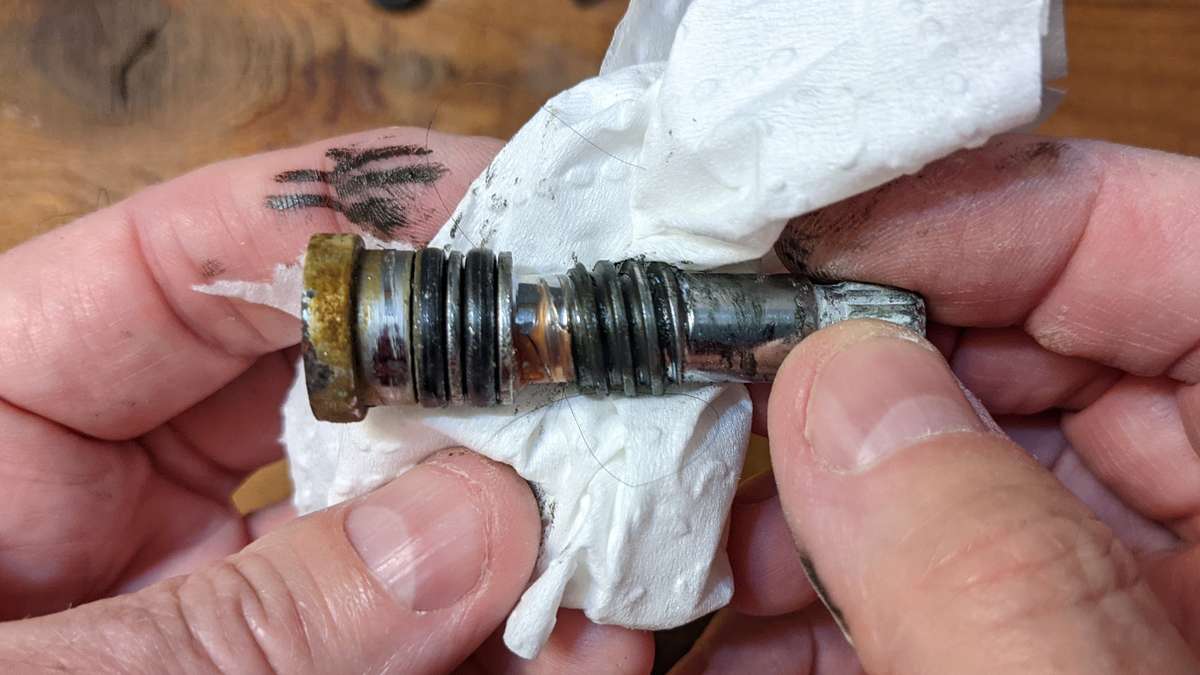
Now turn your attention to the bore in the faucet cartridge body. This wants to be clean and free of pitting or damage as the O-rings need to fit properly in there or the faucet will leak from up under the tap handles and dribble constantly down and around the faucet base. Thankfully on ours this wasn't the issue, ours was simply difficult to turn off so it constantly dripped water.
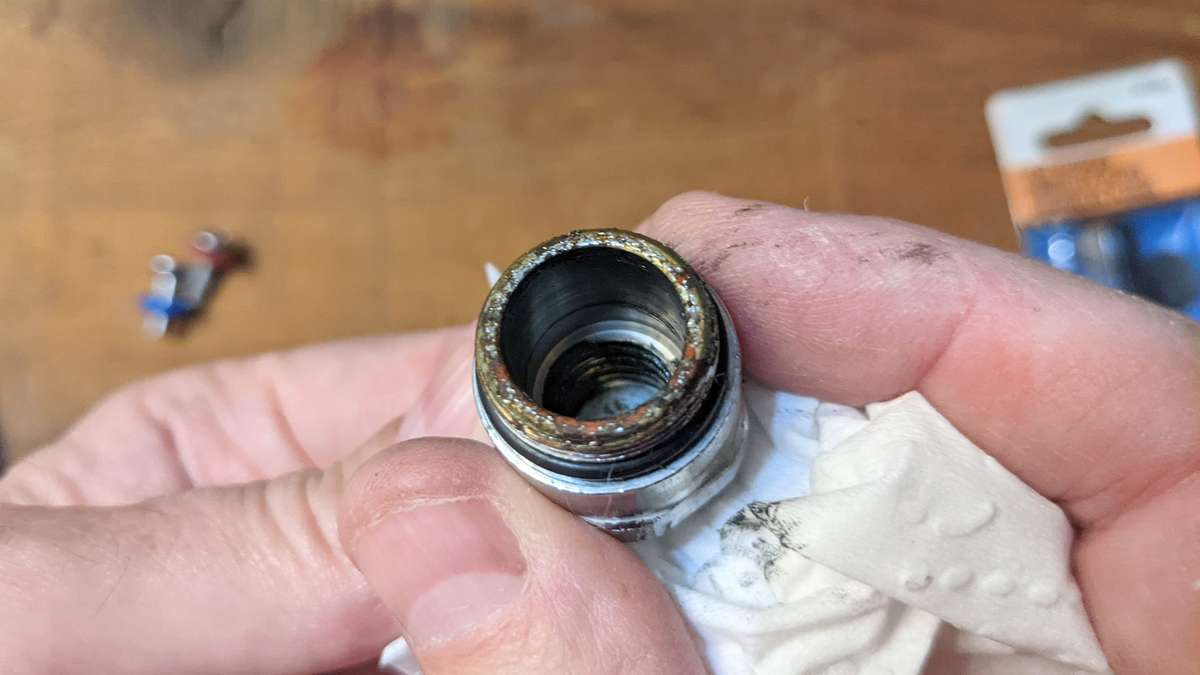
If all is well in the faucet mechanism bore, get it as clean as you can.
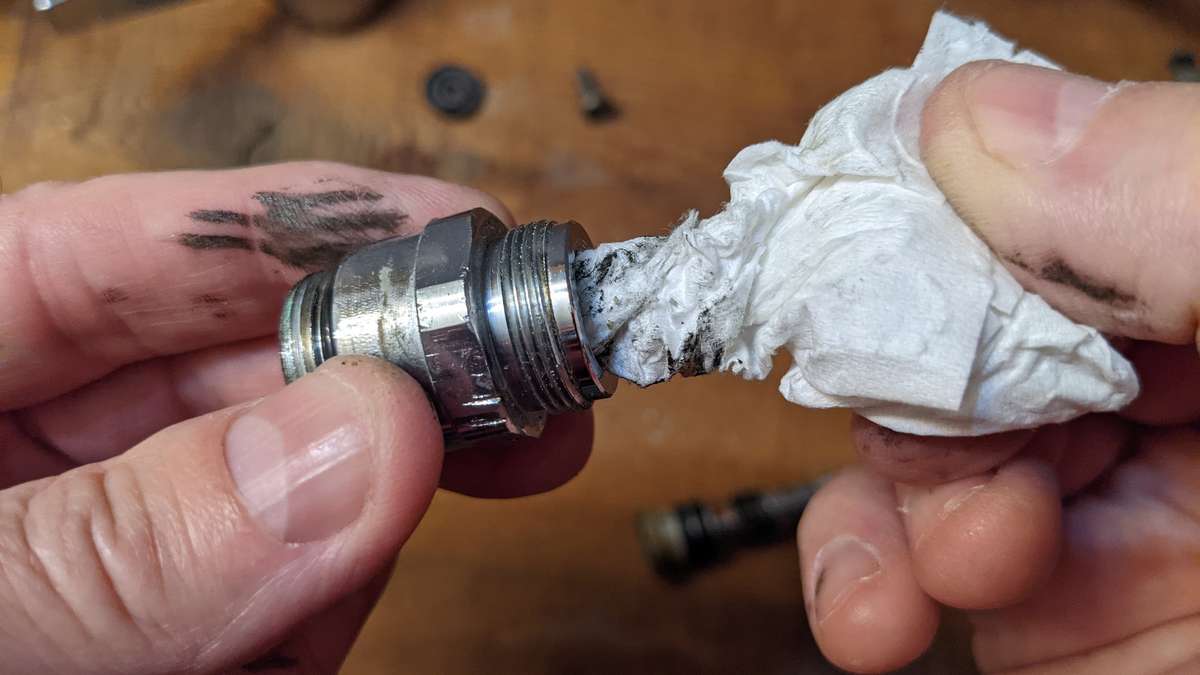
Once everything is as clean as possible, it's time to use some of that waterproof grease I mentioned. Now, as the faucet I was repairing at the cabin only has water going through it from our rainwater recovery - which we'd be unwise to drink due to it likely containing mouse, bat and bird poop plus pine needles - I used regular waterproof grease as it was on hand. However, for most faucets you really need some food-grade silicone grease to be safe.
Assembly after checking, cleaning and greasing is pretty much the opposite process of pulling the faucet mechanism apart. Once it is seated all the way home in the cartridge body and you've checked that it operates smoothly, it's now time to fit the new sealing washer in the cup on the end.
Step 8 - fitting the new tap sealing washer to the faucet mechanism
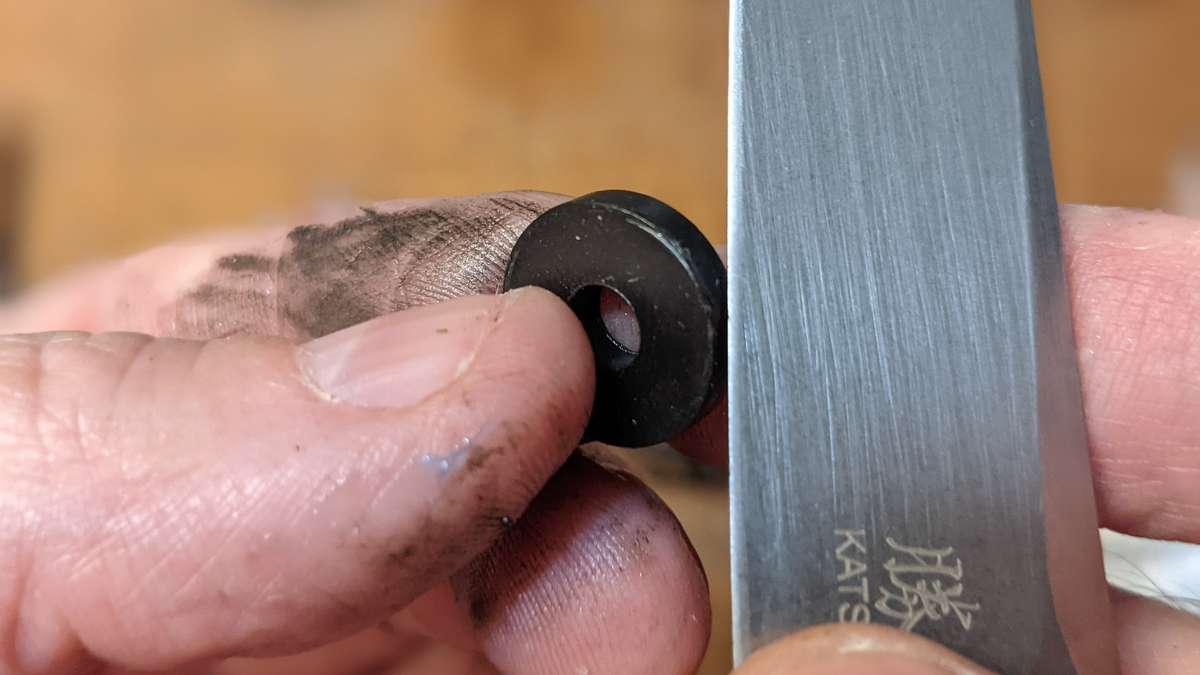
Helpful tip: find a heavy guage steel washer that is bigger than your faucet sealing washer, and check the rubber washer for irregularities on the edge before fitting. When I got to this stage and tried to get the sealing washer to fit into the cup in the tap mechanism, it simply didn't want to pop into its place. And when I looked closely there was some excess rubber from the molding process, so I found it helpful to carefully trim this off with a very sharp knife. Be very careful with sharp knives people.
The rubber sealing washers I had bought also had the size embossed in the rubber face on one side, so I decided to fit them with this part into the cup leaving the flat sealing face visible that should locate snugly onto the valve face and stop any drips in the future. It might not make a difference, but I didn't want to take a chance with my DIY faucet fix!
Remember that heavy guage steel washer I mentioned above? Well, this is where that becomes very useful. My new rubber sealing washers were a really snug fit, and despite much s̶w̶e̶a̶r̶i̶n̶g̶ pushing, they wouldn't go in straight, which wasn't going to stop that faucet from dripping. My solution can be seen below - by using the steel washer temporarily and winding in the screw, this forced the rubber seal into the cup.
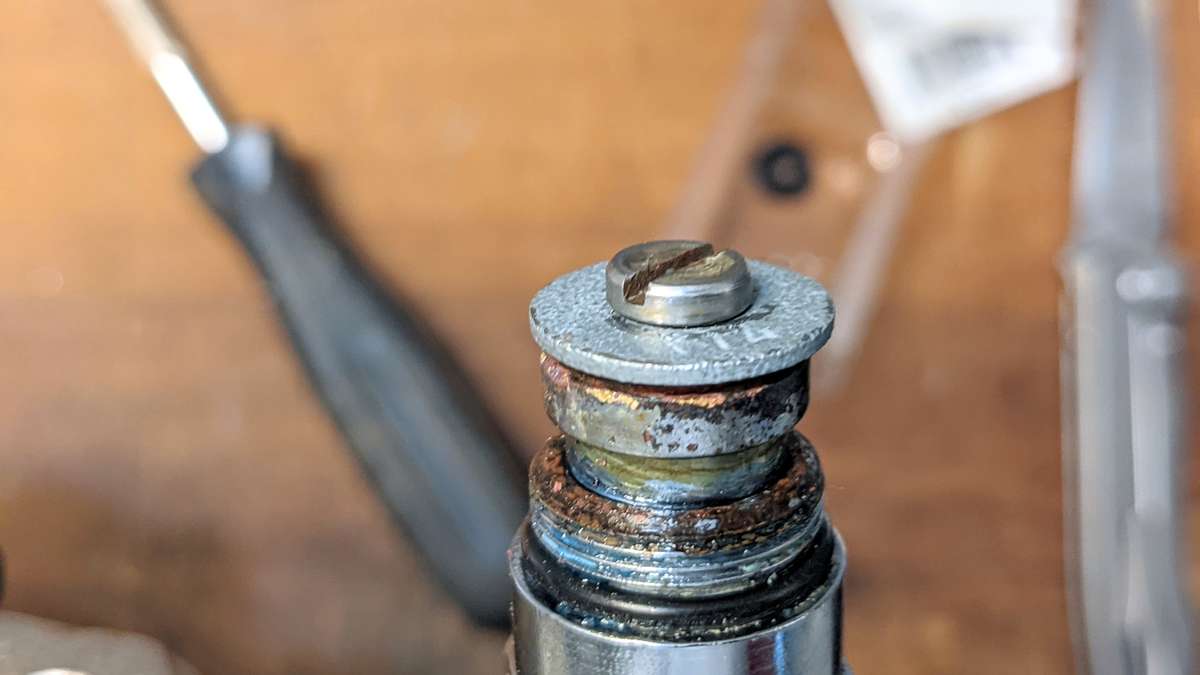
I then took the screw back out and removed the steel washer before refitting the screw tightly to retain the rubber sealing washer in the quarter turn faucet mechanism.
The renovated tap cartridges are then ready to refit into the faucet - here's hoping this is going to fix those drips!
Step 9 - refit the renovated faucet cartridges
Fitting the repaired cartridges with the tap mechanism is the opposite of removal but easier, as they aren't all stuck in years of sink-gunk. Just remember, if working on a quarter turn faucet to put each side back where they came from, and to turn the plumbers grips over so they grip harder the tighter you screw the cartridge back into the faucet body. (see image below)
Step 10 - fit the faucet handles back on
Once both the cartridges are tightened back into the main faucet body, it is time for a little trial and error on a quarter turn tap to get the two lever tops back into place evenly so they look right. They need to be aligned on the right spline, and remember to also test you put the left (hot) and right (cold) sides back in the right place so they operate correctly.
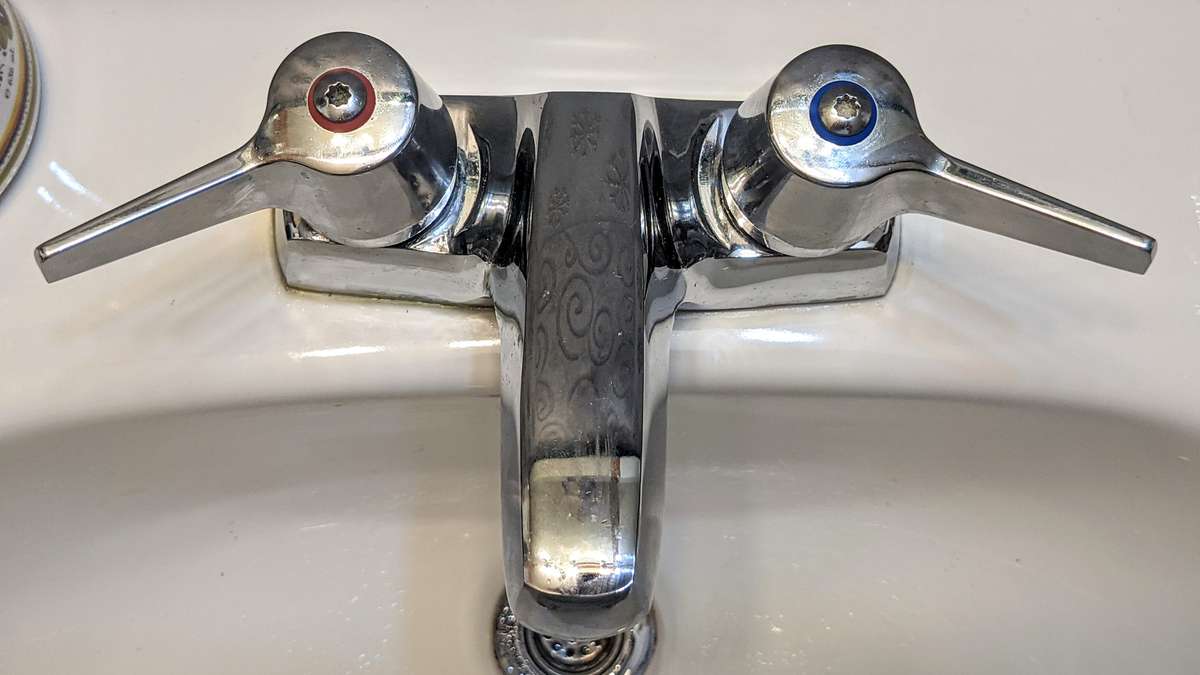
This is the quarter turn faucet before we renewed the washers to fix them dripping - in this position they were both locked down and yet the washers were both leaking.
It is also very much worth mentioning to the whole family that you just fixed the leaking bathroom or kitchen faucet, or they will keep on forcing the taps closed and will wear another groove in that new and soft rubber tap washer PDQ.
Step 10 1/2 - clean out the faucet aerator!
We know that we are here to fix a leaking faucet, but while in the washroom with a pair of plumbers grips in hand I couldn't resist removing and cleaning out the faucet aerator - below you can see why I am glad I did. I'm purposefully not going to mention the appearance of a Band-Aid for these last few images - but I did go back and add 'first aid kit' to the essential tools list - nothing if not thorough, that's me! (And that's all I have to say about that...)
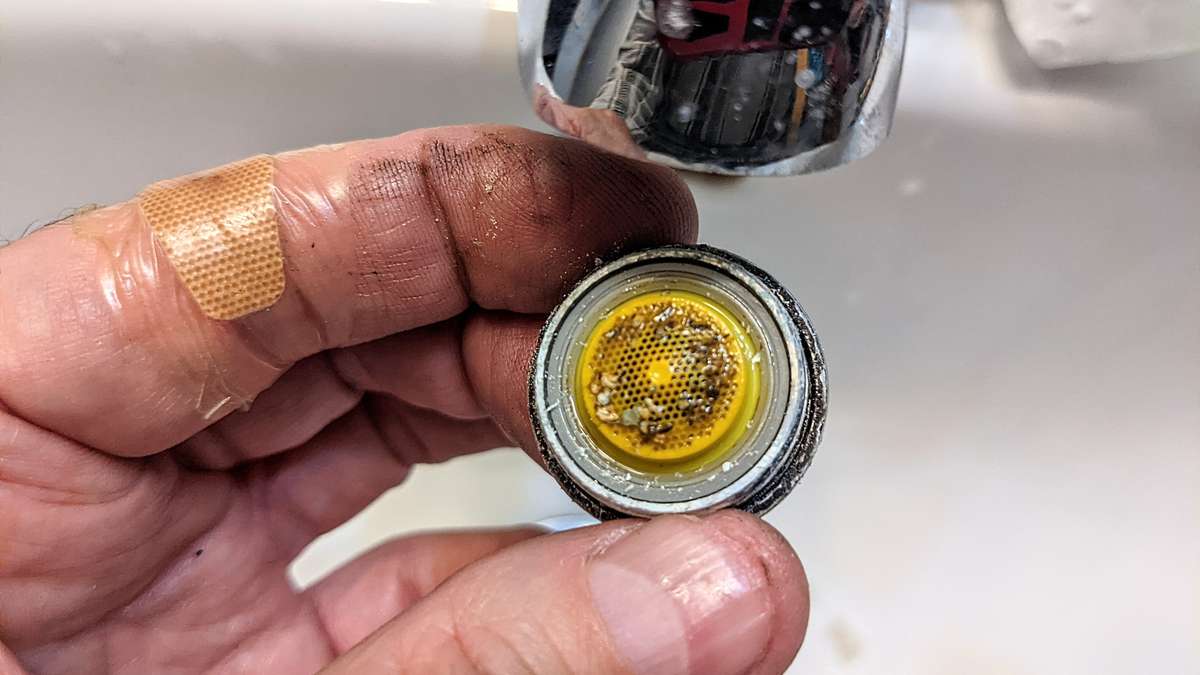
When did you last clean out your faucet aerators? Yeah, exactly - you'd be surprised or even horrified what you can find stuck in these things. They act like a filter and trap contaminants in your water supply, so these are better cleaned out regularly, and especially after you move into a new house.
While plumbers are supposed to flush out the water system thoroughly before screwing all these aerators onto faucets, they often don't, and we have found that a poor water flow was down to blobs of solder stuck in here, which we don't really want potentially contaminating our drinking water.
If you want the aerators really clean, drop the whole assembly into a glass of cola type soda and let them soak for an hour which will also remove limescale. That's probably the best use I can think of for that stuff other than for cleaning toilet bowls if you live in a hard water area - but I digress.
Onto the exciting and hopefully last part, testing the faucet for drips and leaks.
Our dripping faucet fix final checklist
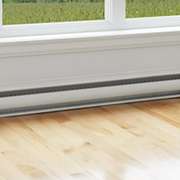
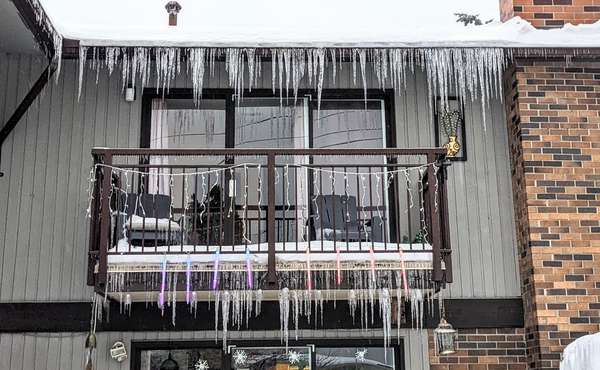
So, now that you've finished your DIY fix for a leaking faucet, it's time to turn the water back on and to check for any drips or leaks. I always recommend checking around carefully after carrying out any plumbing work. As I mentioned earlier, nothing causes more damage in a home than water dripping where it shouldn't be, which can include inside walls in the case of air leaks with interstitial condensation, or under windows where cold weather and high humidity causes condensation.
And if, while you're at it, you happen to notice your bathroom or kitchen sink isn't draining properly either, you might want to take a look at our step-by-step guide on how to troubleshoot and repair a clogged sink drain. It’s another simple plumbing fix that can save you water, time, and the cost of a service call.
If everything looks good, the faucet closes down smoothly and you've fixed the dripping tap, then it's time for a pat on the back. Your leaky faucet is fixed.
Tools should now be cleaned and dried off and all put neatly away ready for the next DIY home reno job... because once you're comfy on that couch with a celebratory beverage, if you're anything like me it won't get done until tomorrow, (if at all). Unless you can bribe one of the kids with some extra allowance that is...
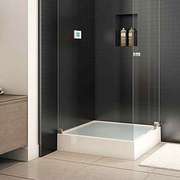
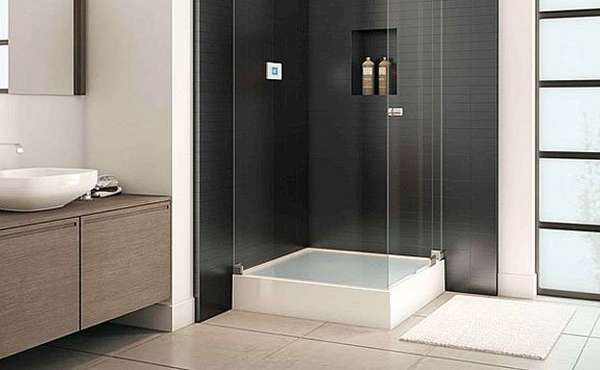
For those planning a long-term residence, researching the best walk-in showers for seniors is a top priority to ensure ease of entry and exit.
If you've any helpful tips to add, or comments about this Ecohome guide on how to fix dripping faucets, please post them in the comments section below. Stay safe out there!
Author: Robert J. Pierson - Ecohome Network
See all posts by Robert J. Pierson
Now you know more about how to fix a leaky faucet and why it's a good thing to do...Find more pages for DIY reno guides and sustainable and resilient green building techniques here :
Find more about green home construction in the Ecohome Green Building Guide pages and if you would like more DIY reno articles like this, then subscribe for the free Ecohome Network membership here |
Although we only use links appropriately and in context, and they don’t influence our content production, Ecohome Network may get commissions for purchases made through some links in this post and on the site in general as per our terms and conditions. As Amazon Associates, we may earn from qualifying purchases, if this comes as a surprise and you'd like to know more, contact us below.


Comments (0)
Sign Up to Comment