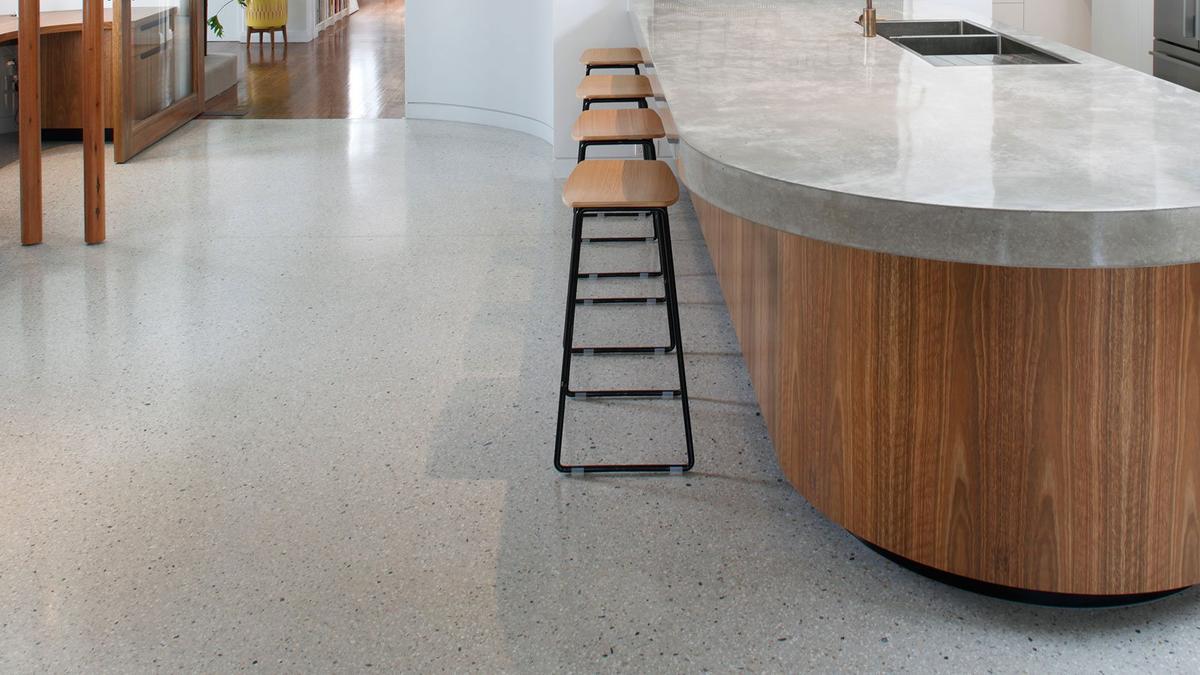


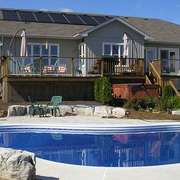

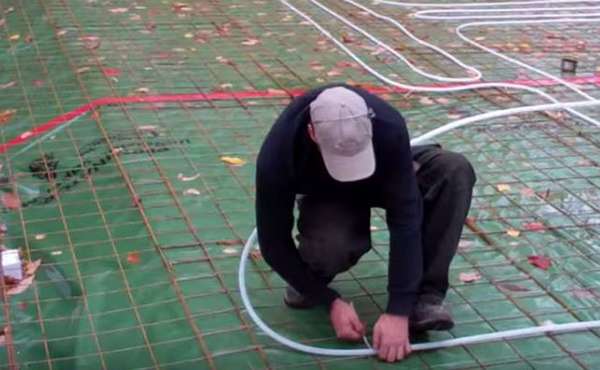
Polished concrete floors are extremely durable and non-toxic; silicate-based densifiers keep them that way and make it a great start to safe indoor-air quality in a home. This is an excellent flooring option for anyone with chemical sensitivities who wants a beautiful and durable eco-friendly floor in their passive solar home - especially as built correctly with sufficient subfloor insulation a concrete monolithic slab on grade foundation makes a perfect thermal battery for solar heat.
Sealing concrete floors:
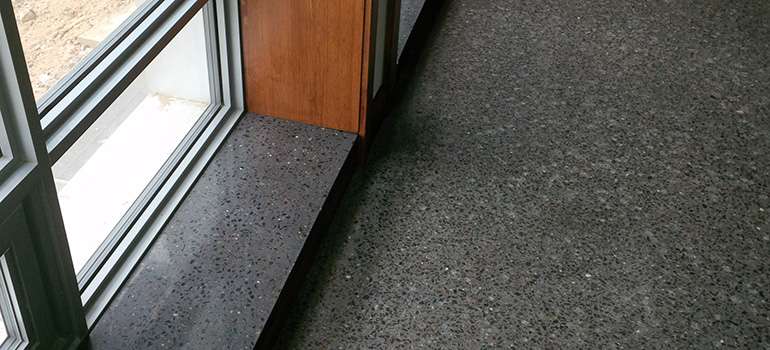
Raw concrete is very porous and will have a lot of tiny, interconnected air pockets in it that will absorb moisture and other contaminants, and stain easily. It will also endlessly release dust into the air through any contact with it.
Silicate densifiers are, in the most simple of terms, 'liquid glass' that you spread on floors to fill and seal the pores. The liquid will penetrate and harden, leaving you with a shiny surface that is able to repel (but not always stop) stains from household contaminants and spills.
A densifier will protect concrete from impact damage, and most importantly, it will eliminate the dusting you would experience with an untreated floor. Applying a densifier is all that is ever needed for a garage or commercial warehouse floor; any additional finishing sealer will peel and chip if it sees a lot of heavy use. Applying an additional sealer is an option for residential floors; we'll cover that in a moment.
Stronger concrete:
When you drop something heavy on a concrete floor or countertop, the action that you can't see happening in that split second is that the concrete actually compresses and then springs back, often releasing a chip.
Silicate densifiers will make concrete stronger, and add between 1,000 to 2,000 PSI to the compressive strength. As a result, it is more resistant to chipping than it would be with just a finishing sealer.
Concrete densifier product options:
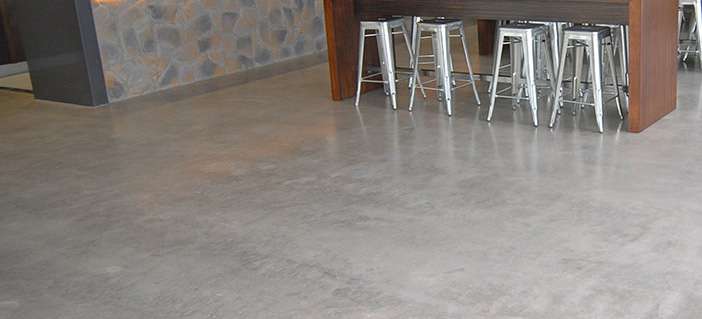
To choose the right densifier, you first need to make a fairly insignificant choice between how much sheen versus how much depth of penetration you want.
Products that penetrate deeply don't produce the hardest silicate/glass crystal in the concrete, so as a result they don't polish up to as high a sheen as the ones that penetrate the least. The ones that penetrate the least come out shinier but you can't restore them as many times.
Each silicate densifier (sodium, potassium, lithium) will penetrate to a different depth;
- sodium silicates penetrate the deepest but burnish up to the lowest sheen,
- potassium silicates penetrate up to 2 mm and burnish up more than sodium,
- lithium is the shiniest but only penetrates to the thickness of a sheet of paper.
How to choose between concrete densifiers:
For the shiniest floor: definitely use a lithium densifier, and what can make an even bigger difference is choosing stronger concrete with a higher MPa (megapascal) for the initial pour. 25-28 MPa concrete is typical for a house but you could instead specify 35-38 MPa concrete as it generally polishes better.
For the most hassle-free floor: choose a potassium densifier rather than lithium. The deeper penetration means you will be able to buff out any etching caused by acidic materials, many more times over the years than you could with lithium.
For the healthiest floor: just use the densifier of your choosing and no further sealers, as most sealers will contain some level of VOCs (volatile organic compounds). Many densifiers have no VOCs; they will seal the floor, so additional sealers aren't absolutely necessary. A surface sealer will also wear out and require re-application in as little as a year, depending on how much use they see. Any sealer will be subject to etching as well.
For the cheapest floor: sodium densifiers are the most affordable, and they are the choice to make if you aren't polishing a floor to a final finish. Warehouses, garages, workshops for example, or an interior floor that will be covered by a flooring material.
You will probably find that residential floor finishers prefer to work with potassium or lithium densifiers for one main reason - the deeper penetration with sodium densifiers means that it will not be cured by the heat generated during burnishing. Instead, you have to wait 72 hours before burnishing it. That simple fact means a return trip for installers, whereas potassium and lithium densifiers can be burnished immediately, so they can finish a job in a day and not have to return 3 days later.
How to apply silicate concrete densifiers:
Of course you should read the manufacturers’ recommendations before getting down to business, but here are the steps to a finished floor in a nut shell:
- 28 days after the pour, concrete is sufficiently set to begin the finishing process.
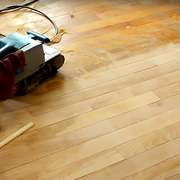
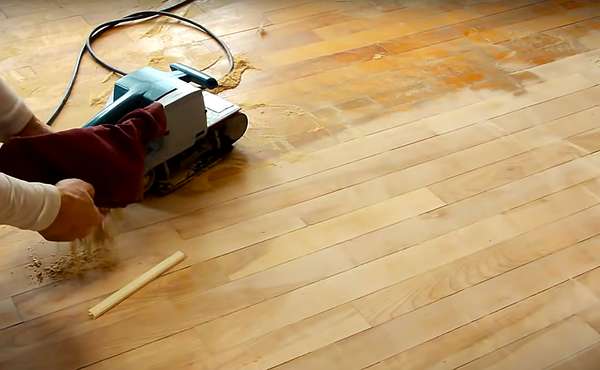
- If the floor is really out of level you can grind it with a 70-80 grit metal bond diamond abrasive to even it out, then continue through the grit levels to achieve the desired shine. Note: Only start as low as 80 grit if absolutely necessary as that will add a lot of cost. In most cases there is little need to start lower than 200 grit or go beyond 1,500 grit. Every pass costs you money in pads and labour. So don't get up-sold to a 3,000 grit finish by a charming contractor with lots of time on their hands. You probably won't see the difference in the finish but you'll definitely see it in the bill.
- Some manufacturers recommend applying the densifier after the first leveling pass for greater penetration, but there is a risk that it will be removed if there are many more grit stages remaining. Other manufacturers recommend waiting to apply densifiers until right before the final pass at the highest grit to ensure not too much of the product is removed. Use your own judgment here.
- After applying the densifier, squeegee or hose-off the excess material before you start burnishing it. The heat from the burnishing will cure it at the same time as it polishes and you can walk on it immediately.
Sealing cracks in concrete:
A certain amount of hairline cracks are natural; much larger than that could be an indication of a structural problem. First apply the densifier and see how it looks; the glass crystals should fill cracks up to .7mm wide. Any remaining cracks can be repaired with a cementitious filler, any excess will be removed with the grinder. For cracks much larger than that, install a backer rod first, and then the cementitious filler.
Alternatively, you can use an epoxy crack filler, but as they never completely harden, they have a tendency to leave a bit of a mess during polishing.
Choosing a final concrete sealer:
The first thing to remember is that you really don't 'need' a sealer, the densifier pretty much does that already. Adding a sealer means a lot more work for a bit more protection, but here we go anyway:
Concrete coatings (both densifiers and sealers) are for the most part alkaline in nature, while a lot of the foods we consume (coffee, citrus fruits, tomatoes, etc) are acidic in nature. So when these foods spill and are left for too long a period of time, the acids will neutralize the alkaline and leave etching on the floor.
When there is enough etching to get on your nerves, you can burnish the floor back to a nice sheen again. But if you remember that bit mentioned earlier about depth penetration and hardness - the harder the silicate crystal formed in the concrete by the densifier, the higher the sheen that is possible when the floor is polished or burnished, but the less times you can restore it.
Some concrete sealers are breathable and will let moisture pass through, others are not. If a concrete floor has no vapour barrier below it or if the concrete has not sufficiently dried, 'waterproof' sealers such as most epoxies are, can bubble and peel as moisture rises from below.
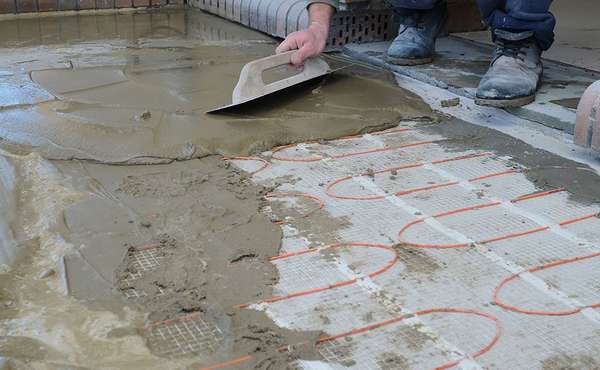
If you don't know if there is vapour protection under a concrete slab, be sure to use a breathable sealer. It's probably a good idea to go for a breathable product anyway, unless you are positive you have continuous and well-sealed vapour protection below the slab and that the slab has had sufficient time to fully dry. If you have in-floor radiant heat, running it after you pour will speed up the drying process.
Back to health issues again, remember that you don't absolutely need a sealer. It will result in a bit less staining if you spill something, but so will a speedy cleanup. The safest surface finish would be a wax with no toxic additives, and for the best results try to find an acidic-based wax as it will be less likely to react with the foods that may land on it. This will probably be a bit harder to track down; your best bet would be to check with janitorial-supply retailers.
Applying a concrete sealer:
Different products and manufacturers will have specific instructions for the application of their products, so we won't get into too great detail here. But the short story is - a day or so after completing the densifier, you can apply a final sealer. Normally you would just apply it to the floor and buff it with a high-speed burnisher and 3000-grit or hogs hair pad. A second and third coat can be applied if desired.

Now you know about what to look for when choosing between a basement, a crawl space or a slab on grade. Find more pages about sustainable construction below and in the Ecohome Green Building Guide pages.
Discover all the benefits of a free Ecohome Network Membership here - promote your business and get access to discount pricing on select building materials! |


Need for removing concrete floors, as previous owners applied the wrong product and the floor became toxic and hence the property unsuable. What is your advice and possible correcting the problem. Thank you for your response. EH.
Hi EcoHome! Thanks for all that you do. I have a passive solar home with a currently bare floor that I want to finish. It is basically a one-room cabin that is 18 by 24 feet, so the main room is high traffic. After reading your article above, I had some trouble understanding my options for sealing my floor. If I don't care about having a high sheen, could I just go with the sodium silicate for high penetration and lower sheen? It seemed that this choice is also economical. In your article, you recommend this for "Warehouses, garages, workshops, or an interior floor that will be covered by a flooring material." Is this because the low sheen floor could stain? While I do use a mat at my sink for comfort and to protect my joints, I don't want to cover all of the high traffic areas in this small room. One final question: Can I apply a silicate concrete densifier on the concrete floor directly underneath my woodstove? Thank you in advance for any assistance you can provide.
Kind regards, Colette