


Sanding and refinishing a hardwood floor, when is the best time to do it?
It may seem weird to say, but the best time to refinish a hardwood floor is before it shows severe signs of wear and tear. Hardwood floors and hardwood laminated or engineered floors are durable and can withstand a lot of traffic, but over time, they can start to show their age.
Scratches, dents, and fading are all indications that your floor may need some attention. However, it's crucial not to wait until these signs become too extreme. The more damaged the floor, the more sanding and work it will take to restore it, which can significantly increase the cost and time of the project.
Prevention is better than cure when it comes to wooden floors, and especially the ever-popular engineered hardwood floors. Recoating them before they need a complete strip, sanding and reseal is the best policy.
Refinishing your hardwood floor while it's still in a decent condition can extend its lifespan and enhance its natural beauty. A well-maintained hardwood floor can add significant value to your home. It's not just about aesthetics; it's also about preserving the quality of your investment.
Regular maintenance and cleaning, including periodic refinishing of your hardwood floors, can prevent more severe damage and help avoid the need for a complete wood flooring replacement. So, don't wait for your hardwood floor to scream for help; taking proactive measures to keep it in top shape is the most sustainable way to save money in the medium to long term, and, this guide is for refinishing hardwood floors and wood plank floors.
If your hardwood floor has holes, or parts of the wood laminate have started to separate and you need to replace boards, this is not the article you're looking for - this guide is all about the relatively easy renovation of wood flooring at a reasonable cost and that will give a return on investment of 1000's of dollars. So, with that understood, let's get into it...
Refinishing hardwood floors; sanding and careful preparation are the key
Refinishing hardwood floors or regular wood plank flooring costs a fair chunk of change & sanding wood flooring planks down yourself will definitely save money. Even an inexperienced homeowner can likely do a better job of sanding their wood floors than the lowest bidding handyperson who quotes on the job.
Once you understand the basics of wooden or hardwood floor refinishing, a decent quality final result on your beautifully refinished wood floor is more about patience than anything else, although our top tips on sanding will certainly help too.
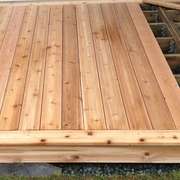
Ultimately though, once any ridges and loose splinters between boards are removed so you won't trip or snag your socks, it's all about aesthetics. Upon completion, your natural wood floor will be a work of art to show off and be proud of, clear of clutter or dropped coats.
Then your kids or your dog will come in and it will just be a durable, forgiving and warm wood floor again, something that you mop or vacuum once a week without much thought until the next time it needs refinishing.
Although, if you do sand down and refinish your wood floor yourself, we bet that you'll be insisting that outside shoes get swapped for slippers at the door in future, so that the new finish lasts much longer!
Before refinishing a wood floor, carry out these checks
Before attempting the refinishing of any wood floor, including hardwood, know what you're tackling first. Do you have old floorboards that have been covered with carpet? Are they good enough for sanding and finishing? Are you sure? Did you pull all the gripper rods off first that held the carpet in place - because sometimes they use no-nails AND nails, and that makes a mess as the planks often split when you try to get them off.
There's little worse than slaving over the perfect finish to your wood floor only to be hobbling around very shortly after when you scuff the floor with your bare foot one evening after a couple of pints and drive a splinter under a toenail...Trust me.
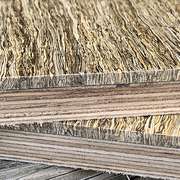
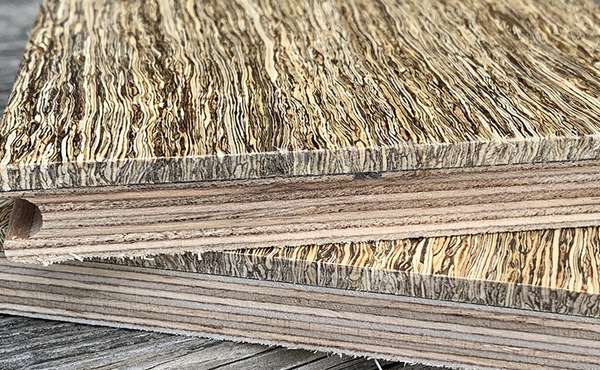
Is the hardwood floor for refinishing a solid or engineered hardwood? Some engineered wood floors can be sanded and refinished but not all. Generally speaking it needs a few thou of laminated hardwood surface layer before you should consider sanding and refinishing (maybe try a hidden area first, like inside the bottom of a closet).
If the floor is solid hardwood planks, congratulations, you should be good to go. But, one word of caution because I've seen someone try it, make sure your floor isn't a very realistic laminate, or a vinyl plank, before renting a sander for the weekend... that absolutely doesn't work.
Also, be sure to follow our top tips for DIY sanding wood floors yourself, or skip directly to how to refinish hardwood floors, below.
Floor preparation, the first step to the perfectly sanded and refinished wood floor
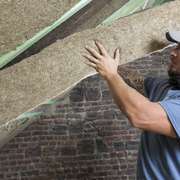
After all that, start by moving everything off the whole floor to be sanded, then sweep and vacuum everywhere, then mop it with a slightly moist cloth and once dry, vacuum it again, particularly around the edges. Ban everyone from the room, because the worst thing is getting a big lump of grit stuck in your sanding pad, disc or belt and putting a huge gouge all over the precious wood floor you're supposed to be making beautiful.
Then, get down on hands and knees, and if it's an old planked floor, very carefully run your hand over the entire floor to check for protruding nail heads or bits of grit stuck in the joints and to catch the odd splinter, because woodworking is all about learning to wear gloves.
Once you're convinced that your wood plank floor is suitable for refinishing, that it's immaculately clean, and when you have nothing better to do on the weekend (and want to save a few 1000$), it's time to decide what kind of sander to rent. But first, think safety!
Before sanding a wood floor yourself, safety first!
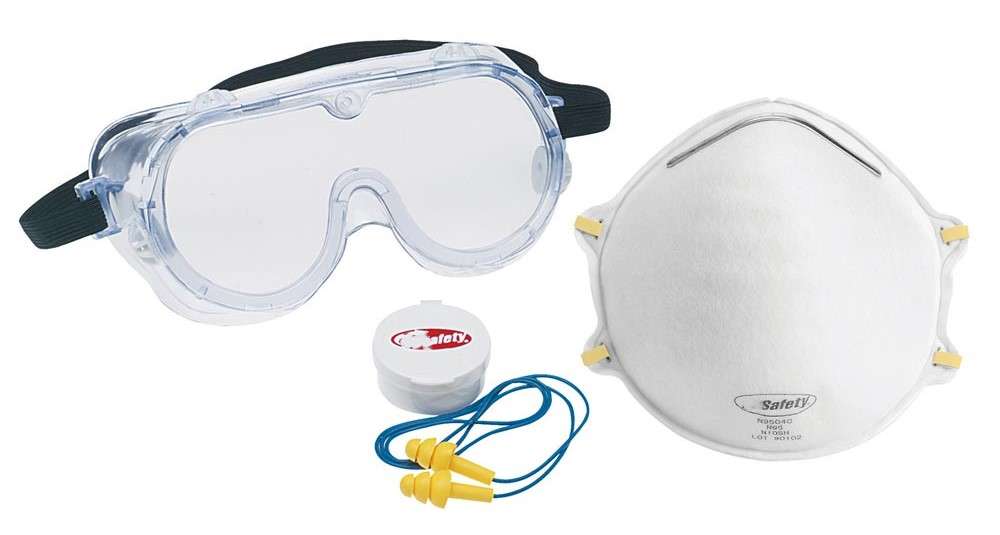
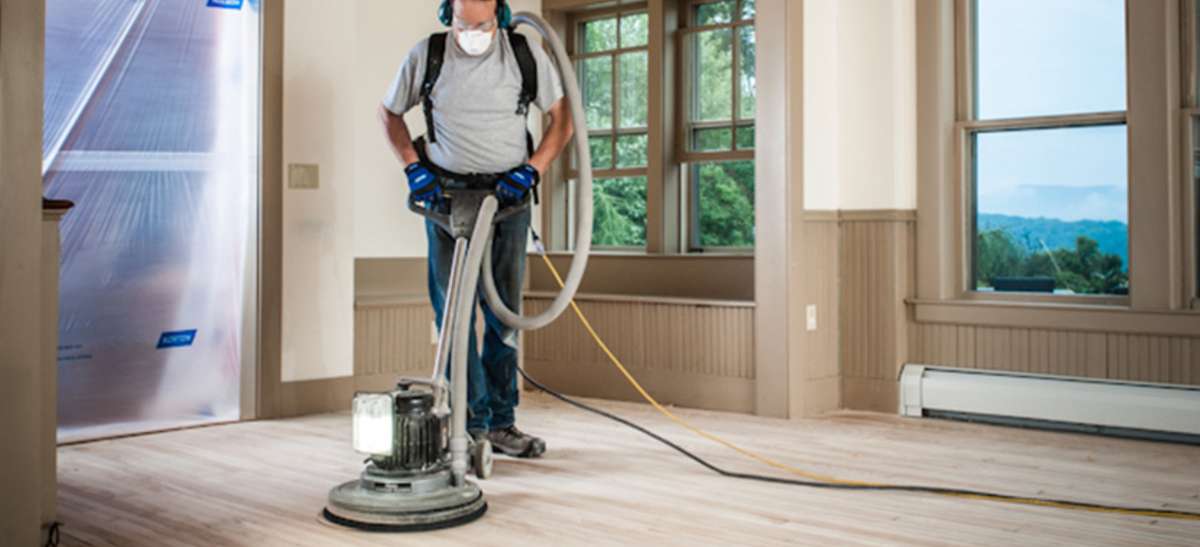
When you're refinishing your wood floors all these sanders are going to produce dust, and you're going to be using noisy machines - so ear protection is a must. Splinters are a definite probability, so wearing gloves is a good plan too. Eye protection is recommended, and a suitable facemask is essential unless you enjoy blocking sinuses with old toxic varnish and peppery wood dust that can also be pretty toxic depending on the type of hardwood.
While you're at it, you might as well get a couple of those disposable all-in-one's like on CSI, complete with the pull on booties for after the floor is all prepped to make sure you don't drag something all over it out of the garden.
Once you've got all that on, you'll be too hot, and/or nature will call - so you'll probably end up doing the job without protection and suffer for weeks after with sinusitis. It's not big, and it's not clever to ignore safety warnings folks - and now you can't say I didn't warn you... so on your head's be it!
Sanders for refinishing wood floors, the different types available to rent or buy
Step two in refinishing a wood floor is the process of sanding the floor down to even out the surface and remove whatever product is on there now. To do this, depending on the size and condition of the floor that needs attention, you're going to want to resort to some type of mechanical sander, or a combination of them, from the following choices:
Buffer Sanders
Buffer sanders, also known as a floor buffer or rotary floor sander, work in a circular motion, it's the same machine that is often used to polish and clean industrial and commercial floors. If you've used one in any other application you could give it a try, but sanding floors might not be the best place to learn. They have a very sensitive balance and will take off across the floor spinning wildly and wrapping the cable around your legs as they go if you don't yet have the magic touch. And if you even have to ask "do I?" - you don't.
If you decide you are brave enough anyhow, (really?) you will need to buy several different grits of paper and some cushioning pads. These are available at the rental counter, someone there can likely help you determine how many of each you will need based on the square footage of your job, but buy a few extra as they can usually go back.
This is a common practice, and you will be going back to return the machine anyway so there is no inconvenience or wasted trip - better to have too many pads than not enough - and catching just one proud nail in an old floorboard you didn't notice before, very quickly rips up a pad - which goes straight into the bin.
The pad acts essentially as a shock absorber, giving the sander a smooth ride and ensuring even removal of material. After a while (a couple of hours or so) the pad will become compressed and worn out and need to be replaced.
Installing paper and pads is quite easy. The paper sticks to the pad, you then just drop it on the floor (yes that's right, paper side down) then sit the sander on the pad which will stay simply due to friction and the weight of the machine.
The cost of hiring a buffer sander for stripping wood floors can vary greatly depending on your location, the duration of the rental, and the specific type of sander you need. On average, you can expect to pay anywhere from $30 to $70 per day. Some places may also offer weekly rates, which could range from $100 to $300. It's always a good idea to call local tool rental companies for the most accurate pricing.
Old sanding pads can be cut up and re-purposed into excellent floor scrubbers.
Vibrating Sanders
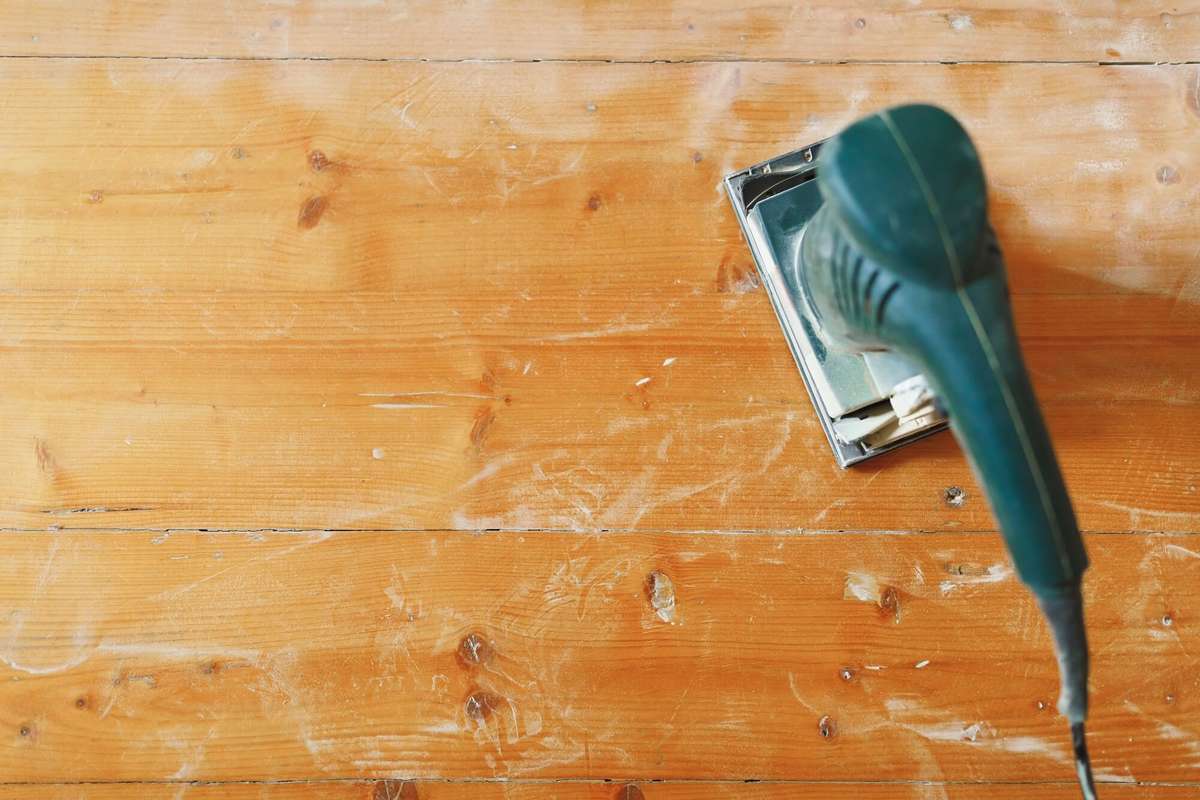
Vibrating sanders are the easiest to use and the hardest to screw up with. They can be square, circular, shaped like an arrow-head, and you can rent one at most major home building stores, and like with buffers, you'll need to purchase pads and paper. This is really you're best option if you haven't sanded floors before, but here's hoping it's just a powder room floor - seriously, it needs to be small for this option to work.
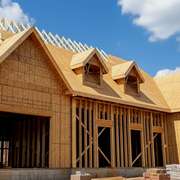
Both buffers and square sanders will come quite close to the walls, but you'll also need a small orbital hand sander to do around the edges. For new floors, keep in mind your baseboards will likely cover a good 1/2 to 3/4 inches away from the wall.
For using a buffer or square sander, the process is the same. You start with a really rough paper that will smooth out any ridges between boards and give you a uniform surface. From there each different grit of paper is designed to remove the ridges from the paper before so don't worry if the first pass leaves all swirly lines everywhere, they'll progressively disappear.
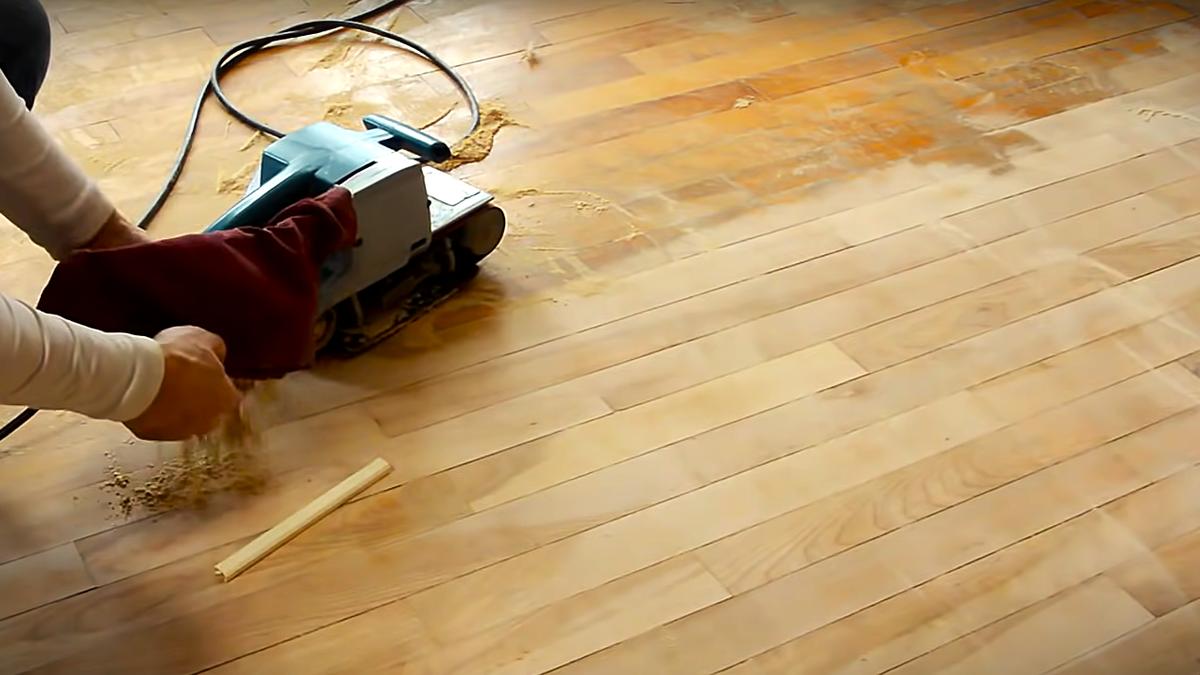
Belt sanders
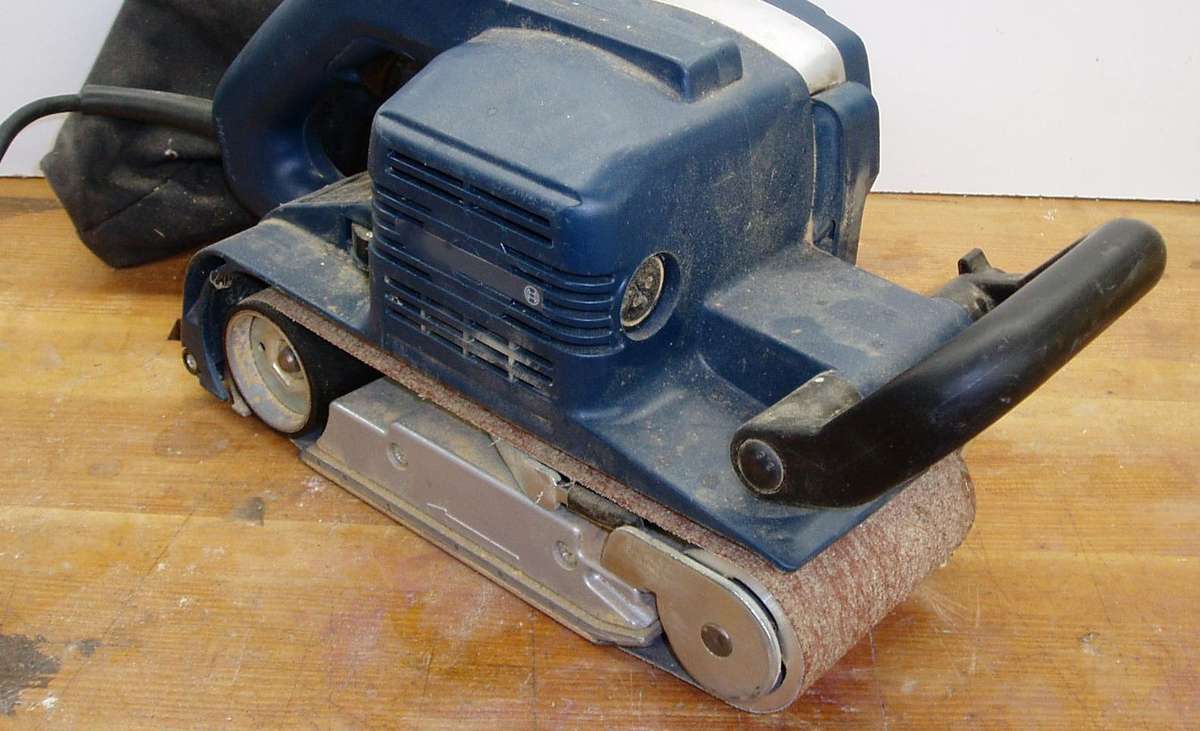
Handheld belt sanders are powerful tools that are essential in the process of refinishing wood floors. They are designed to remove material from the surface of the wood quickly and efficiently, making them ideal for removing old finishes and leveling uneven surfaces. The main strength of handheld belt sanders is their aggressive sanding capability.
They can remove old paint, varnish, and stains much faster than other types of sanders. Additionally, they are easy to control and can reach into corners and along edges where larger machines like drum sanders cannot.
However, handheld belt sanders also have some weaknesses. Their aggressive nature can be a drawback if not handled properly and kept parallel to the grain of the floor planks being sanded, as they can quickly gouge the wood, leaving deep scratches that are difficult to remove. They also tend to be quite heavy and can cause fatigue if used for extended periods.
In terms of cost, renting a handheld belt sander can range from $30 to $50 per day, depending on the model and the rental company. If you're considering purchasing one, expect to pay anywhere from $100 for a basic model to $250 for a high-end model. Keep in mind that the cost of sandpaper belts, which need to be replaced regularly, should also be factored into the overall cost.
Oh and one last tip! Make absolutely sure that the trigger has been released befor plugging your belt sander in, or it will set off like a demented personnel carrier across the floor and rip the power cord and maybe even the socket out of the wall...
Drum sanders
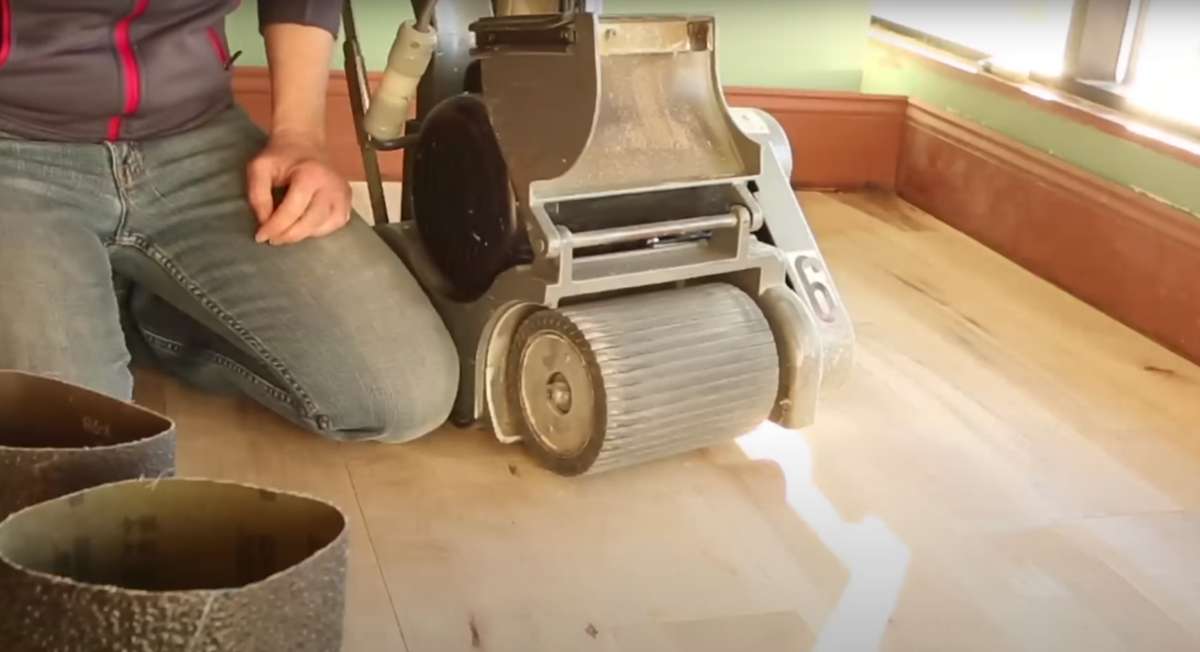
Drum sanders - oh boy, this is where things get a little different, and the stakes go right up. If sanding a floor for the first time was like learning to drive, choosing a drum sander for refinishing your first hardwood floor would be like choosing a stick shift instead of an automatic. With lots of hill starts, blindfolded and with Metallica blasting on volume 12.
Drum sanders have a rotating belt, and do a quick and relatively clean job in experienced hands. But they can be quite tricky to learn, and have a lot more potential for causing damage if you do it wrong. Like huge furrows, everywhere. Nightmare! If this is the machine you choose, make sure you start out in a place that won't be highly visible. Like the dark side of the moon.
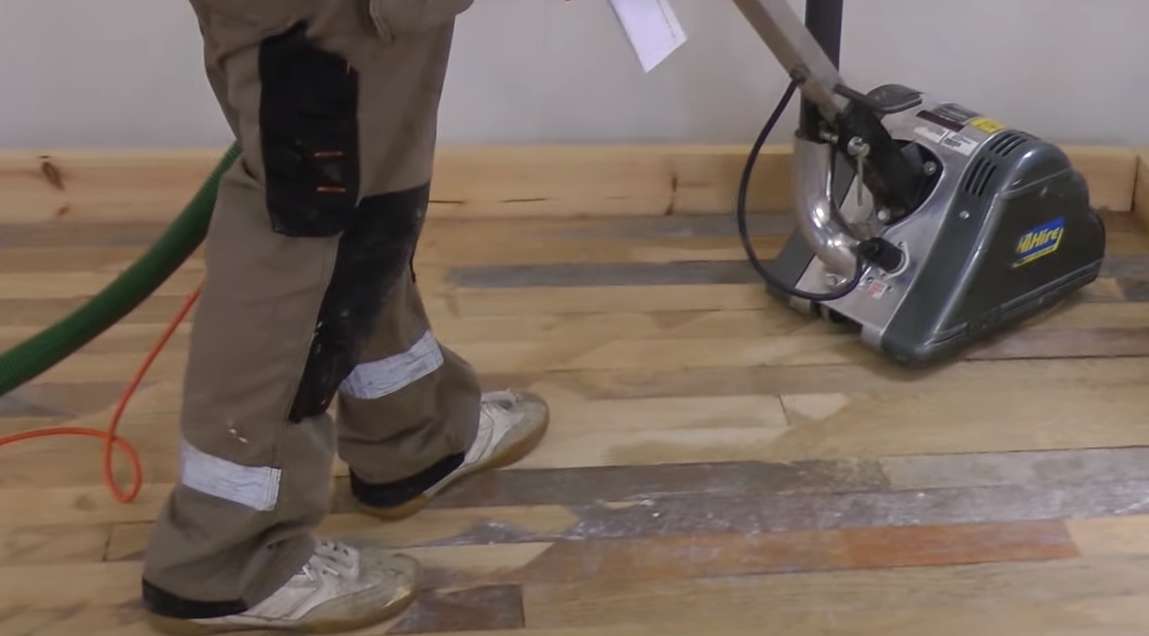
There are two types of drum sanders; tip sanders and lever sanders, both of which operate with sandpaper belts. Of the two you are most likely to encounter is a tip sander, as they are the easier of the two to learn and use, relatively speaking. They have two wheels that you tilt the machine back onto to change directions, whereas a level sander mechanically lifts and lowers the drum.
It's important to start the machine with the paper OFF the floor. Once you tilt it down and the sandpaper touches the wood, it will instantly start pulling you. This forces the operator to switch actions from pushing to pulling - usually eyes popping as you strain every muscle in your arms to stop it hurtling across the floor and through the opposite wall. These things are brutal, and pull your arms out of their sockets.
For all types of sanders (especially drum sanders), if you're hoping for any kind of a decent finish to your wood floor, it's important to keep the machine moving. If you stick around in one spot you will start to dig yourself a bit of a hole (literally) that will be hard to fix with the next grit. Very, very hard if it's a laminate and you grind right through it!
On average, you can expect to pay anywhere from $30 to $70 per day for a drum sander rental. Some companies may also offer weekly rates, which can range from $120 to $280.
Keep in mind that these prices are for the rental of the equipment only. They do not include the cost of sandpaper, which can add an additional $10 to $20 per day to your total cost.
Techniques for sanding wood floors
When carefully refinishing a wood floor, with whichever sanding machine you choose, be sure to go with the grain. And, after ever stage, do a quick look around to see that you've got all the scratches from the pass before. Papers will go in sequence starting at 36 or 40, then to 60 grit, 80 grit, 100 grit, and 120 grit. You can go up to 180 or 220, but before you do that, I'd think about hand sanding 2 sample pieces and putting some oil on.
If you can really tell the difference between a 120 and 180 then go for it. I'd do it for a paying client simply because there will be an initial nose to the floor inspection, but for my own floors I stop at 120 grit.
Once you've done a 120 grit pass, for a really smooth surface you can wet it (that brings up all the fibers) then wait for it to dry and do a quick pass with a 120 screen. The golden rule is that if you can see marks, swirls and scratches, keep going, move a grade finer, keep going again. Basically, if you can see it before it's finished, it will look ten times worse after you apply the final finish to your newly sanded floor...
Skipping a step might seem like a time and material saver, but it isn't. If you go from 60 to 100 grit and don't do 80, you will spend a long time trying to wear down ridges with a paper that is just too fine for the job and often clogs before it cuts the surface.
Really the only step you can feasibly skip in sanding the floor during refinishing is the initial paper you choose. If the newly installed floor is quite uniform, you may be able to start right at 60. How long you spend on a floor is really determined by how well it is installed and how long it takes on your first pass to get it to a point where you are happy.
The one thing that can really expose cut corners will be if you choose to stain the refinished floor. Floor stain will make any scratches and flaws a lot more visible, especially if applying a shiny finish.
And as I said, be sure to wear proper protection from breathing dust particles, especially if you are repairing older wood floors with a finish on them - and especially, especially, older white paint that might date before 1980. In the United States, lead was banned from inclusion in household paints in 1978 due to the serious health risks associated with its use, but as we all know, every older home has a few tins of vile old oil based and VOC heavy paint lurking in the shed or garage.
Small paper masks protect you a little, but not much. Despite being a sweaty pain to wear in hot weather, wearing a respirator is a really smart idea to protect your lungs, and the now famous N95 rated masks should be considered the minimum standard to wear.
Be ready with a broom and dust pan, and ideally a shop vac equipped with a hepa filter. Be sure to use vacuum attachements with soft bristles, hard plasic can leave lines across the floor. Also, if you vacuum with the grain, there is less chance of leaving any visible marks.
Get as much of the dust off as possible, if your floor is nailed planks make sure any nail heads are under the surface (as otherwise they tend to rust over time and leave stains. As well as ripping your grit paper as you're sanding, which soon gets tiresome and expensive.)
Refinishing a wood floor, after sanding, what's next?
So, the floor is sanded and clean, the weekend is over, your arms and back throb and ache, you're a few thousand dollars better off depending on the size of the floor you're refinishing, and you're half deaf, but hey - at the very least you now have a fun dinner party story to share and you'll really appreciate the professional you're going to pay to refinish your hardwood floor next time!
Now you know how to sand hardwood floors yourself and to refinish all wood floors. Find more pages about sustainable construction and how to reduce emissions on the pages below and in the Ecohome Green Building Guide pages.
Find more about green home construction and reap the benefits of a free Ecohome Network membership here. |


Did you use Rubio Monocoat's pure clear oil finish or a tint? If a tint, which one? Did the color change over time?
I used the "Oil Plus 2C Pure" which is the clearest offering. On application a slight golden tinge resulted, but not very strong. The floor I did was pine and i liked the slight colour shift as I did not use the UV block product so that I could enjoy a more natural aging.
Hello again, Your floor looks less matte than ours (we also used the 2C but with a mix of 2 parts pine and part cherry). Do yo buff it again after it was dry to give more sheen or use anything else? Thx.
I checked with him they did not buff it.
Just wax on wax off a la Mr. Miyagi.
You could certainly check with the manufacturer for other concerns, I've spoken to them a few times and they are quite helpful. I was so impressed with what I saw I used it on my new office floor which is 90 year old reclaimed pine and it looks amazing.
When I ordered it from the dealer, they told me you only need a single coat, but that I might as well do a second one. This turns out to be false, since it seals the wood on a molecular level, the wood will reject any additional oil. There is a second product available called 'refresh' for going over high traffic areas and damage.
We plan to do a product piece on this, so please drop us a line at info@ecohome. net and let us know how it turns out. It's not a common product in Canada, and we'd like to include more first hand experience.
For smooth surface like a dining table up to what grit I should sand??
Hi Stathis,
If you are building a new table you would probably want to start with a 100 grit then move to a 150 and finally a 220, but if you are repairing an older table and have to remove varnish or paint first, then you might want something even more coarse than a 100 to start with. And what sort of a sander are you using? A belt sander will remove material quicker, but there is a greater risk that you will damage it by causing grooves. I would propose an orbital for at least the final pass if not the entire job.
If you are not an experienced woodworker and don't have the tools already, this is a cheap way to get started on a DIY project and end up with a new finish on a table. The purchase cost of an orbital sander, paper and finishing material would for sure be less than hiring someone to do it; it's also fun, and you end up with a new power tool as well for your coffee table!
Nice article on preparation of wood flooring. Before reading this article I didn't have knowledge on sanding process. I have recently purchased the home and I want a proper finishing on hardwood floor. Thanks a lot.
This is a nice article to know about the finishing process of wooden floors. I have to install hardwood flooring in my bedroom and it's more expensive than I thought so this information will help me a lot.