


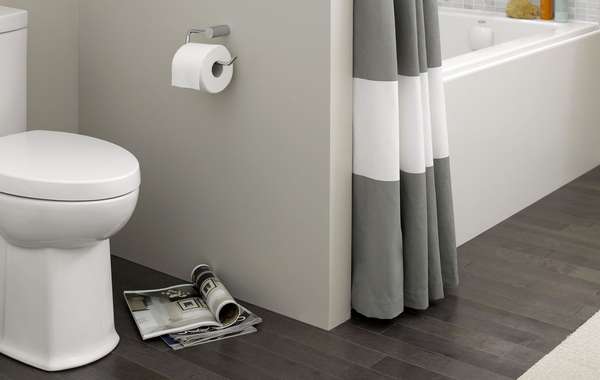
Why fix a leaky toilet flapper?
Another of the jobs that sat on my Honey-Do-List for quite a while longer than I care to admit has been to fix the leaking toilet flapper in the bathroom at the cabin - made worse by us being off grid and only having a relatively small amount of water available in our outside rainwater catchment tank.
Over this long dry summer, our water supply kept on running out, so we became very aware of how precious every single drop of water can be. But I confess, that the beach and yard chores during the hot weather were way more appealing than sweating away in the very warm house fixing a leaking toilet. So that toilet flapper left water running needlessly down the drain unless we remembered to turn off the isolation valve between flushes!
There is really no excuse for wasting clean drinking water though, even if you're connected to a seemingly endless supply of city water. I wonder how many of those who rely on the Lake Mead reservoir in Nevada have a leaking toilet flapper?
Lake Mead is one of several man-made reservoirs that store water from the Colorado River to supply drinking water to homes, irrigation for farms and hydropower to Arizona, California, Colorado, Nevada, New Mexico, Utah, Wyoming and parts of Mexico - a total of 40 million people in Western USA - and last summer it nearly ran dry. We can all do our bit to save water, especially as fixing a leaking toilet flapper can be really quick and easy.
A leaking toilet flapper can waste a lot of water
Until I looked it up, I didn't realize that a very typical old and leaking toilet flapper can waste up to 200 gallons of water per day. That could increase your water bill more than $50 per month if your water is metered. Even more astounding, is how much water a running toilet can waste and cost.
A running toilet where the flapper has failed completely can waste 4.5 gallons per minute, and that's nearly 300 gallons per hour, or 6,480 gallons per day. That could increase your water bill nearly $60 per day if you are on a water meter. Changing that toilet flapper suddenly seems like an even better idea and those drops of water are definitely worth saving!
I decided to do something about fixing our leaky toilet by changing the flapper to save us some of this precious rainwater in our recovery system tank for next summer's vacation.
What tools are needed to replace a toilet flapper?
At a minimum, to replace a leaking toilet flapper you're going to need some basic plumbers tools on hand, like plumbers grips, a screwdriver set, probably some rags, as well as safety goggles, gloves, ear muffs, and a comprehensive first aid kit and a tetanus shot (you can never be too careful!)
Seriously though, repairing a leaking toilet flapper is one of those "DIY easy fixes" that can get complicated really quickly if it turns out you don't have the right tool when you need it. So, if you don't have a fair selection of handtools already, or don't feel 100% comfortable around water leaks and hand tools, then maybe leave tasks like replacing a leaking toilet flapper to the professionals.
Otherwise, use it as a great excuse to go and buy some tools and give DIY home repairs a go - but don't blame me if it all goes pear-shaped, ok? If over 30 years in the construction industry has taught me anything, it's that home reno jobs, especially "quick repair tasks" rarely go 100% as planned. However, in this case at least, I'm pleased to report that toilet flappers are one of the easiest repairs I've succesfully accomplished, and here's how to do it:

Step 1 for fixing a constantly running toilet
Before even opening the toilet cistern, turn off the isolation valve underneath to save any water escaping unnecessarily or just in case you catch anything in there by accident during the process. Experience tells me this is a really good plan whenever renovating anything to do with plumbing - isolating a water supply 'just in case' is a lot easier than mopping up a mess or repairing water damage!

Step 2 - check that the toilet flapper is the reason why the toilet is running and leaking
To check whether the old toilet flapper is the problem, carefully take the lid off the cistern (this is an older lever-operated flush pictured below) and ascertain that the flapper is the problem. The first thing to check when you remove the lid is the water level, as sometimes if the water check valve is faulty or has grit or debris stuck in it, the cistern overfills and runs down the middle of the water outlet tube.
If the water level does seem high, then check that the water fill valve is working properly, and that it actually shuts off when the right level is reached and before it overflows. Having checked that, and seeing that the water does shut off, then proceed to check if the flapper looks to be in good condition and that nothing is impeding the chain or lever preventing it from closing properly and sealing the hole.
I reached in and carefully pushed down on ours, and immediately the water stopped running into the bowl. Then when I released it, the running water started right back up. Forensic work completed - time to change the toilet flapper then!

Step 3 - check the size and type of toilet flapper
To replace the old toilet flapper, you're first going to need a new toilet flapper of the right design and size. The way to check is to carefully take the lid off the cistern, which is easier with an older lever operated flush than the new double flush models, and measure the flapper width as well as the total width from the center of the mounting spindles to the exterior edge of the flap.
Looking in the cistern above and below - I removed the float arm to get easier access to the flapper. Also, you can see our way of reducing the amount of water in a flush - we had placed some round beach rocks in the bottom to reduce the total volume of water it holds.
Older toilets (as in the ones more likely to need such repairs) often consume far more water than needed per flush, so taking up space in the reservoir with rocks, or a brick perhaps, can save a lot of water per flush. If you find the toilet is not flushing well with rocks to take up volume, then use a smaller rock to leave more water. Just make sure they don't interfere with the flapper mechanism or the float arm as this will prevent the toilet functioning correctly.
Once you have the correct flapper dimensions it's time for a trip to your local hardware store - which is always my first choice, or you can find new toilet flappers on line here.

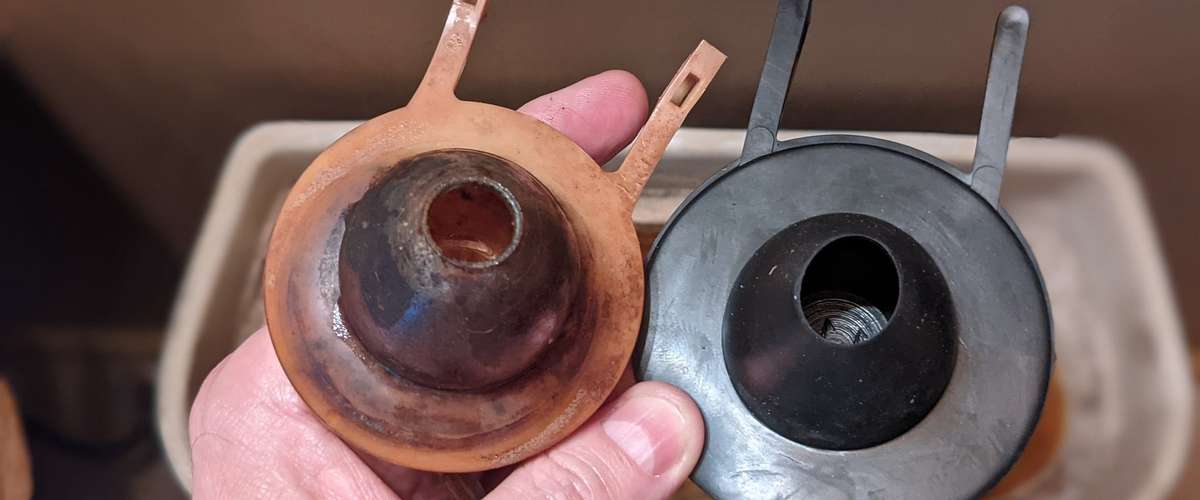
What I realized with our toilet flapper, apart from it's very old and perished condition, was that it was warped, so I could see the outer edge of the valve seat past the edge of the flapper. This was probably a good part of the reason why our toilet was running constantly with the refill valve going on and off as the level fluctuated.
Step 4 - remove the old toilet flapper

Removing the old toilet flapper takes a little dexterity and care, as the arms need to be twisted off the plastic carrier arms. Holding the end of the arm firmly, bend the rubber outwards and twist it around the end of the arm it is clipped on. I was advised that these can sometimes become hard and brittle, in which case run some hot water over them then squirt a little dish soap on to help them release easily.
Most of all, resist the temptation to force anything or to use plumbers grips on it as if you break off one of those skinny little plastic arms it's game over for your toilet valve and that 5 minute DIY repair job I promised just turned into a two hour long DIY nightmare. Worth mentioning, these flappers can be squirmy! It felt like I was wrestling with a small squid, and with the slime and residue in the cistern I wouldn't say it was one of the most pleasant tasks I've tackled.

Once the old flapper is removed from the toilet cistern take a good look at it to see if the reason for it leaking and running water is apparent - which on this one it was.
With my suspicions confirmed, I could clearly see where the flapper barely covered the edge of the sealing seat and allowed water past. Feeling reassured, I also compared it to the new replacement flapper seal I had purchased from the fabulous Lilani at our local co-op hardware store - and exactly as she had said, the new one was slightly larger to allow for different seating and better sealing all around. (see below)
As per the suggestion in our comments below, I would also suggest smearing /coating the entire surface of the new flapper with plumbers grease as the chlorine in water will slowly harden and deform all flappers, but plumbers grease will repel the water and extend the life of a rubber flapper.

Step 5 - replacing the toilet flapper with a new one
The new toilet flapper was even more flexible than the old one, and as there was still a little dish soap on the holding arms it slipped into place really easily. So easily in fact that I was a little doubtful it was going to even hold!

All the same, I carefully put all the mechanism back together and turned the water back on to let the toilet cistern fill back up. I held my breath - so far this seemed almost too easy...

Much to my relief, the new flapper sealed perfectly, and the toilet was no longer leaking. I fitted the float back into the toilet mechanism by screwing the lever back into the valve.

Step 6 - adjust the water level in the toilet if necessary
I decided that while the cistern was open as I was replacing the flapper valve that I would check the water level, as it is easy to change the amount of water entering the toilet.

These two adjustment screws are easy to turn, which release or add pressure to the water inlet valve that the rising float exerts on the membrane inside and that operates and seals the valve.

The water level in the toilet was set a little high, but it only took a few turns of the screw to get the level adjusted so the stop valve turned off sooner.

Step 7 - test the toilet flushes and seals correctly
So, now that you've finished your DIY fix for a leaking toilet flapper, it's time to turn the water back on, to flush the toilet, and to check for any drips or leaks. I always recommend checking around carefully after carrying out any plumbing work.
As I mentioned earlier, nothing causes more damage in a home than water dripping where it shouldn't be, which can include inside walls in the case of air leaks with interstitial condensation, or under windows where cold weather and high humidity causes condensation.
If everything looks good, the toilet flushes as it should, the flapper closes down smoothly and you've fixed the running toilet, then it's time for a pat on the back. Your leaking toilet is finely fixed!
Tools should now be cleaned and dried off and all put neatly away ready for the next DIY home reno job... because once you're comfy on that couch with a celebratory beverage, if you're anything like me it won't get done until tomorrow, (if at all). Unless you can bribe one of the kids with some extra allowance that is...
If you have any helpful tips to add, or comments about this Ecohome guide on how to fix leaky toilet flappers, please post them in the comments section below. Stay safe out there!
Now you know more about how to fix a leaking toilet flapper and why it's important for water conservation. Find more pages for DIY reno guides and sustainable and resilient green building techniques here :
Find more about green home construction in the EcoHome Green Building Guide pages and if you would like more DIY reno articles like this, then sign up for a free Ecohome Network membership here. |


before i replace a flapper, i will smear/coat the entire surface of the new flapper with plumbers grease. chlorine in water will slowly harden and deform all flappers, but plumbers grease will extend the life of a flapper.
That seems like a sensible tip, especially as I bought a big tube of the stuff it may as well be put to good use - thank you I will add this to the article.