


Permeable pavers or paving stones are best for driveways and paths
Gaining an understanding of the importance of stormwater management may steer you towards a design and product choice in interlocking paver stones, which will help you retain and manage stormwater that falls within your property.
When patios and driveways have stones tightly joined and sealed at the joints, water has no ability to penetrate the ground below. It will then either need to be directed towards permeable areas, find its way towards sewer systems, or remain on any flat surface where it will simply pool up and be left to the mercy of a hot sun and the natural process of evaporation. Waiting for that to happen is a bit more speedy than watching grass grow, but not much. So, aside from the ecological impacts that come with an impermeable world, you may need rubber boots to barbeque your dinner on an otherwise lovely evening.
Permeable paver stones allow water to flow down between the joints of stones and into the sub-base drainage layers, where water is stored until it is eventually absorbed into the soil below.
Unlike pavement and poured concrete, the natural expansion joints of paver stones make those surfaces somewhat flexible, so they are rarely subject to cracking due to the freeze/thaw cycle of the seasons. They are great for maintenance as well; if a stone is damaged or stained you can pull it out and replace it. So, it's not a bad idea to keep a few around at the end of a project in case the particular design you chose was discontinued.

How permeable pavingstones work:
For the most part, the 'water-permeable paver stones' you will see and read about are not actually porous and don't absorb water any differently than conventional paver stones, the permeability comes from creating a larger space between them to allow water to drain through. To that end, the stones have bumps on the side that create a natural gap between them, allowing water to pass through to the various layers of stones below.
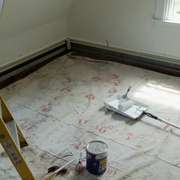
Preparing the site:
You first need to remove the layer of top soil and organic material, which will often be about 6 inches deep before you get to the mineral base. You need to compact that, then add a geotextile to keep the added stone layers separate from the natural ground but still let the water flow through.
Creating a permeable reservoir base:
Fully saturated ground cannot always keep up with the rate of falling rainwater, so in order to keep a solid base and avoid runoff, what you effectively need to do is create a water reservoir underneath the final surface of paving stones. This is done by adding at least 6 to 8 inches of 3/4 inch clean crushed stone as a base for walkways, and between 12 and 18 inches for patios and driveways.
Creating a base for laying stones:
There are different ways to do this, and each landscaper will have their preferred method that they stick to. However you do it, you just need to stick with the underlying principle of creating a base of materials that water can pass through, and enough of it that it can store water until it is absorbed into the ground below. This means clean stone of various sizes (bigger on the bottom, smaller on the top), leveled with a plate compactor.
Some installers add a layer of sand at the top (1 to 1.5 inches) to help set and level the stones, that is more common when the final surface will be sealed. With permeable surfaces that sand can wash through to the layers below. You may be best to stick with stones at this point, if you plan to use sand you would be wise to include a geotextile separating the sand from the stone so it doesn't wash down.
Filling the joints:
Here is where you really need to make the call that you are going for a permeable surface or not. If you fill the gap between the stones with something that isn't water permeable, then it won't be - you guessed it - water permeable. Interlocking paver stones will often have sand in the joints with an additional polymer to prevent weed growth, but that amounts to waterproofing the joints. If weeds can't come up then water can't seep down.
To maintain permeability at this point, you'd want to go with either pure sand in the joints, or pea gravel, which as the name suggests, is gravel about the size of peas. This will fill the joint but still allow water to flow through and inhibit weed growth, though nature is pretty adamant so you'll get some eventually.
The conversion to an organic state is very much slowed by the use of pea gravel, but over time sediment will build up and allow weeds and grass to eventually take root. Before you run out and buy a hazmat suit and chemicals, it's easy to take care of tiny new shoots either by pulling them out by hand or by pouring boiling water on them.
Laying concrete paver stones in a pattern may seem pretty easy at a glance and tempt the DIYer in all of us, but in order to create a patio or laneway surface that will stay flat, you need to do a really good job on the drainage layers below. So it's maybe best to hire a professional if you don't have experience yourself and if you're picky about having a really uniform final product. Proper drainage and a level base are essential for attaining an even final surface.
Paving slabs colour and the heat island effect:
Temperatures in dense urban areas can be several degrees higher than nearby green spaces due largely to heat being absorbed and released by concrete and asphalt. We all know a black car will be hotter than a white car on a sunny day, the hard surfaces of your property will react in much the same way. Light coloured stones are more reflective than dark stones, so a dark coloured patio may be noticeably hotter than a white one.
As an aside, If you are building a home hoping for LEED certification, there are points waiting for you when you build permeable hard surfaces, but also for choosing lighter coloured stones. Stones are rated with the solar reflectance index (SRI), which is a measure of the ability of a constructured surface to reflect solar heat, measured on a scale of 0-100, with 0 being white and 100 being black. LEED points are awarded for surfaces with an SRI rating of 29 or under.
Other permeable paving options:

There are also stones designed to let grass and ground cover grow through, this is really the ideal world for marrying the natural environment and a laneway. Rather than trying to inhibit growth, this invites it.
If you like the look of a more organic and natural environment then options start to open up in terms of both design and materials, and the DIYers will be happy because this falls more into the category of 'art' than 'geometry' and we're all good at art.
We found some instructional videos at Oaks Landscape products that may help you with a successful install as well as understand the concept of permeable lanscapes in general. Below are a few photos of different styles of stone work that may offer you some ideas and inspiration - Or go to our Guide about Rainwater Management and permeable landscaping pavers for paths and driveways Here.


Now you know about water permeable landscaping, find more pages about about sustainable green building in the Ecohome Building Guide and in these pages :
Sign up and learn all about the benefits of a free Ecohome Network Membership here! |


Great information! Very detailed.
Great information on water permeable landscaping surface. Very Insightful. You can also read to know more about
Where can I purchase permiable pavers? Or any of the other products mentioned?
Here is one company we have listed from whom you can buy permeable paver stones , but it really depends on your location. This isn't something you want to be paying to have shipped from long distances. So I would try looking for terms like permable patio stones, paver stones etc, and the closest major city so you can find something local.
Just remember, that you need to make sure your baselayer is made of the correct materials, especially if you have a lot of clay in the ground.
How close can permeable pavers be installed to the foundation of a house?
Is there a barrier that can be installed between the permeable pavers and house foundation?