


How to stain or paint an old cedar deck to make it look new and last longer.
Staining or painting an old weathered cedar deck can be quite different than staining a new one. First, pressure wash the deck to remove the old gray color and all the build up of grit and stains. Try to always blast the water with the direction of the grain or you will end up having to sand it all too. And, the bigger the deck, the bigger the sanding job will be so its worth taking the time to be careful.
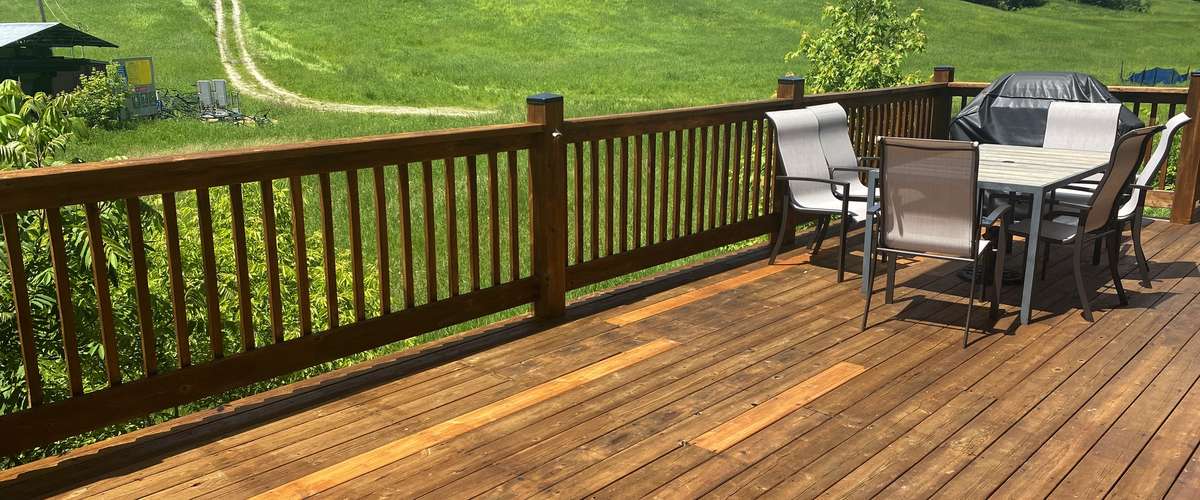
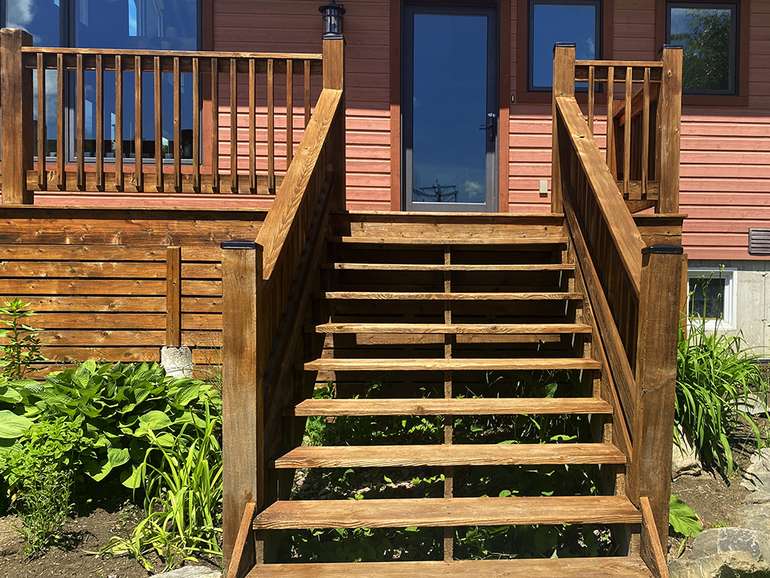
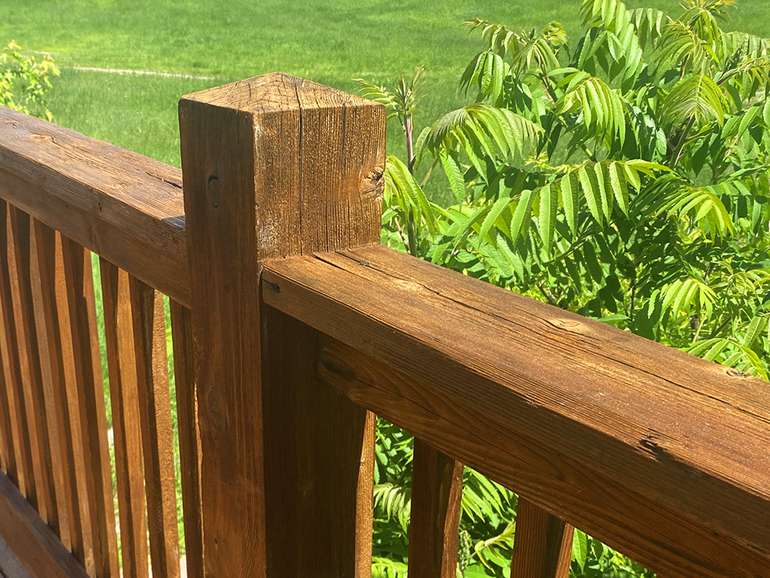
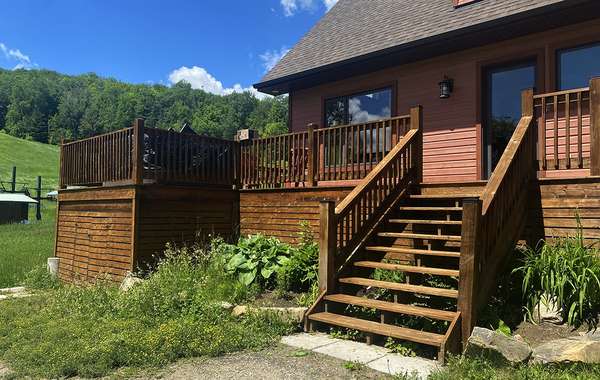
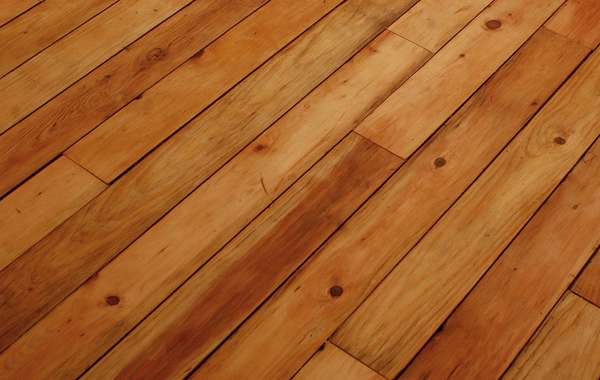
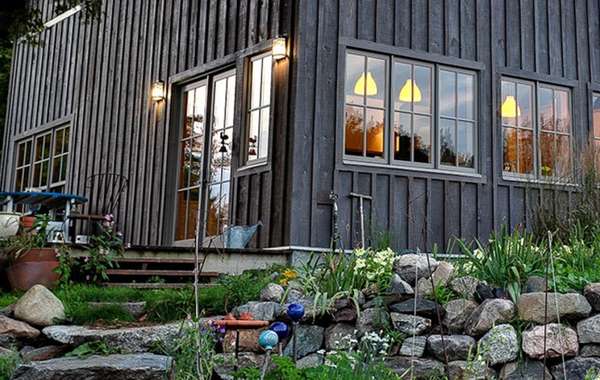
As you can see in the before and after deck reno photos in our deck cleaning and renovation guide here and below, this deck looking like it was ready to be replaced, and ended up looking (almost) as good as new with likely another 10 years or so until it will need more work.
We would recommend keeping on top of your deck staining rather than leaving it this long if you like the red cedar look, by doing so you will keep the wood protected as well as likely avoid the power washing stage.
There is one important difference between staining an old cedar deck rather than a new one that we should point out first - old wood that has seen years of weather will absorb a lot more stain than new wood. The area a container will cover should be on the label, so measure the deck and calculate what you’ll need considering the age of the wood and add a decent margin for error and it being an older weathered wood deck.
Another suggestion we would make would be to see about buying more stain than you need as long as you are able to return it. It’s difficult to accurately estimate the required quantity of stain for old decks, and going back to return cans of deck stain would be preferable than running out and hoping you can find more of the exact type and color of stain that you've just coated 90% of your old deck boards with. The other thing is, for the new deck stain to be durable, it needs to have a thick enough layer applied, which is why the general recommendation is to apply 2 coats of new stain.
The first coat of deck stain on freshly cleaned older cedar decking planks seals the weatherd wood, and the second coat is what gives it lasting water resistance and UV protection. The second coat of deck stain goes on quicker, uses a lot less product and comes after hours of pressure washing and sometimes scrubbing and sanding. Putting on a second coat - if that's what the manufacturer recommends - is a small price to pay for extended peace of mind and enjoyment of a better looking renovated deck.
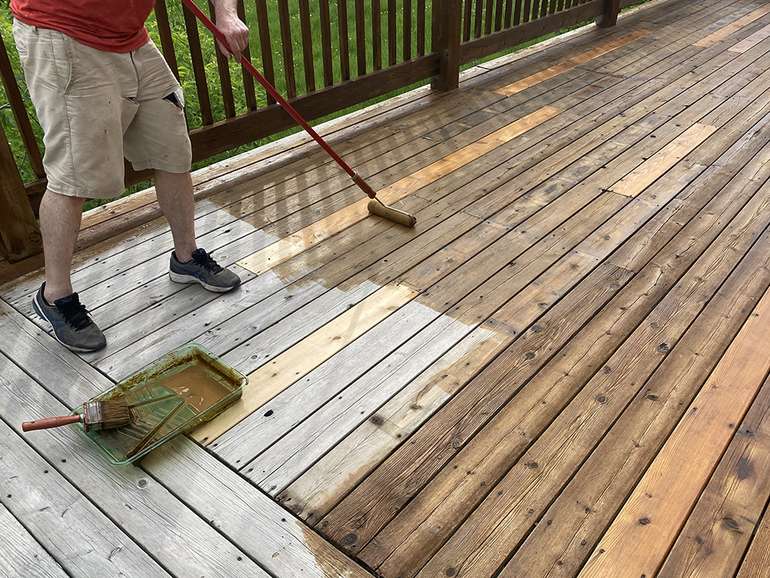
Deck stains can be applied in several different ways. Using a pump-up garden sprayer and roller are two popular methods. Regardless of how you apply your wood stain, keep a paint brush at hand for smoothing the material as well as getting between the cracks between deck boards. To see a selection of very low VOC deck stains, sealers and tools online, see here, and Ecohome may get a commission as per usual if you choose to buy some*.
Choosing a stain color for your deck
As we mentioned, since old wood will absorb much more stain than new wood, any color you choose will appear darker on older deck boards than new ones. Before you commit to a color for renovating your weathered cedar planks, we would suggest you pick up a few samples of deck stains - especially if it's a pretty big deck like the one we photographed for this article. You should be able to find very small cans of deck treatment to test, and some companies even have tiny sample packs of stain for exactly that purpose. To pick the perfect stain color you like when renovating your deck, remember to go slightly lighter if it's old wood.
If the cedar wood planks are still structurally sound but really badly stained, or have had paint or stain on in the past and so are flaking or patchy, then you have a whole different set of choices to make. An opaque deck stain then becomes the only practical option if you want the deck to look like new and be evenly colored.
Lighter colors will make a deck area look more modern, but on a traditional type exterior, we'd probably suggest choosing a deck stain color that compliments yet contrasts with the finish on the house walls and trim.
Bear in mind if the deck faces full south or gets a lot of sun, that a darker deck color can make it very hot in summer, and can cause premature deck stain failure, so choose wisely. Bottom line, there's no right or wrong choice in decking stain color choices, it's all down to personal choice - and if an opaque stain is the only way to renovate a deck to keep it looking good for a few years, rather than have to remove all the decking planks and starting again, then it's a good option.
Is oil stain better than water based acrylic deck stain for finishing decks?
Choosing which is better between water based and oil based deck stain is not a cut and dry issue. Different manufacturers make different claims as to the durability, and endless experts weigh in online extolling the virtues of both. So rather than continue to muddy the waters by making claims about which type of deck stain is better, we will stick to what we pretty much know for sure.
The manufacturing of oil stain pollutes more, they are higher in VOCs, more toxic to work with, more toxic to humans and pets while they cure and off gas, more difficult to clean up and they take longer to dry. Will an oil stained deck last longer than water based? Some say yes and some say no, so we tend to lean towards protecting environmental and human health when given the choice.
Also, as we just had the experience of a next door neighbor sealing their deck with an oil based stain that basically meant their (and our) back decks were out of bounds for close to three weeks because of the fumes off-gassing, we would personally recommend sticking to the water based acrylic deck stain.
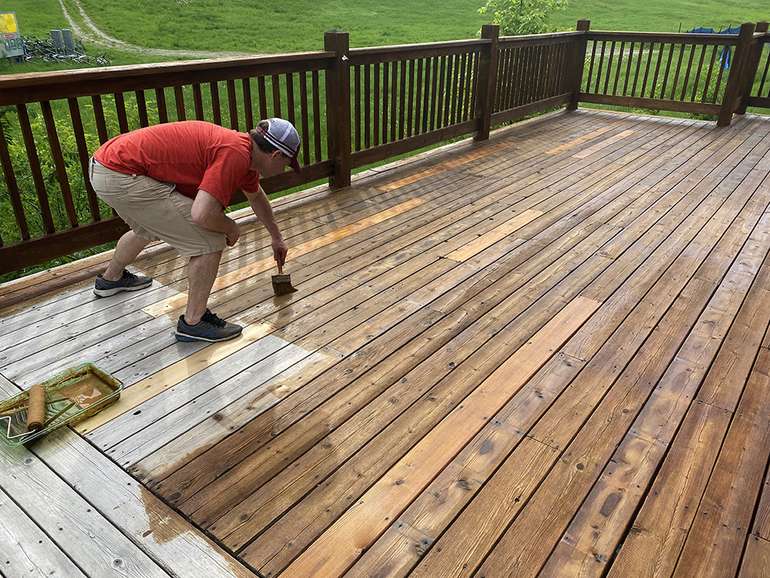
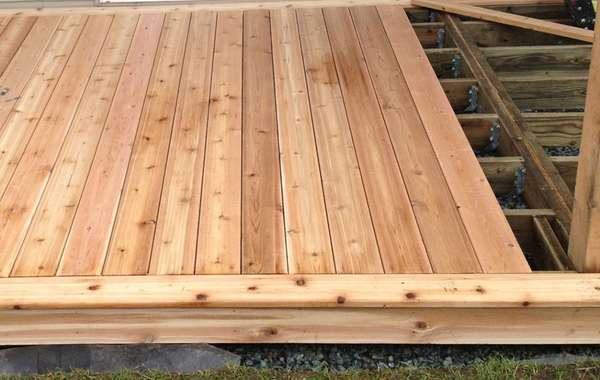
The images in this article are of a 15-year-old red cedar deck that was originally never treated and for this repair it was just pressure washed and stained. A water based stain was chosen, and only one coat installed.
For an untreated deck to be restored to this look after 15 years is an indication that pressure washing and staining an old cedar deck will significantly rejuvenate it and almost make it look new again. That's really a thumbs up for natural red cedar as a superior decking material, and speaks volumes for how durable this option is. In our opinion the extra cost over what you would pay for basic pressure treated pine decking boards - especially if you like the look of natural red cedar and are intending staying in the home for a few years.
Protect against toxic fumes, especially when staining an older deck
Whether you choose a water based or oil based deck stain, it is still best to wear a full-face or half-face respirator suitable for organic fumes such as a P100 filter when staining an older cedar deck as you're going to be using much more treatment products. This is most important when using oil based stains, but wise even with water based acrylic deck stain. Wearing safety glasses will protect your eyes from mist or droplets spraying from brushes or rollers. To further reduce your exposure, notice if there are any prevailing winds and try to stay up wind of the stained areas. Think of it as self preservation, at the same time as preserving your deck!
When should a cedar deck be stained?
The first variable to consider when finding an appropriate weather window to stain a deck, is the manufacturer’s recommendations for temperature range and drying time and that should be listed on the can. But in general, for proper penetration and even color, a deck should have a few days without rain before staining and ideally a few days after. A bit more time with oil based stain as it takes longer to dry, but predicting the weather is an inexact science.
For a little dose of reality, while this deck staining job was planned as best as possible, it rained slightly the next day, yet the finished images taken days later show no signs of damage from that light water exposure.
What is the best temperature and time of day to stain a deck?
Staining a deck in the sun on very hot days can lead to it deteriorating quicker over the long run, so best is not to do it on days of extreme heat. The ideal conditions are when ambient surface temperatures stay between 10°C (50°F) and 32°C (90°F) for 24 hours after staining. In the summer, morning and evening are best when the deck surface isn’t as hot. Deck stain is also best applied when the relative humidity is between 40% and 70%. Too low and it can dry too fast, too high and the humidity could affect the gloss and the extend the drying time.
Keep in mind, getting it done is better than not doing it, so if you have a weather window without rain and you need to stain through the day, then don’t lose sleep over it if you are close to the ideal situation. Waiting for the perfect conditions of sun, temperature and humidity, along with a time you can spare to do it, may simply not be possible and weather forecasts are not always perfect. If it gets too hot or it rains too soon after staining, the world will not stop spinning and your deck will not spontaneously combust so don’t sweat it.
When it's really hot, it's a good idea to wait untill later in the day all the same, as otherwise you're going to dehydrate, burn and generally suffer from applying the deck stain quickly enough for it not to drag - and you're going to be breathing in the fumes while you're doing it.
Can you stain a cedar deck with a roller?
Yes, you can stain a deck with a roller, you can also use a mop or a pad. This deck was stained using a roller, and for the best results a thick and absorbent roller was chosen than holds a lot of stain. A roller will not get in the spaces between boards however, so best is to progress about an arm’s length at a time so you can swipe a brush between the boards to properly coat the edges. Rollers, mops or pads work fine for the decking boards themselves but a brush is more suitable for staining decking railings and spindles.
What kind of brush is best for staining wooden decks?
For the best results when staining an older cedar wood deck, use a synthetic bristle brush with water-based stains and for oil based deck stains, a natural bristle brush is better. Be sure to apply with long even strokes along the grain, then turn the brush sideways to get down into those gaps between the decking boards.
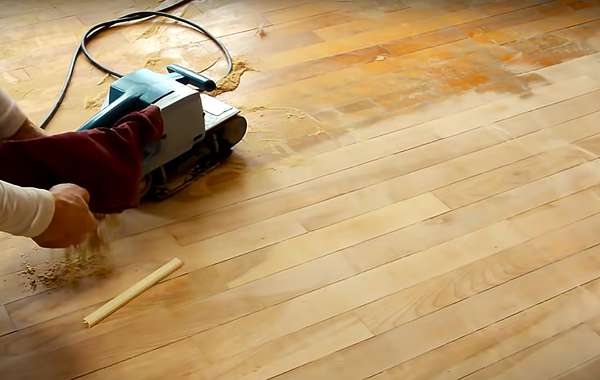
Should I sand a deck before staining?
If you pressure wash an old deck, you don’t necessarily have to sand it. Really it depends on the deck, the condition of the decking planks, and the quality of job that was done during pressure washing. If you were careful to go with the grain when pressure washing the dirty weathered deck boards, it would not raise too many fibers, and likely not need much sanding down after cleaning. So it is a judgement call really. Consider how much time and effort you are willing to spend on it and how picky you are about the final finish.
As is often the case, we recommend trying a small patch first to test your methods. In an area that isn’t too noticeable you could stain a small portion that is sanded and a one that is not. From there you can determine if it will be worth it to you to add that extra step of sanding.
In the case of this deck, only the railings were sanded since they will be touched by hands. But, at least, we suggest looking over all the decking carefully to see if there are any potential areas that will cause slivers in bare feet and sand those spots for sure.
An orbital palm sander is good tool to buy (the price depends on brand and quality). It can improve the looks of the deck and add a handy home repair tool to your collection. A sheet of sand paper and a block will also work fine for deck railings and balustrades if you prefer, though it will take more time.
How long should I wait between coats of deck stain?
If you plan to do two coats of stain when renovating your cedar deck, it’s best to go with the manufacturer’s recommendations on the can. But in general, you should wait at least 4 hours between applications and avoid staining at midday or in direct sunlight. Depending on temperature and humidity, allow 24 - 48 hours of drying time before using your beautifully restored deck or porch, and if you did decide to go with oil stain, expect for it to smell really badly and make everyone around feel ill for a week or two...
How long after staining a deck can you walk on it?
As mentioned above, wait at least 4 hours to do a second coat of deck stain, but give it 12-24 hours if you can. Usually, 48 to 72 hours of curing time is recommended before you replace furniture and begin full use of your deck. Generally speaking, the more time and care to get everything right before applying stain, the better the result. And the same goes for giving the deck stain sufficient time to harden properly before using it.
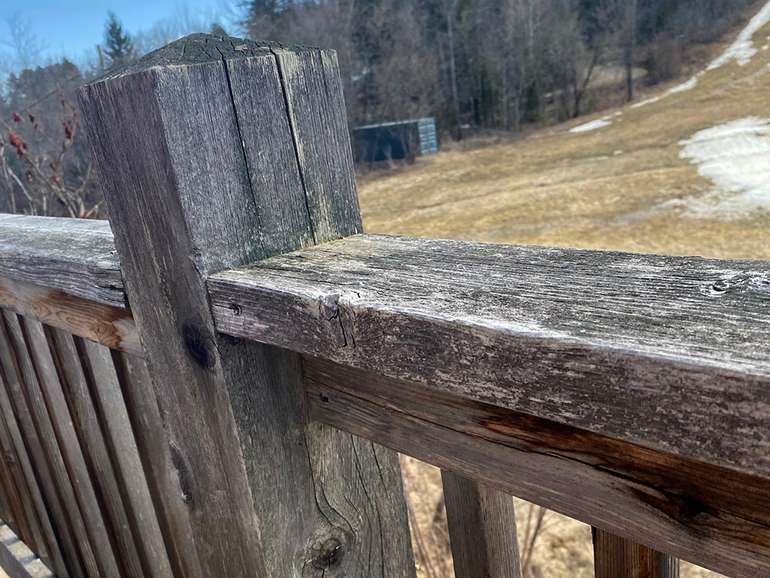
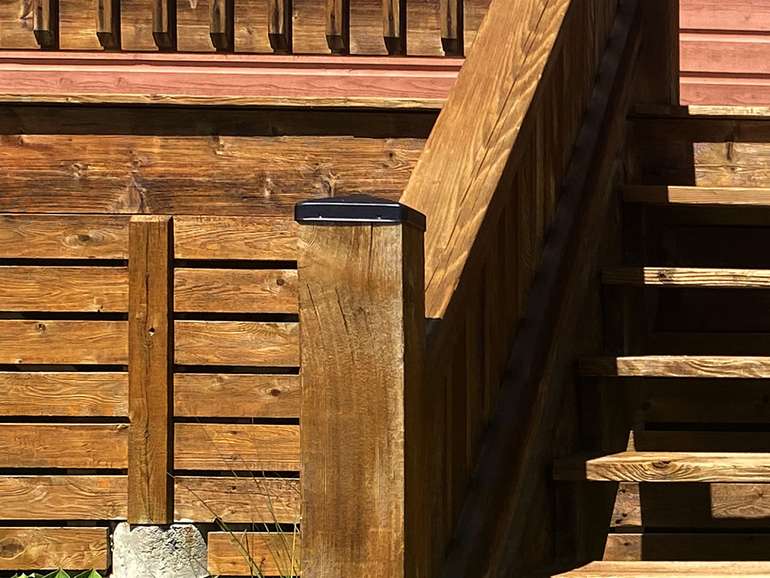
Install metal caps to protect deck posts
The cut end of wood is the least resistant to rot, and particularly the posts as they are upright and completely exposed. Cutting angles on the tops of deck posts is better than leaving them flat, but installing metal caps is the best way to prolong the life of posts when building or renovating a cedar deck.
And finally – cleaning up after deck staining:
The easiest cleanup job after staining a deck is the job that was prepared and protected ahead of time. If you have living space below the deck, such as another wood deck or a patio, lay down tarps first to avoid stain blotches. Have a pouring station with a large piece of cardboard to hold cans, brushes, rollers and trays.
Keep a lot of rags on hand for wiping spills, and very important note – solvents from oil stains can heat up and even combust, so do not ball up used rags, and certainly do not throw them out with the trash. Lay them out to allow the solvents to evaporate then treat the rags as hazardous waste just like paint and stain cans and disposed of them properly after your deck renovation project is finished.
Brushes with water based stain can of course be cleaned with water. However mineral spirits (paint thinner) or turpentine is needed to clean brushes, hands and containers with oil based deck stain on them. Sediment will drop to the bottom of a container of paint thinner so you should be able to use it repeatedly provided it’s been in a sealed container. A wide mouth glass jar is ideal. What we like to do is cycle them – use old thinner for a first rinse of brushes covered in gooey deck stain and move to final rinse with new and clean thinner.
The Ecohome Network is a collective where we can all learn from each other’s successes, so if you have additional thoughts or tips, please share them in the comments section. Good luck and happy deck staining!
Now you know more about how to stain an cedar wood deck easily. Find more pages for DIY reno guides and sustainable and resilient green building techniques here :
Find more about green home construction in the Ecohome Green Building Guide pages and if you would like more DIY reno articles like this, then sign up for a free Ecohome Network membership here. |
*Although we only use links appropriately and in context, and they don’t influence our content production, Ecohome Network may get commissions for purchases made through some links in this post and on the site in general as per our terms and conditions. As Amazon Associates, we may earn from qualifying purchases, if this comes as a surprise and you'd like to know more, contact us below.
Comments (0)
Sign Up to Comment