


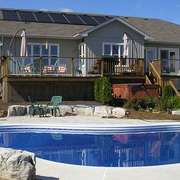


How to build a DIY outdoor solar shower
Building an outdoor solar shower is a really effective way to lower utility bills, and it even frees up some bathroom use, which can be a huge benefit for busy households with only one bathroom. Of course this is not a four-season bathing solution for most climates. So Canadians, Alaskans, Norwegians and Icelanders... don't get rid of your indoor shower.
A solar thermal water heater is something you'd see more of as a water heating solution for off-grid homes; you're less likely to see these in suburban neighborhoods. But if you have the space and a few basic skills, this may be a fun DIY home improvement project.
Here we will cover the very basics in thermodynamics for solar water heating and proper site drainage. This guide covers everything from thermal collection methods, to material selection and greywater management to help you achieve anything from a rough but functional shower all the way to a professional-grade result.
- Understanding solar water heating methods
- Site selection and solar orientation
- Plumbing configurations and water pressure
- Material durability: choosing rot-resistant structures
- Responsible greywater and drainage solutions
- The step-by-step DIY solar shower build
- In brief
Water capacity - how big a system do you need?
Really the first step would be deciding how big a system you want, and how consistant you expect it to be. A homemade solar shower water heater can be a very rudimentary system for a quick rinse at a bush camp, or something a bit more classy and luxurious.
In case you landed here just looking for just a camping solar shower bag to hang from a tree, those exist and you could likely have one delivered for 30 bucks or less within a few days. But if you want to up your game a bit and increase capacity and the cool factor, read the permanent options below.

Understanding solar water heating methods
Passive solar water heating relies on the absorption of solar radiation to raise water temperature without mechanical pumps or electricity. Which simply means, anything in the direct path of the sun will get hot. Homes designed for passive heating and cooling can easily collect significant amounts of heat, and water heating is no different.
For a DIY application, the two most common designs are the integrated collector storage (ICS) system and the coil-based solar thermal collector.
The batch collector Or ICS system
A batch bollector or Integrated Collector Storage (ICS) solar water heater is a simple, cost-effective system that combines the collector and storage tank into one unit, heating water in dark tanks or tubes inside an insulated box. In this type of setup, water is stored in a black-painted tank or large-diameter pipe that is directly exposed to the sun.
While they are simple, these systems can be heavy when full of water (weighing 8.3 lbs per gallon or 1 kg per liter), and require a robust and solid frame. So before you begin adding significant weight to any structure, be sure it has the capacity to handle the added load.
The black poly pipe coil
The most popular DIY solar shower method involves coiling 100 feet (30.5 m) or more of black polyethylene (PE) pipe onto a south-facing roof or rack. The high surface-area-to-volume ratio allows the sun to heat the water rapidly. Note that while solar air heaters use similar principles for space heating, water-based systems must be carefully drained in winter to prevent freeze-thaw damage to the plumbing.

Solar thermal collectors
To truly recreate the luxury and consistency of your indoor shower, that an be achieved with commercial solar thermal water heaters. This is likely beyond the DIY abilities of most people and should be installed by a professional.

Do you need a permit for an outdoor shower?
Before breaking ground on a DIY outdoor solar shower, you need to sort out the legalities, specifically for choosing a drainage method. Municipal building codes and environmental regulations may very well hamstring your project before you start.
While a shower may seem like a simple garden fixture, most jurisdictions classify the discharge as greywater, which carries specific legal requirements for management to prevent groundwater contamination and soil saturation.
In many regions, outdoor showers exist in a legal grey area, but the requirement for a permit typically depends on the permanence of the structure and the complexity of the plumbing. If you are simply connecting a garden hose to a portable rack, you likely do not need a permit. However, for a professional-grade installation involving permanent solar thermal collectors or hard-piped water lines, a plumbing permit is almost always mandatory.
- Structural permits: If your shower enclosure exceeds a certain height or footprint-often 100 square feet (9.3 square meters)-a building permit may be required.
- Zoning bylaws: Always check your setback requirements. Most municipalities prohibit permanent structures or drainage pits within 5 to 10 feet (1.5 to 3 meters) of a property line.
- HOA rules: For homeowners in managed communities, Homeowners Association (HOA) guidelines often strictly regulate the visibility of outdoor plumbing and solar collectors.
Can shower greywater be used for the garden?
A common misconception is that shower water is clean enough to be dumped anywhere. Legally, water from showers is classified as greywater. While it lacks the high pathogen count of blackwater (from toilets), it still contains surfactants, skin cells, and nitrogen. In a sustainable home ecosystem, this water is a resource, but if left to pool, it becomes a breeding ground for mosquitoes and bacteria.
To keep your shower clean enough for simple drywell or garden discharge, its important to use biodegradable, phosphate-free soaps. In some environmentally sensitive areas-particularly near lakes or shorelines-any discharge of untreated greywater into the soil is strictly prohibited to prevent eutrophication (nutrient pollution) of the water body.
Septic connection vs. drywell solutions
The choice between a septic connection and a drywell often comes down to local building codes. Professionals should note that many modern codes in North America and the UK now require all domestic greywater to be treated through the main sewer or septic system if the home is already connected to one.
The drywell option
A drywell is essentially a buried, rock-filled pit designed to manage runoff by letting water soak into the ground slowly. Instead of the water pooling on the surface or running into the street, it flows into this underground chamber and gradually filters through the surrounding soil.

For an outdoor shower, it acts as a simple, natural drainage system that keeps your yard dry and returns water to the local water table.
If you are in a rural area or your local code allows for on-site greywater infiltration, a drywell is the most efficient DIY solution. A standard drywell for an outdoor shower should be a pit roughly 3 feet by 3 feet (91 cm by 91 cm), filled with 1.5 inch (3.8 cm) drain rock.
This allows the water to filter naturally through the soil. However, if your soil has a low percolation rate (high clay content), a drywell will fail, leading to surface pooling.
Septic connection requirements
If you are required to connect to a septic system, you must ensure the additional 25 to 40 gallons (95 to 150 liters) of water per shower does not overwhelm the septic tank or leach field. For those with a deck-mounted shower, a P-trap and proper venting are required if connecting to a main stack to prevent sewer gases from escaping outdoors.
Site selection and solar orientation
Strategic placement of a solar shower is the difference between a lukewarm rinse and a steaming hot shower. For those in the Northern Hemisphere (US, Canada, UK), the solar collector must face True South to maximize 'insolation' (the amount of solar radiation reaching a surface).
- Solar window: Aim for a location that receives at least 6 hours of direct sunlight between 10:00 AM and 4:00 PM.
- Proximity to water: Minimize the distance to your garden hose or main water line. A run longer than 50 feet (15.2 m) can lead to significant pressure drops and heat loss in the delivery pipes.
- Privacy and wind: Use natural landscaping or fencing to provide privacy while ensuring the site is shielded from prevailing winds, which can cause rapid evaporative cooling during the shower.
Plumbing configurations and water pressure
For a professional-grade outdoor shower, you must manage the transition from the solar collector to the showerhead. Most DIY builds utilize a standard garden hose connection, but there are nuances to consider regarding thermal expansion. Obviously for any professionally built and pressurized system, water efficiency is paramount. See here to read about low-flow showerheads to conserve hot water.
Pressure-rated PVC or PEX is recommended for the final assembly. If the water in a black poly coil sits in the sun without flow, it can reach temperatures exceeding 140°F (60°C). Installing a thermostatic mixing valve is a critical safety step for both homeowners and contractors to prevent scalding by mixing the hot solar water with a cold-water bypass.
Material durability: choosing rot-resistant structures
Since the structure will be constantly exposed to moisture and UV radiation, material choice is paramount. Western Red Cedar or Eastern White Cedar are the gold standards for outdoor wood construction due to their natural resistance to rot and insects.
Cedar can be more aesthetically pleasing and eco-friendly, but it requires regular oiling to maintain its color. If plan to use pressure-treated lumber, ensure it is rated for ground contact if the posts are buried. Alternatively, composite materials offer a maintenance-free life but lack the low embodied carbon profile of sustainably harvested timber. See here for help choosing the right decking - cedar, pressure treated or composite deck boards.
Responsible greywater and drainage solutions
An outdoor shower can generate significant amounts of greywater. Improper drainage can lead to soil erosion, foundation dampness, or swampy patches in the yard. So having a plan for where the water can go is essential.
The dry well method
Excavate a pit approximately 3 feet by 3 feet (91 cm by 91 cm) and 2 feet (61 cm) deep. Fill this with clean crushed stone or coarse gravel. This creates a reservoir that allows water to slowly percolate into the soil. For pro-level installations, consider a greywater recycling system if the shower is used frequently or is located near sensitive ecological zones.
Infiltration basins
If the soil has high clay content, a simple gravel pit may not suffice. In these regions (common in parts of the UK and Australia), drainage pipes should lead the greywater toward a dedicated rain garden or mulch basin planted with water-loving, non-edible species. Always use biodegradable, phosphate-free soaps to protect soil health.

The step-by-step DIY solar shower build
- Foundation: Your options go from a crushed stone base that drains water directly to your drainage loation, all the way to a mini foundation. You can treat it like a deck base with either - a small wooden base on deck blocks, pressure treated posts or screw piles below the frost line, or even a poured concrete pad with a drain. For a concrete pad you an install a skirt insulation below it and around the perimeter to avoid frost heave. Here are some relevant reasources - How to build a slab on grade, and How to build a solid base for deck posts.
- Drainage: Dig out the center area between the posts and install your gravel dry well or slatted cedar floor.
- Solar collector: Mount a sheet of plywood painted matte black on the roof or a south-facing rack. Coil 100 feet (30.5 m) of 1/2 inch (1.3 cm) black poly pipe in a tight spiral. Secure with UV-rated zip ties.
- Enclosure: This depends on how much privacy you already have and home much you need, as well as how fancy you want it to look. A basic privacy shield can simply be 1x6 cedar slats with 1/4 inch (0.6 cm) gaps to allow for airflow and wood expansion.
- Plumbing: Connect the bottom of the coil to the water supply and the top to the showerhead. Use teflon tape on all threaded connections to prevent leaks.
Regional variables: US, Canada, UK, and AU
Water management laws vary significantly by region. Contractors must be aware of these local nuances:
- United States: States like California and Arizona have progressive greywater codes that encourage garden reuse, while others like Massachusetts may require a full septic connection.
- Canada: The National Plumbing Code of Canada generally requires greywater to be handled as sewage unless a specific certified greywater recycling system is used. In British Columbia, discharge onto the surface is generally prohibited.
- United Kingdom: Building Regulations (Part G) focus heavily on water efficiency. Discharging into a soakaway (drywell) is often permitted if it meets specific distance requirements from the house foundation.
- Australia: Due to frequent droughts, greywater diversion devices (GDD) are common and often encouraged for sub-surface irrigation, but they must be WaterMark certified.
In brief
A DIY solar shower is a cost-effective way to utilize renewable energy while reducing the load on your home’s water heating system. Success depends on maximizing solar exposure through correct orientation, choosing rot-resistant materials like cedar, and ensuring responsible greywater management. For professionals, adding a mixing valve and a dedicated drainage field ensures the system is safe and durable for long-term use.
Now that you know more about DIY outdoor solar showers, find more info about sustainable water systems & green building techniques in the Ecohome Green Building Guide and these pages below:
-
All about solar thermal water heaters
-
Greywater recycling systems for homes
-
Choosing the best watermaker for off-grid sustainable homes on the coast
-
How to build a compost hot water heater
-
DIY guide to build your own DIY solar air heater


Comments (0)
Sign Up to Comment